
Yarn-Wrapped Christmas Trees
A few years ago, Mom and I were at Target and saw these gorgeous yarn-wrapped Christmas trees in the holiday decor section.
We didn’t buy them, however. It’s not that they were too expensive – truthfully, I don’t even remember looking at the price – but Mom and I looked at them and though, “we could do that!”
How to Make Easy and Adorable Yarn-Wrapped Christmas Trees
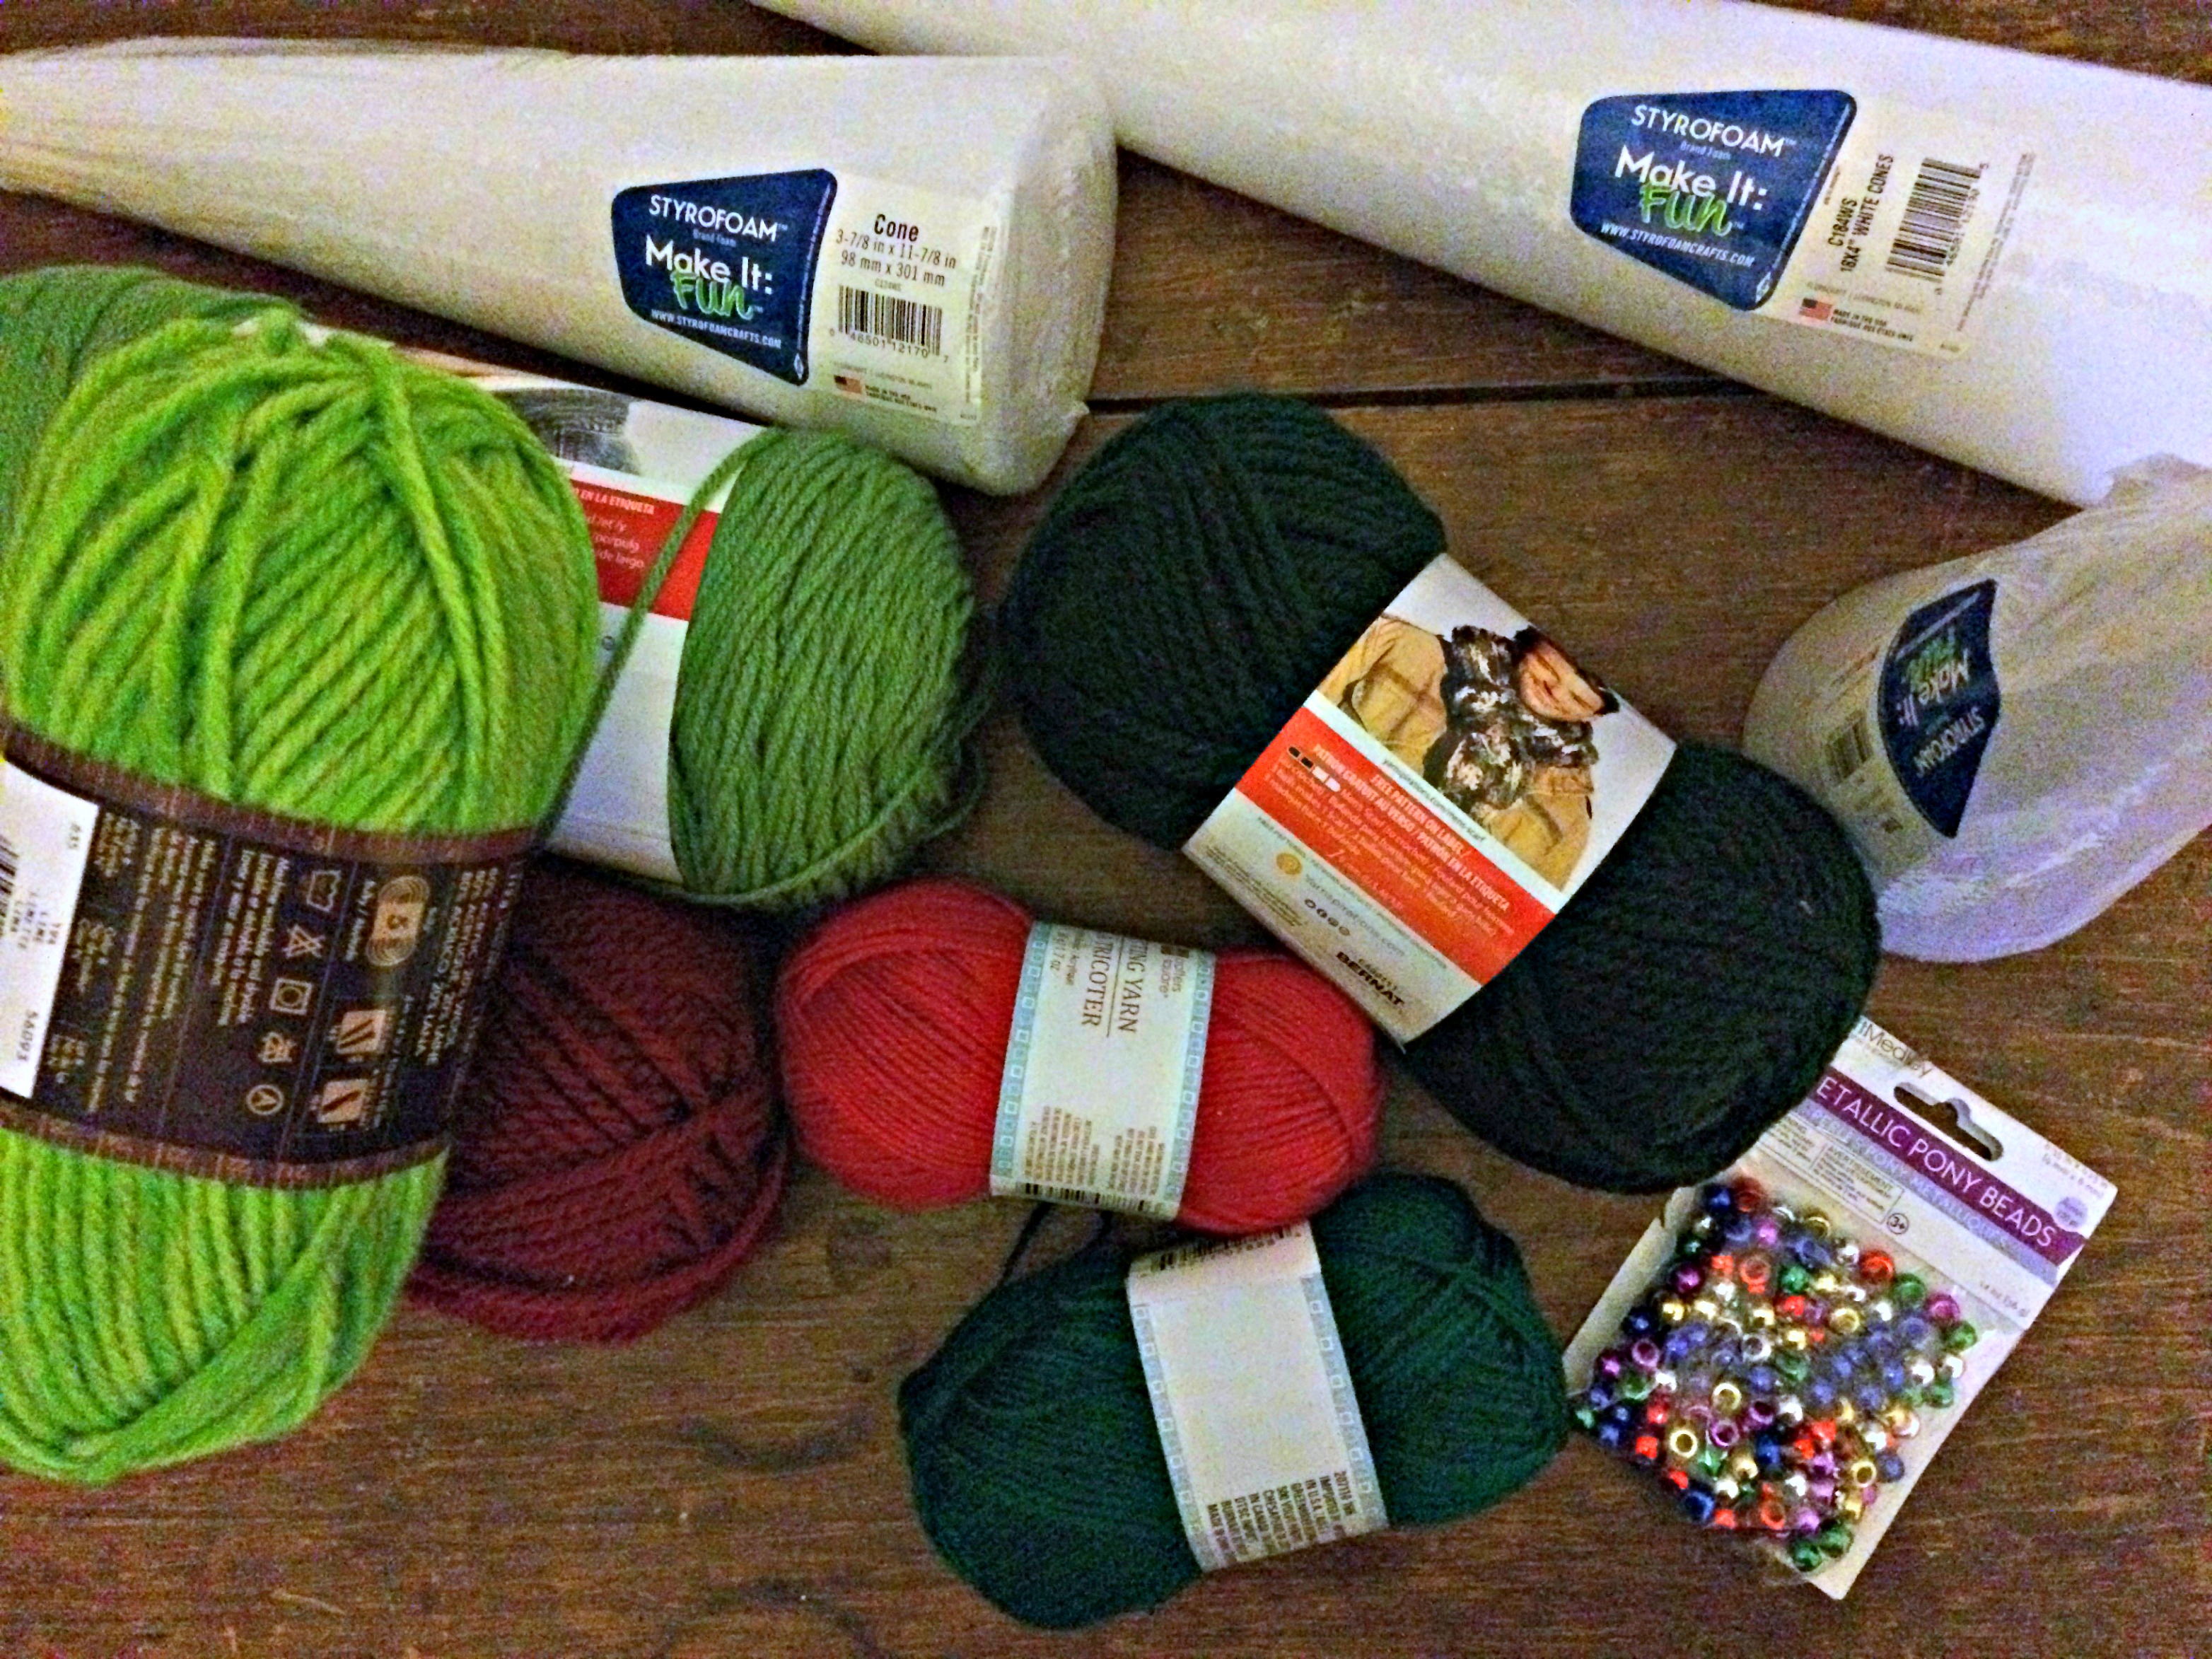
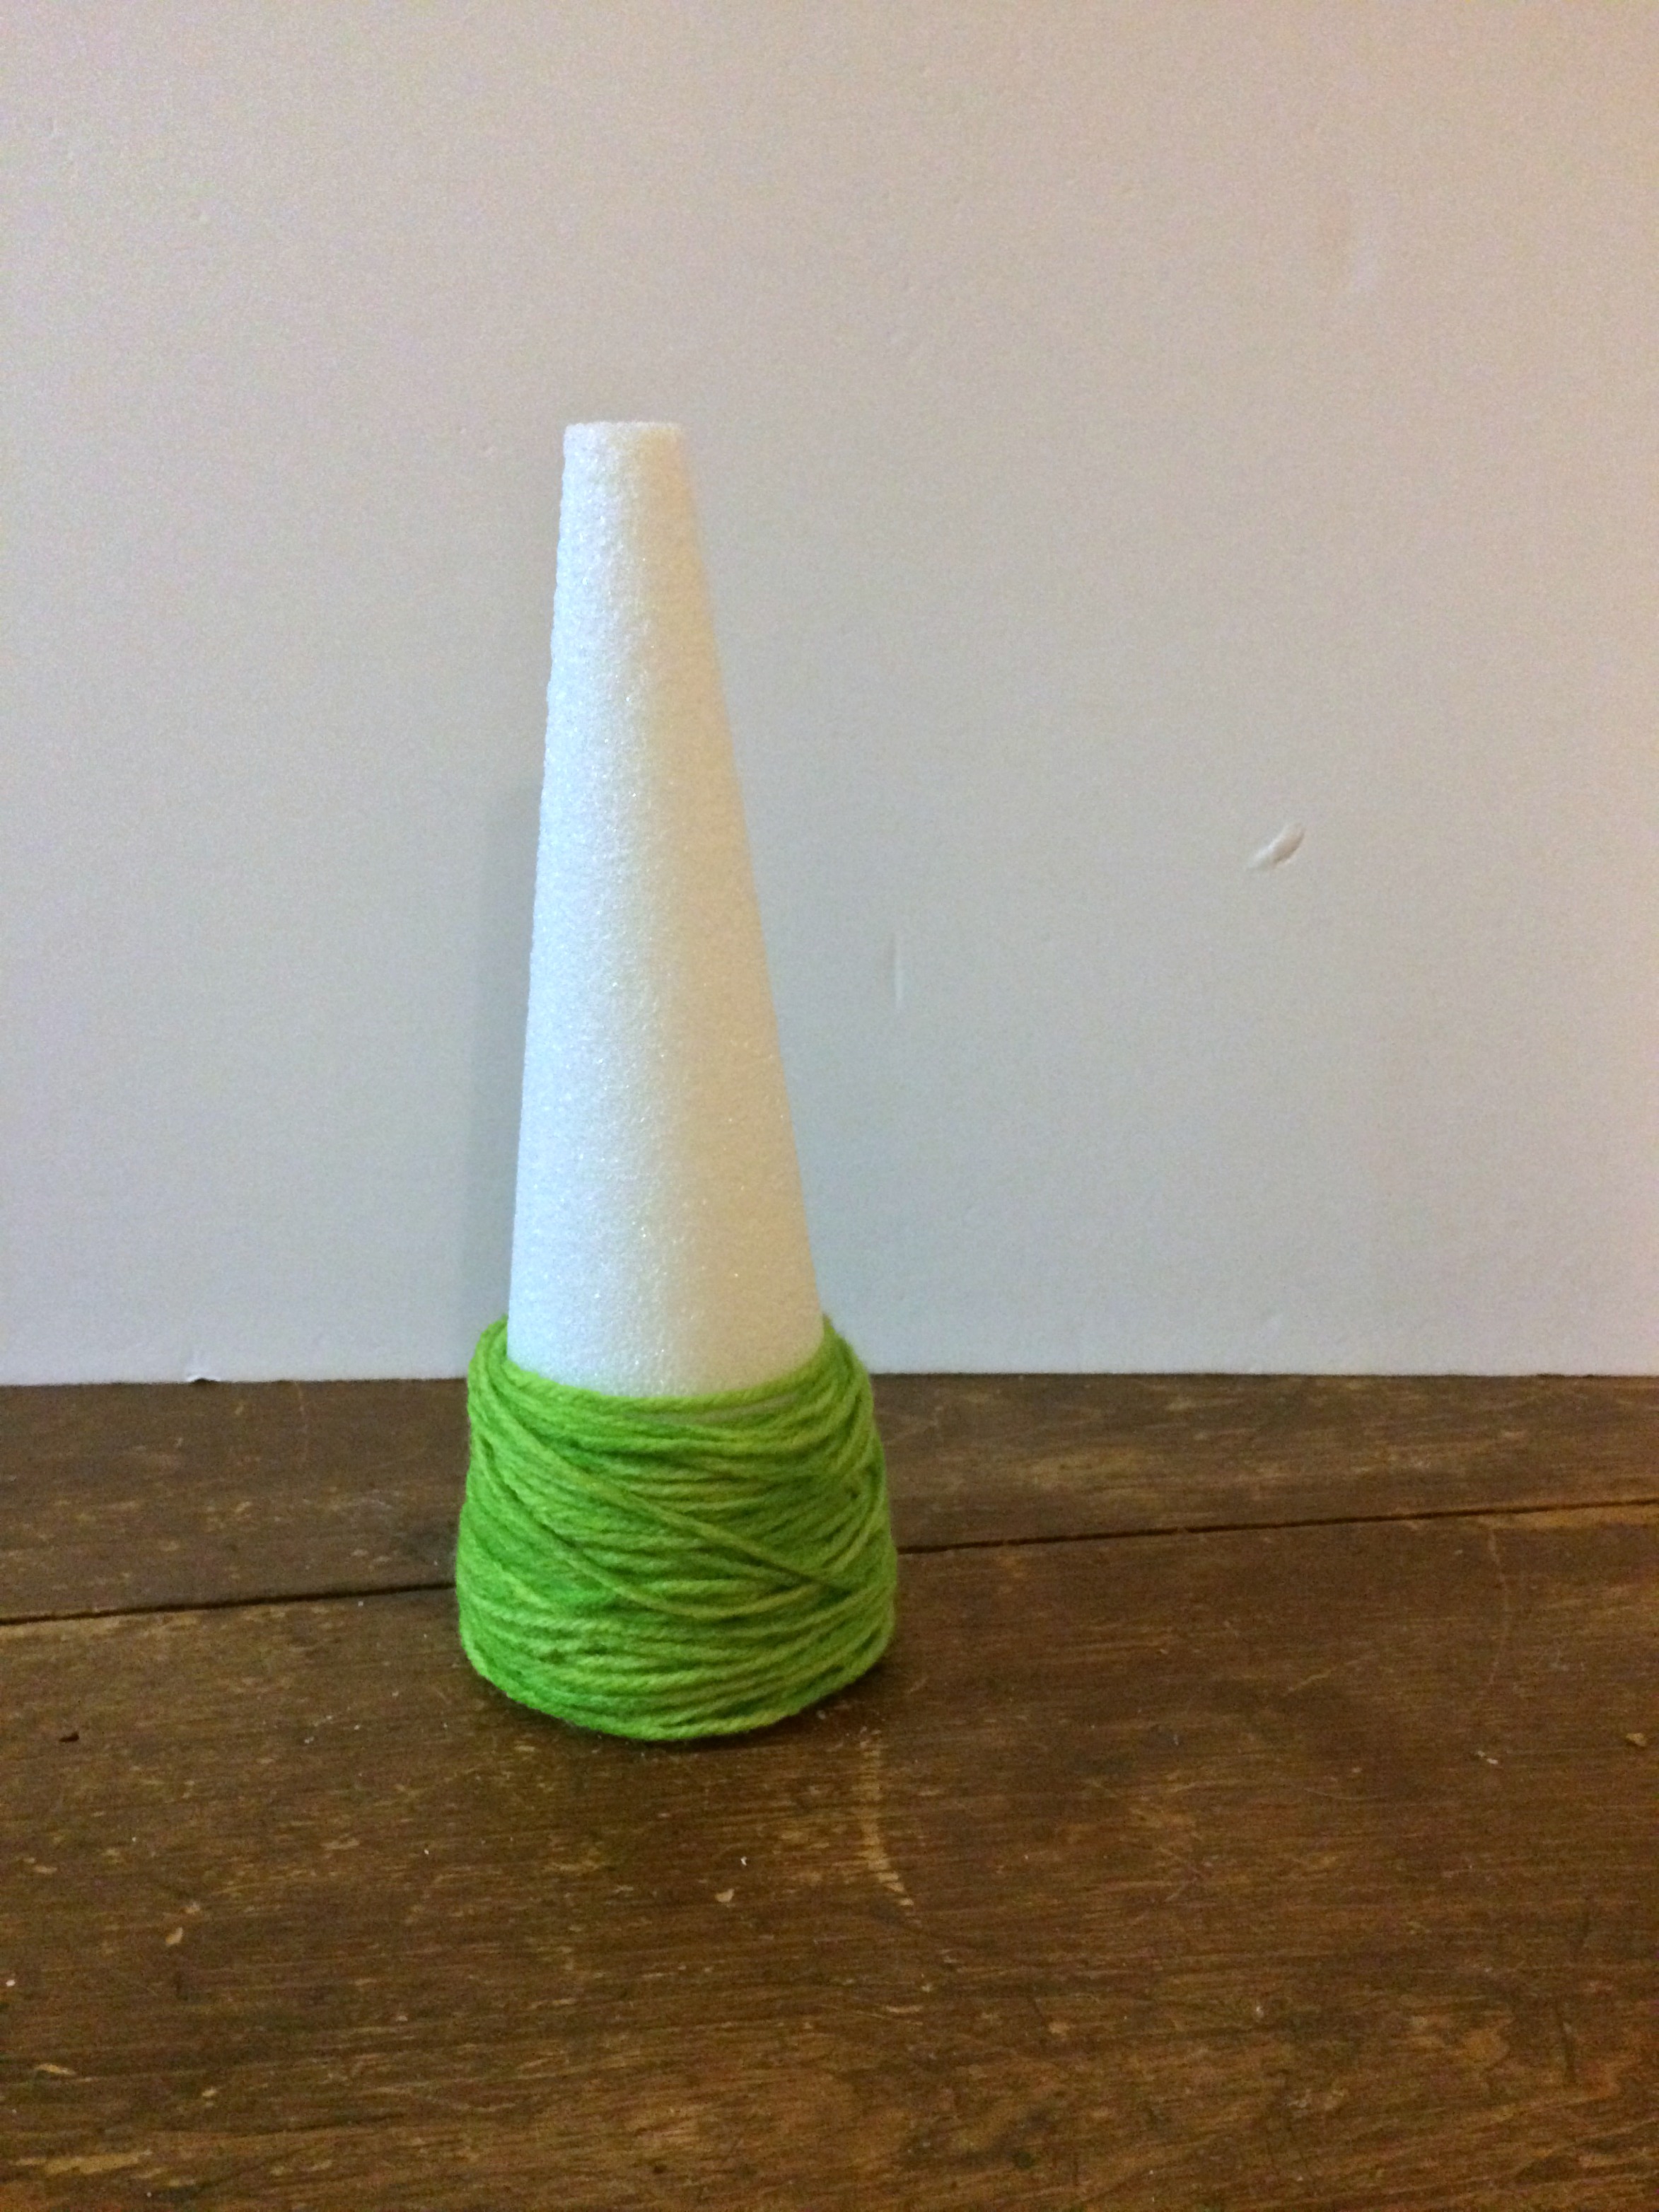
We already had some Styrofoam cones laying around, conveniently in three different sizes, that would serve well as the trees. We also already had some tacky glue laying around, of course.
So all we had to go grab was some yarn and pony beads (I didn’t have the right colors after the Halloween craft), both of which they had at our dollar store (though I did pop over to Michaels for some prettier yarn options).
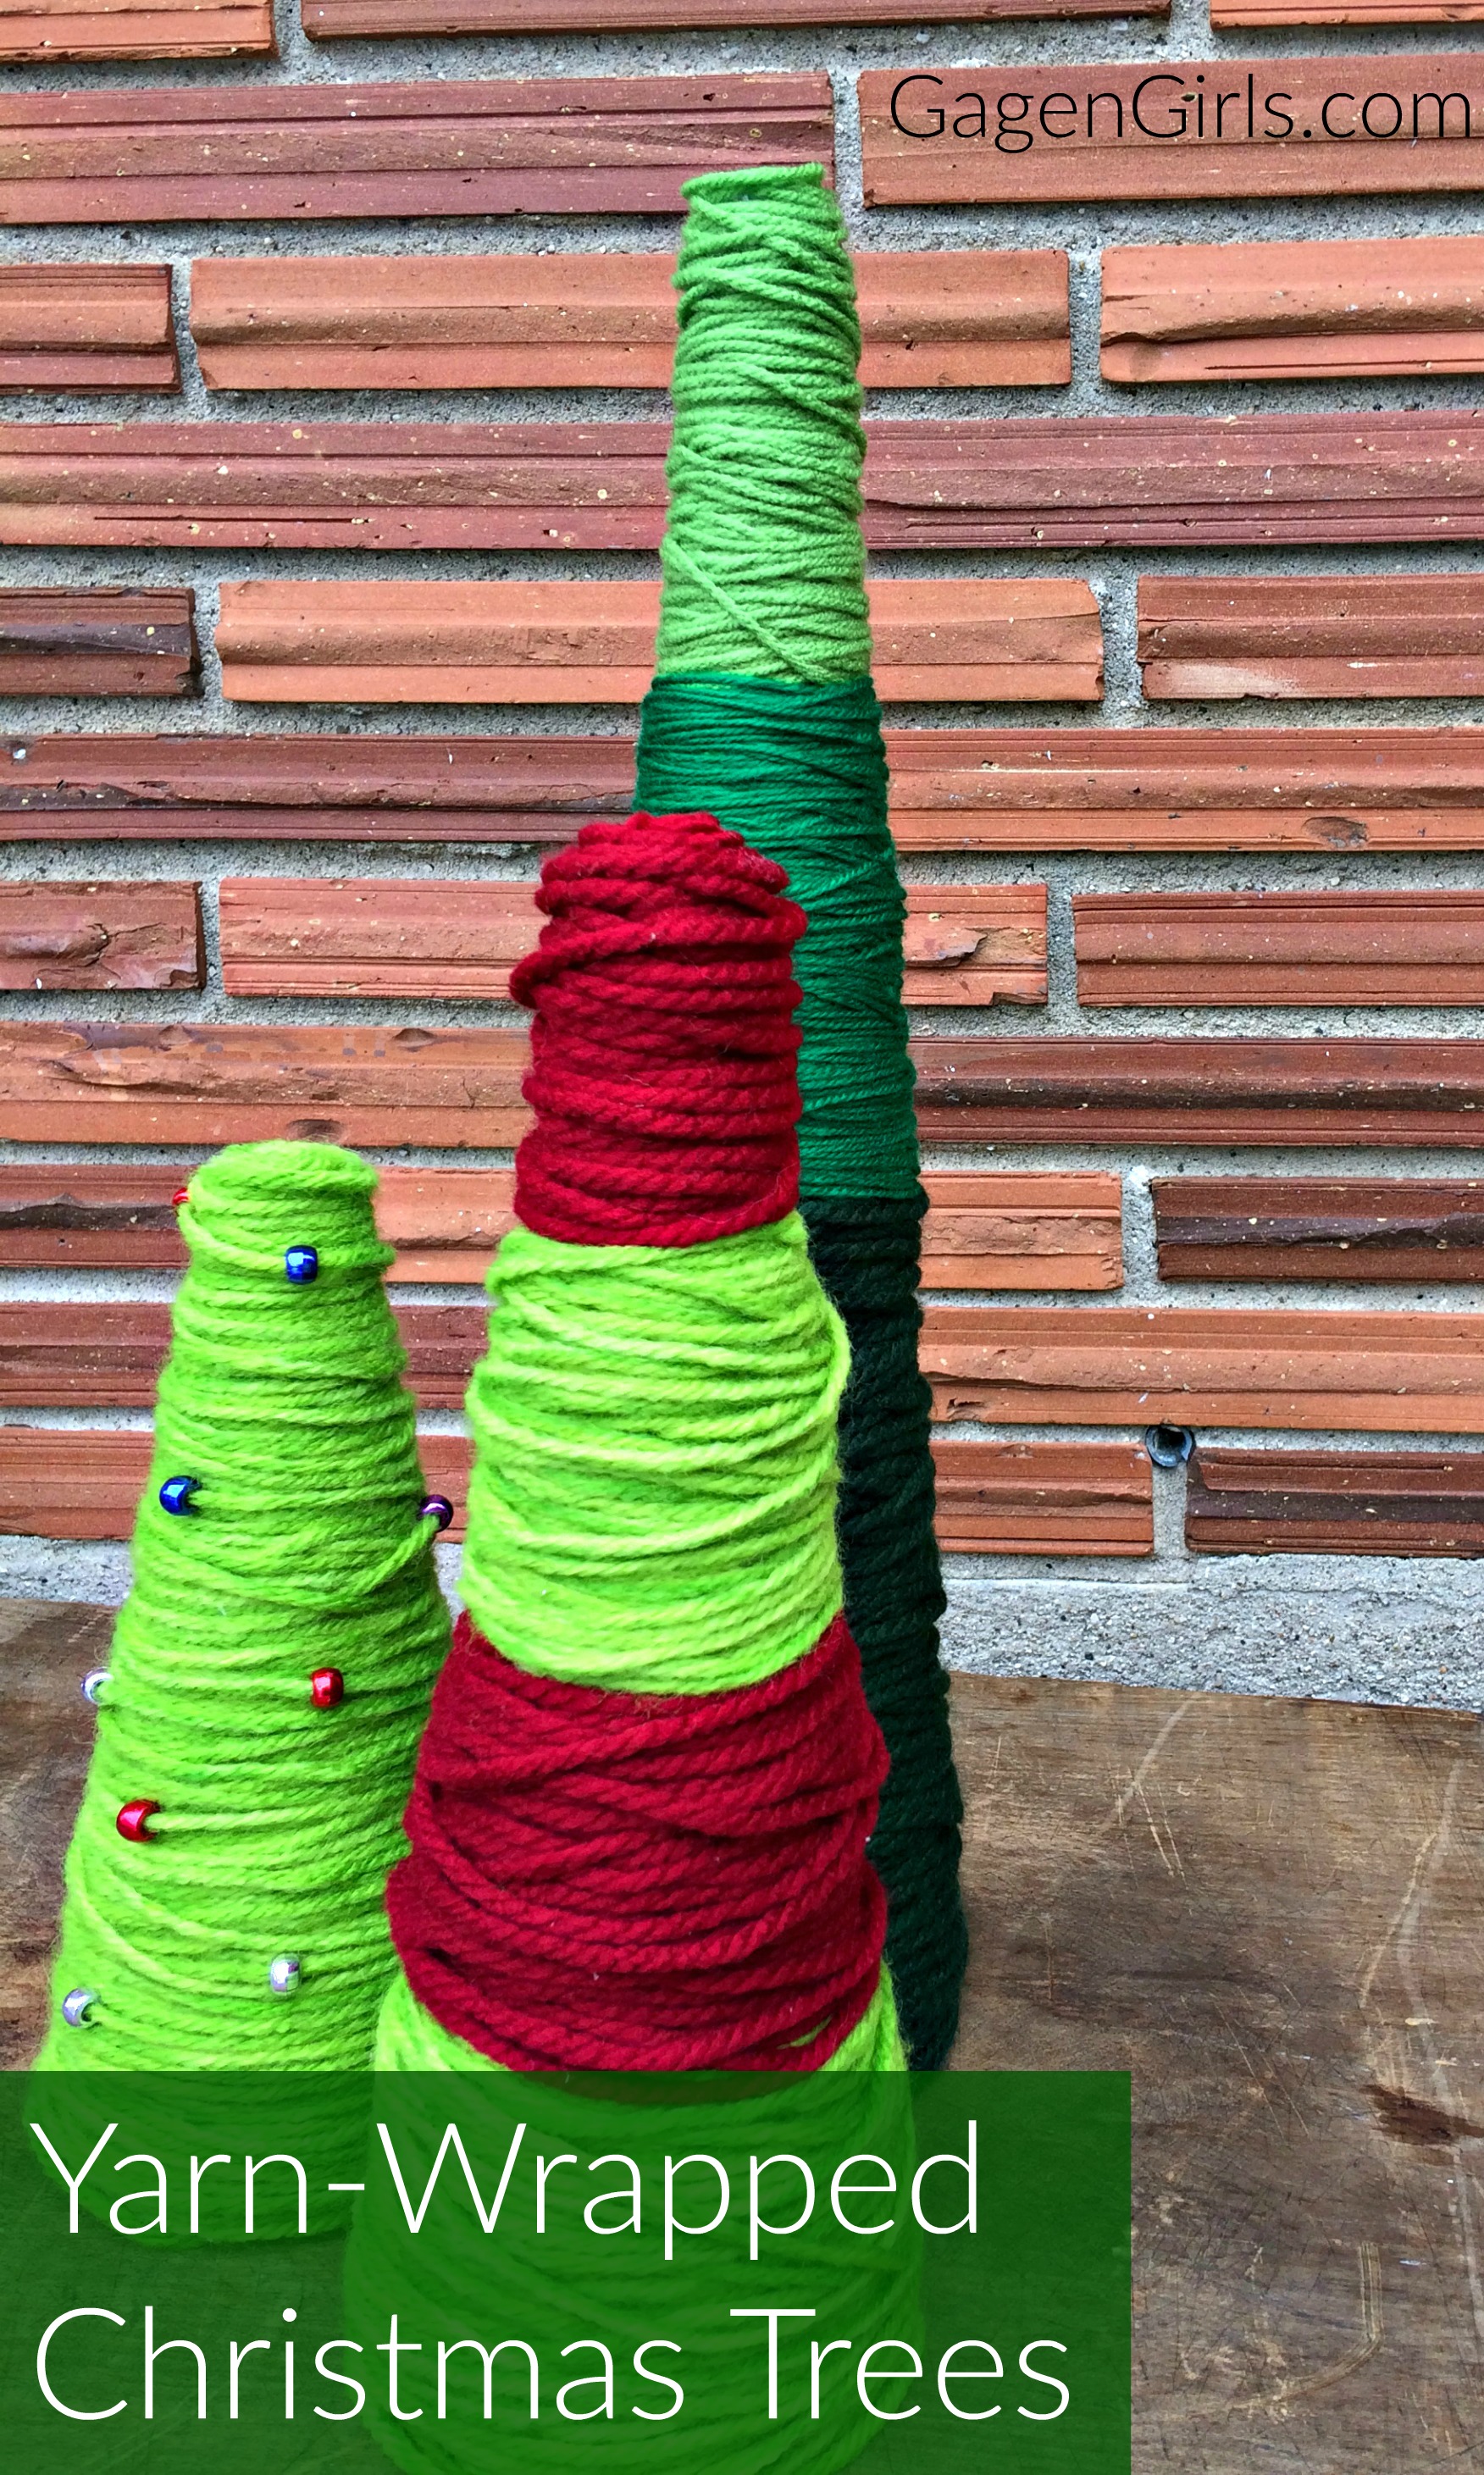
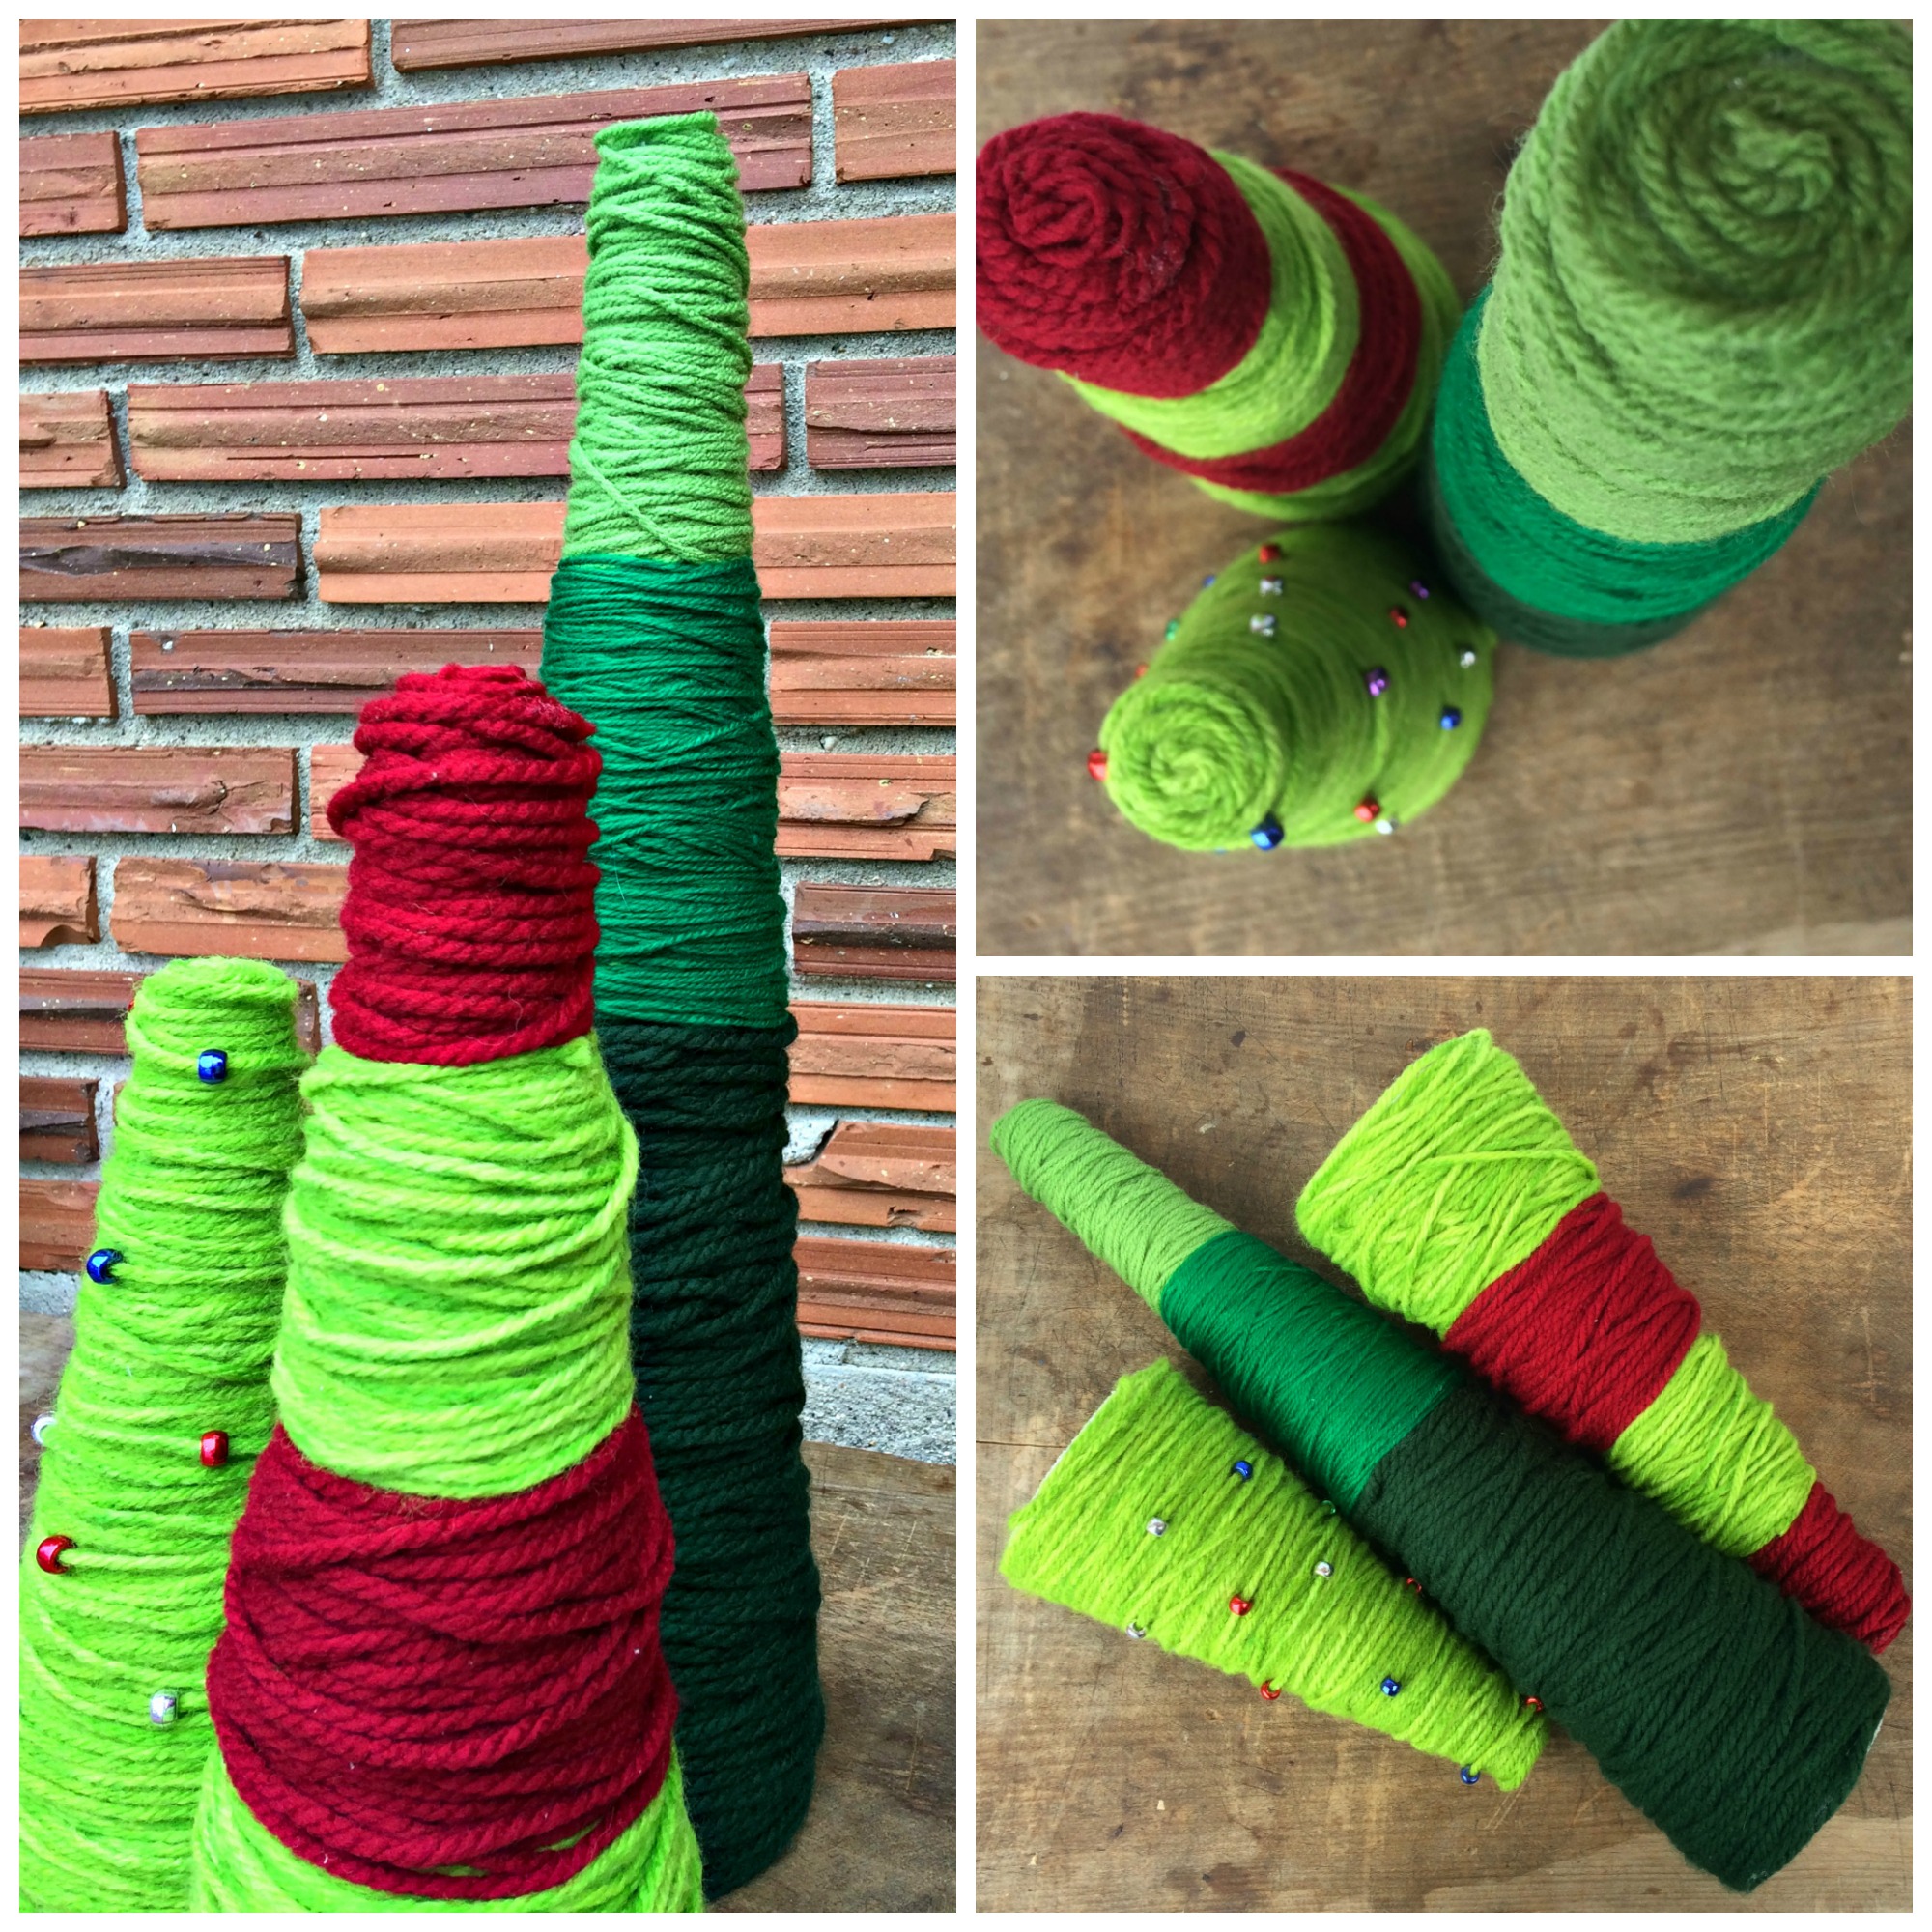
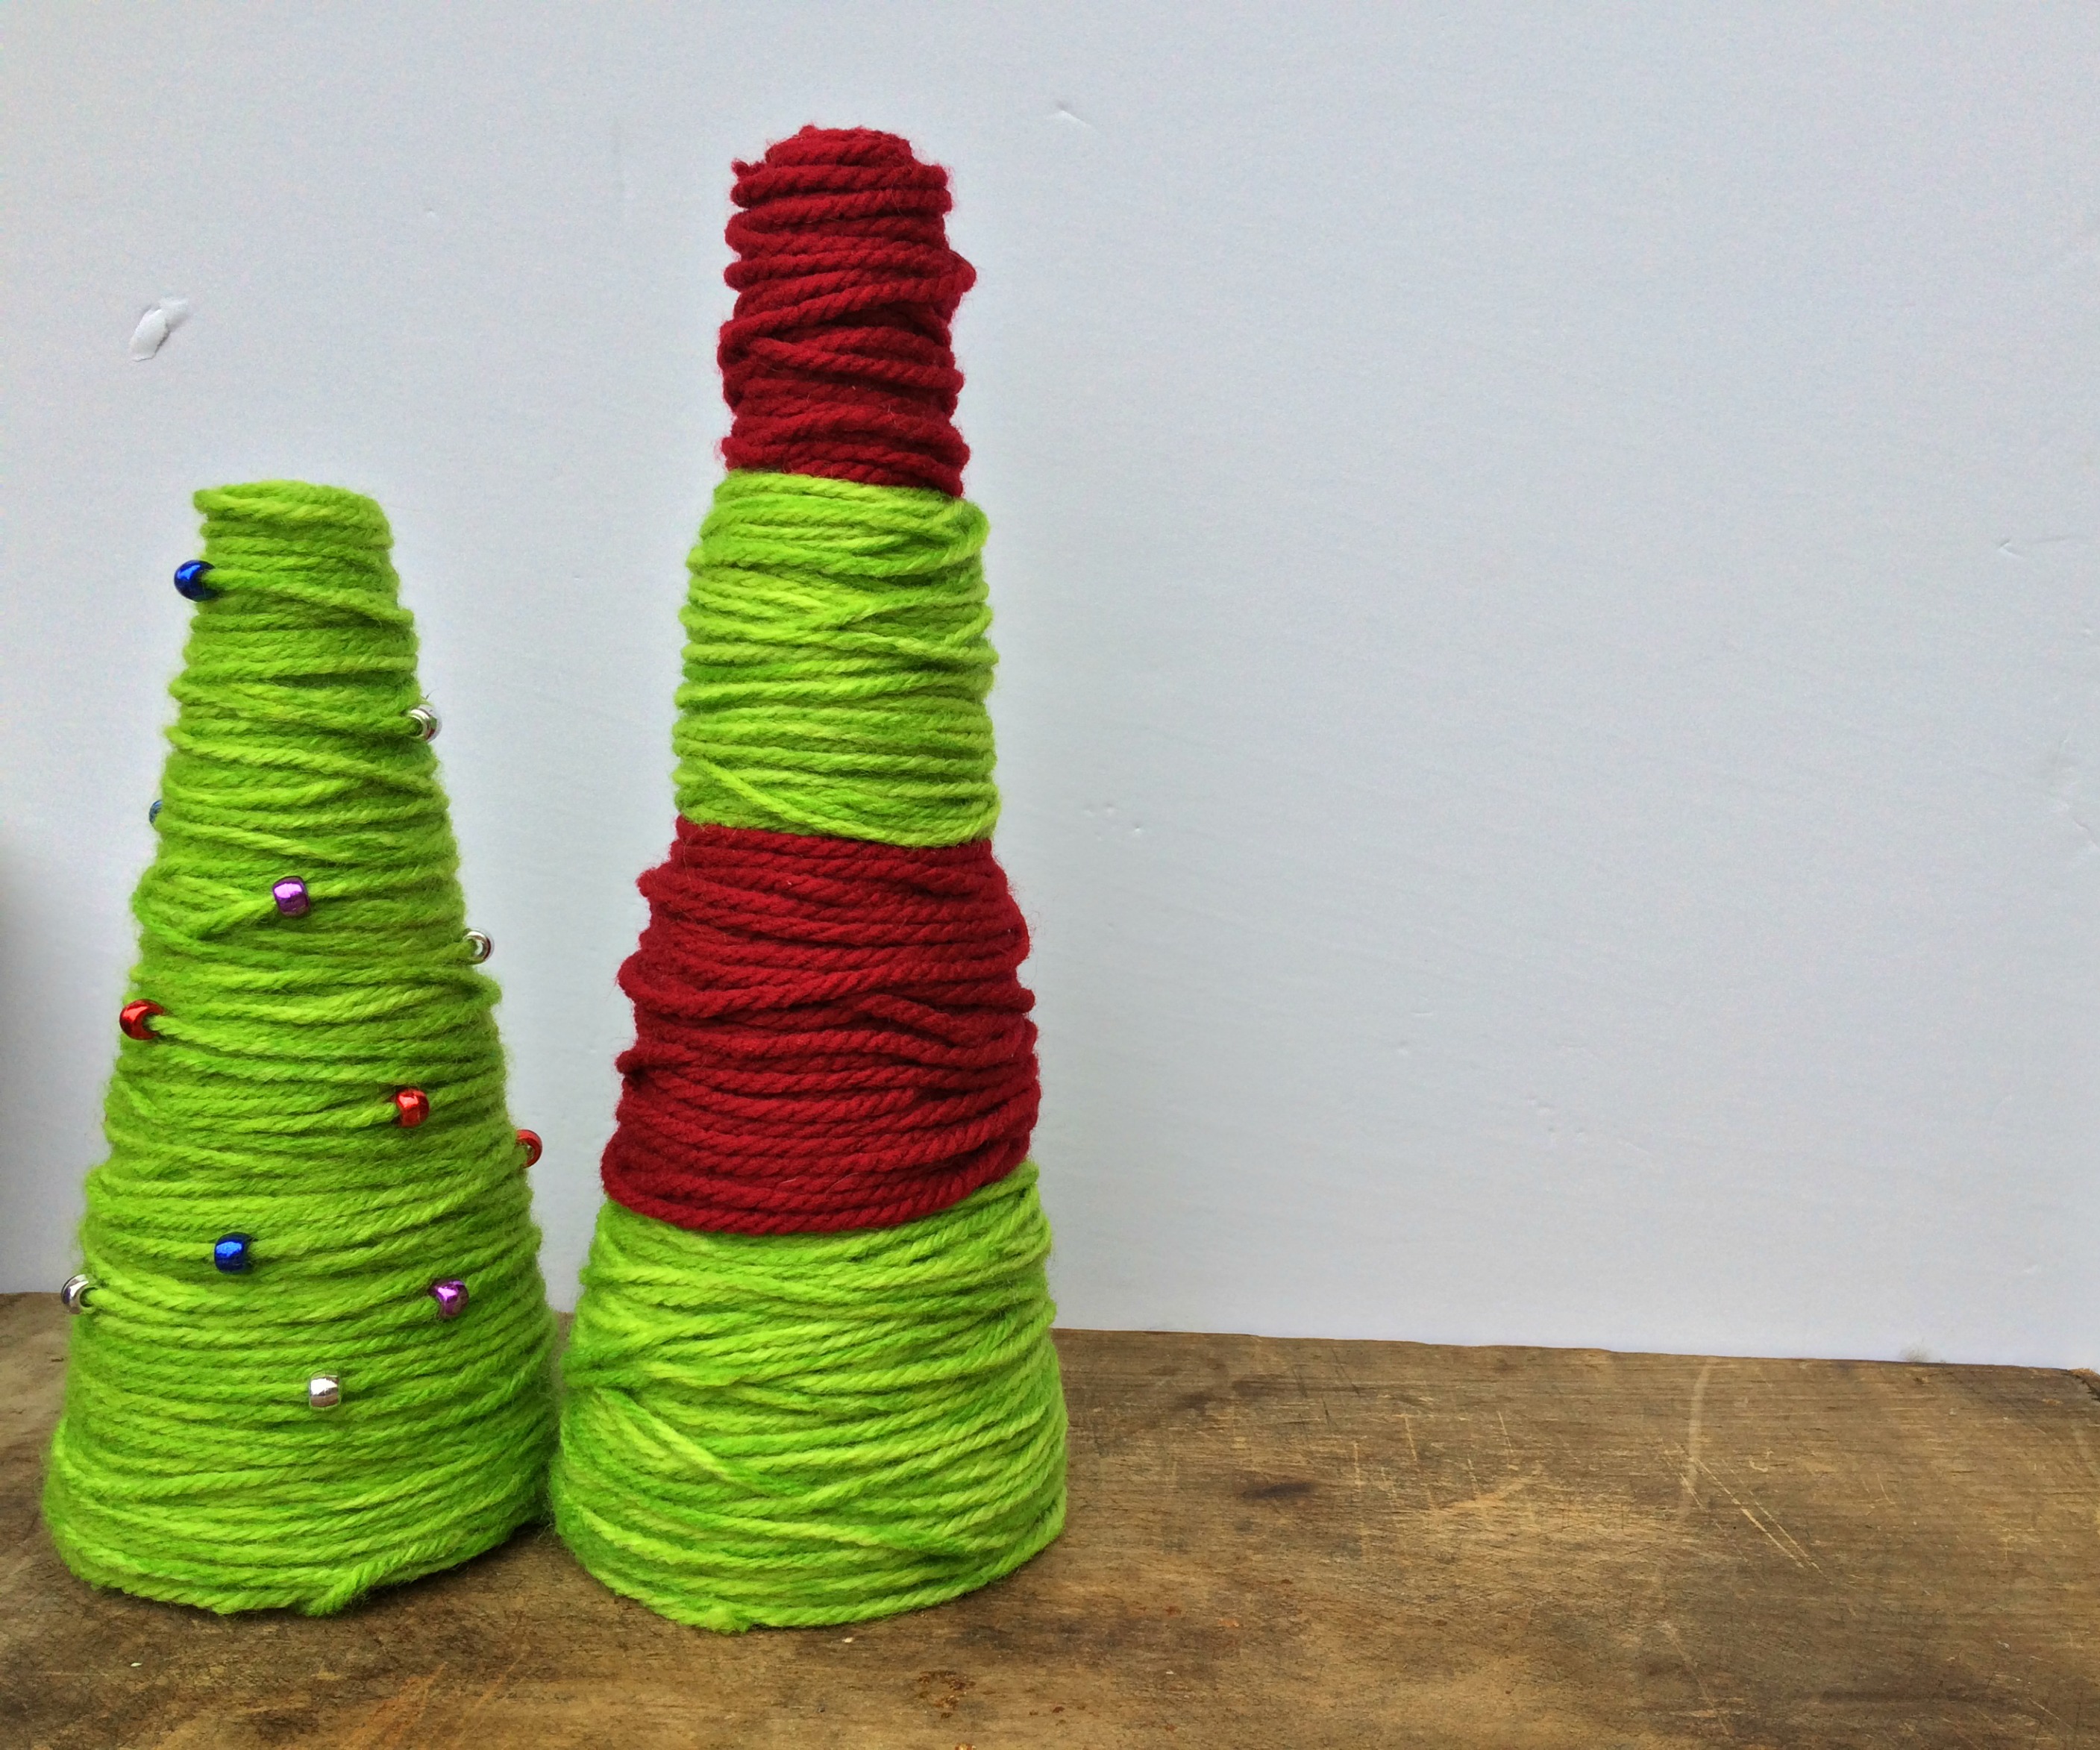
I decided to try three different ways of wrapping the yarn. For the largest cone, I wanted to use three colors of yarn to create a partial ombre effect. The middle cone was picked out to have stripes of green and red, the classic Christmas colors in my mind. Lastly, I decided to only use green yarn and string pony beads along to mimic ornaments.
I want to go back and make more of these: we love the blue and silver color scheme for Christmas, and I could totally see doing a trio for that decor. A big dark blue cone, a medium light blue cone, and a small silver and/or white cone. Wouldn’t that just be gorgeous?
The ones we saw in the store would work in a neutral color scheme, but really any colors you want would work.
Mom also really liked the idea of doing pinks and purples and other colors to create a holiday Whoville!
Supplies
We get commissions for purchases made through links in this post. Learn more about what this means.
Between Amazon, craft supply stores (like Michaels), and the dollar store, it’s really cheap and easy the few supplies needed.
Craft foam cones – these 7.3″ cones are about the size of the smallest tree I made, and these 9.4″ cones are about the size of the middle tree.
Yarn – I’m trying out this red, white and green stripes yarn next time – it looks perfect for this craft!
Glue – Aleene’s tacky glue is always the way to go!
Pony beads (if desired) – I really liked how metallic pony beads looked on my tree, but Christmas colours (or really any colour) would look great, too!
Tips & Tricks
After making these three, I picked up a few ideas on how to make the work easier. (This isn’t to say it’s terribly hard to begin with, but still.)
Use chunkier yarn. It not only looks more elegantly rustic but it also is a LOT quicker to wrap and layer.
If switching out colors, end the previous color by gluing the end where the new color will begin. That way, you can wrap the new color over this loose end and hide the evidence.
Start at the wide bottom and work your way up to the point.
The only ‘rigid’ gluing should be at the beginning – start by wrapping your cord around the wide end and gluing that end down. That way, the yarn won’t slip off as you’re trying to evenly cover it. (You might also want to let this dry before beginning to wrangle the rest of the yarn.)
Limit gluing to the beginning and end of a piece of yarn, and then only when absolutely necessary because the yarn just won’t stay (usually around the ends of the cone). Otherwise, it’ll basically just hold its shape without your help.
With those recommendations, it’s pretty easy. Check out my step-by-step to get started!
Yarn-Wrapped Christmas Trees: Step By Step
Working from the wider base up to the point, wrap the yarn around the Styrofoam cone. Glue the end of the yarn down along the bottom edge of the cone; let dry (at least a little, so it stays put).
Don’t focus on being too neat or too messy, it’ll work itself out. Minor adjustments can always be made, especially if you’ve only glued at the beginning (and end, eventually).
If you’re switching colors – for an alternating or ombre pattern – finish off the first section by gluing the end of the yarn where the next colour is going to start.
Continue wrapping, making sure to fill in any gaps in the yarn.
To finish off, cover the tip of the cone with glue. This is the ONLY time you’ll want a lot of glue. Cover the glue with a spiral of yarn.
(I also contemplated using a star, like the trees we saw in the States, but it was one more thing to make. Not this time, thanks.)
How to Add Pony Bead “Ornaments” to Your Yarn-Wrapped Christmas Trees

First, do a base layer of yarn to make sure the majority of the cone is covered. There can still be a few gaps, but you want it so that the layer with the beads can for sure be on top.
Then, leaving one end of the yarn still attached to your cone, cut yourself a long length of yarn.
Since it was the third one I’d done, I had a decent ability to estimate how much I would need. However, if you run out partway, some careful gluing and tucking should allow you to start and stop several pieces of yarn if needed.
String a whole bunch of pony beads onto that long length. I needed to wet and twist the end of my yarn a little to get it to fit through the bead, but then I was able to string up several.
Then, continue winding the yarn around the cone, placing a bead here and there.
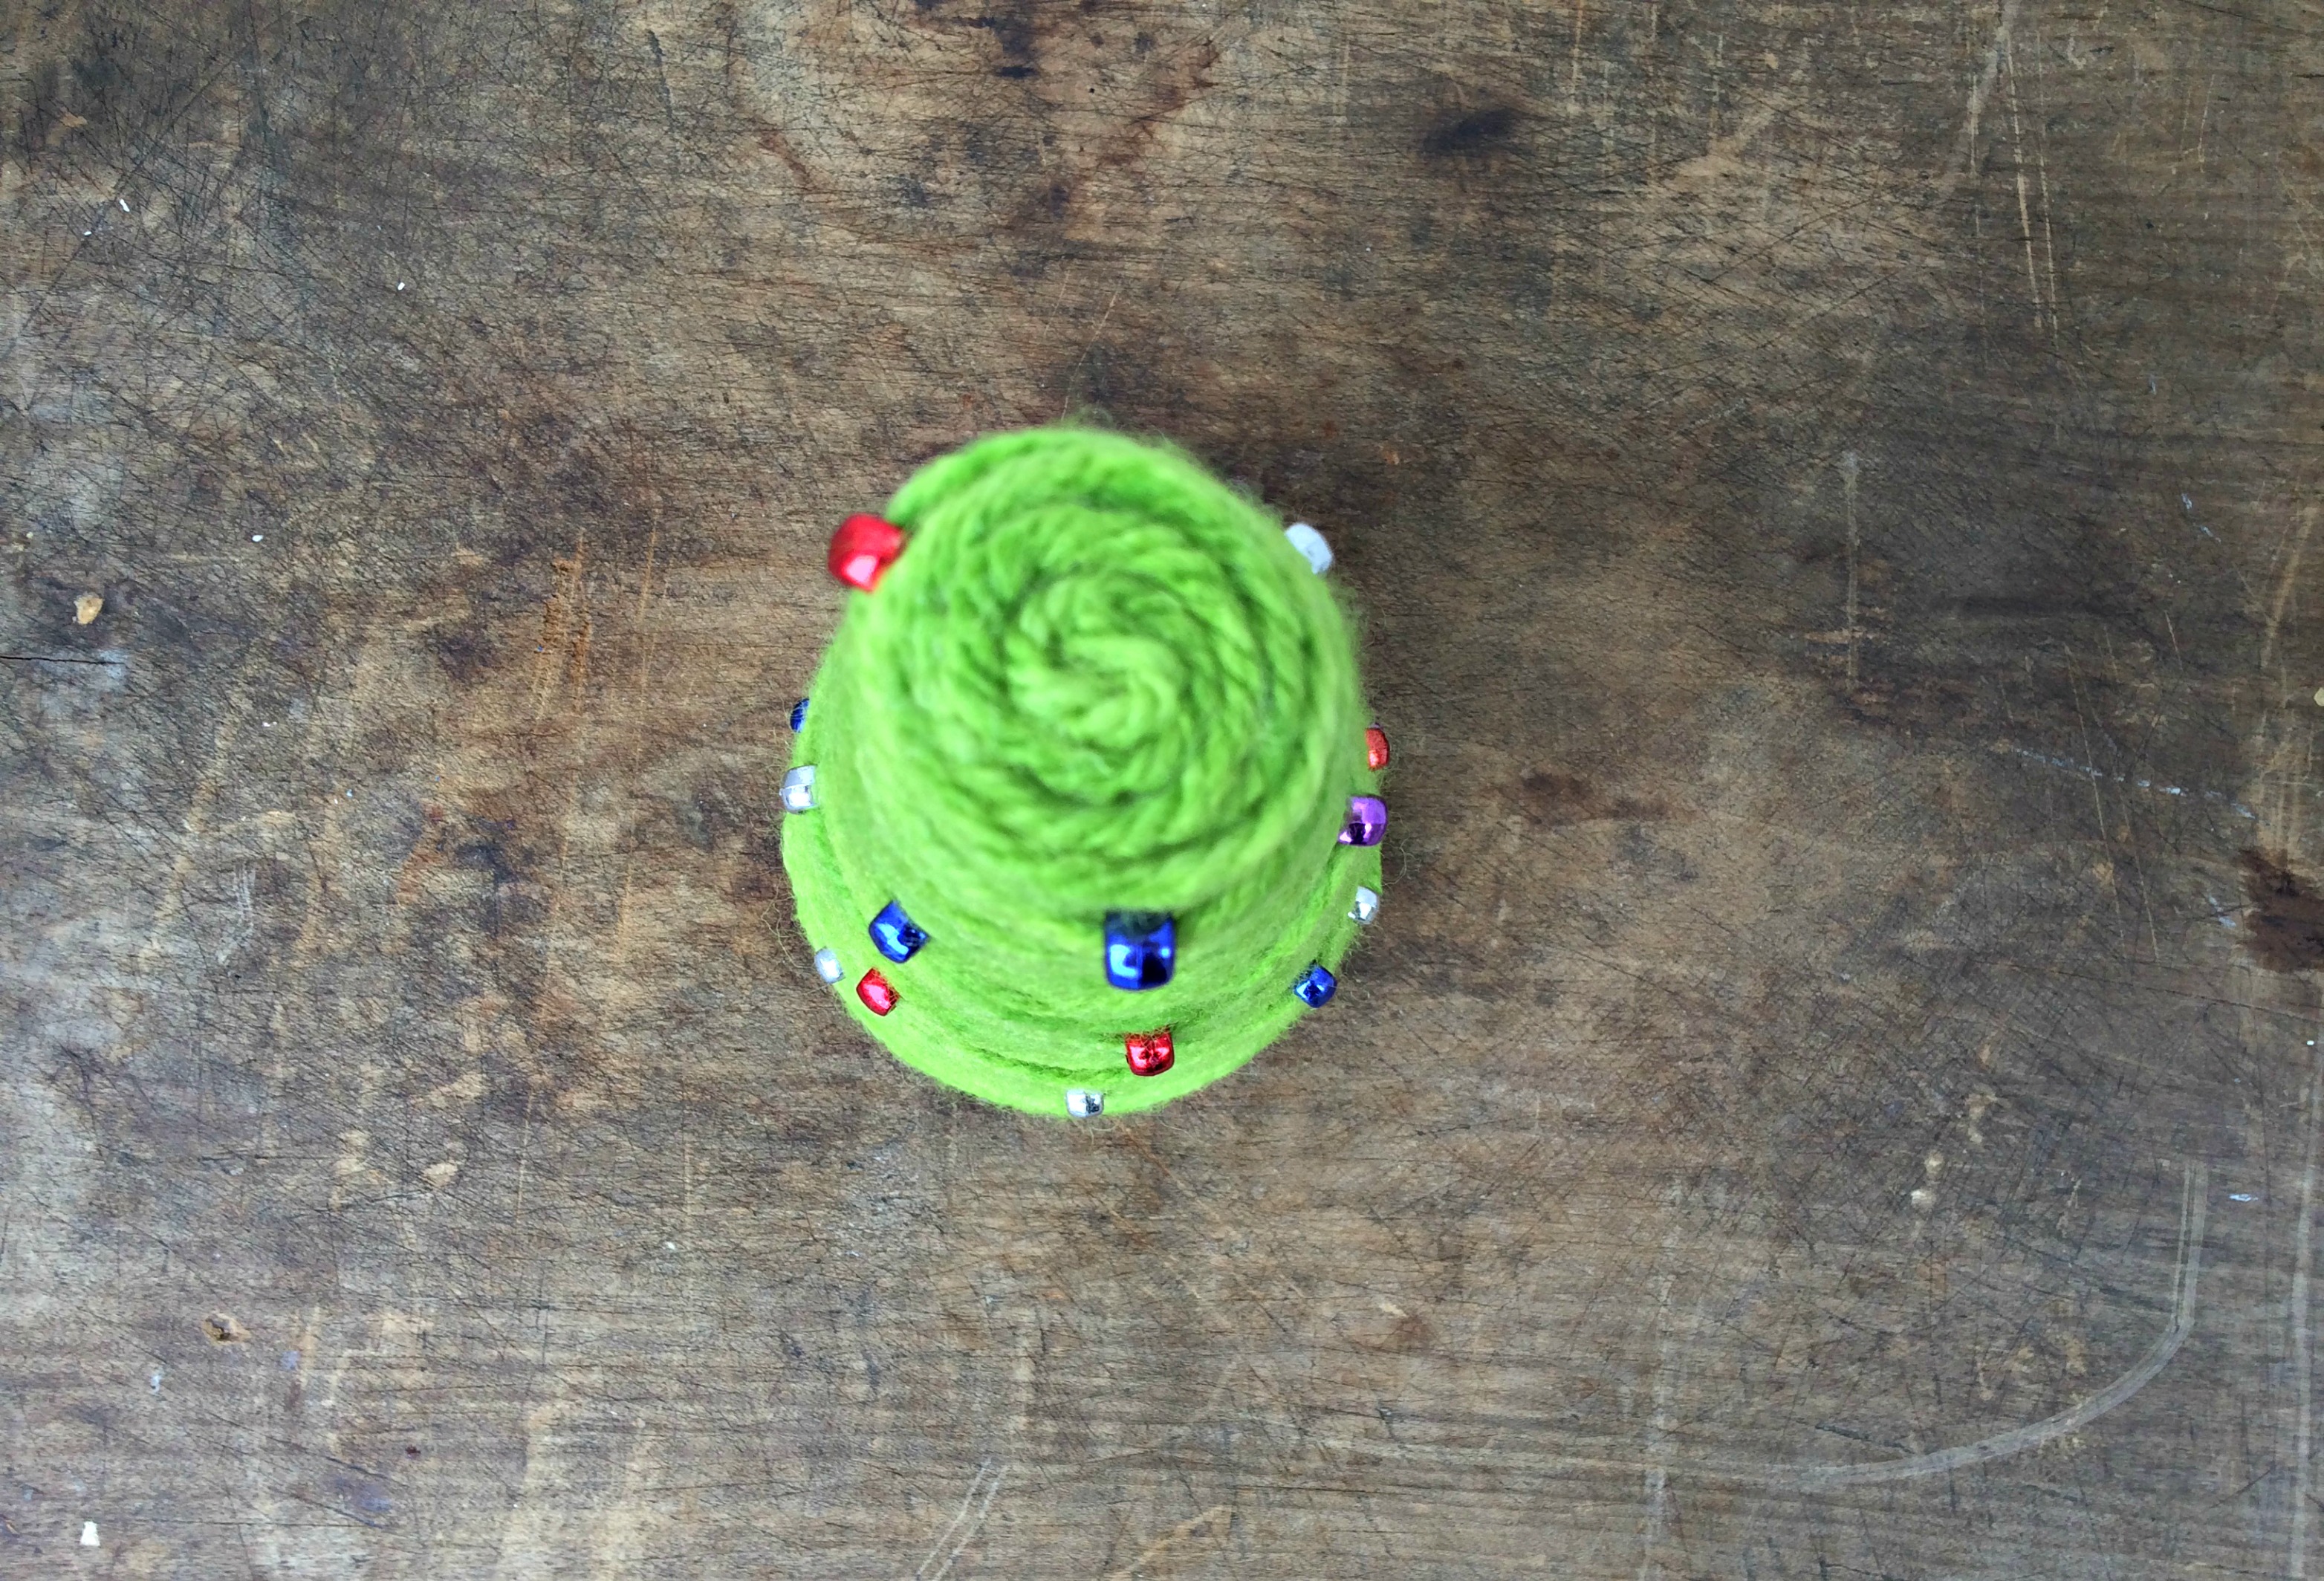
Again, if you need to fix things, the beads easily slide around! Only keep the glue around for the ends – of both the yarn and cone – and it gives you a lot of wiggle room with everything in the middle.
And it’s that simple!
How would you decorate your yarn-wrapped Christmas trees? Let us know in the comments!


Love these bright trees!
I know the holidays are a ways away..but I really like this idea – it’s very unique! Sometimes I have a tough time coming up with new Christmas craft ideas that haven’t been done by lots of people 🙂
I like your craft section too by the way!