How to Make Halloween Pony Beads Beadie Buddies
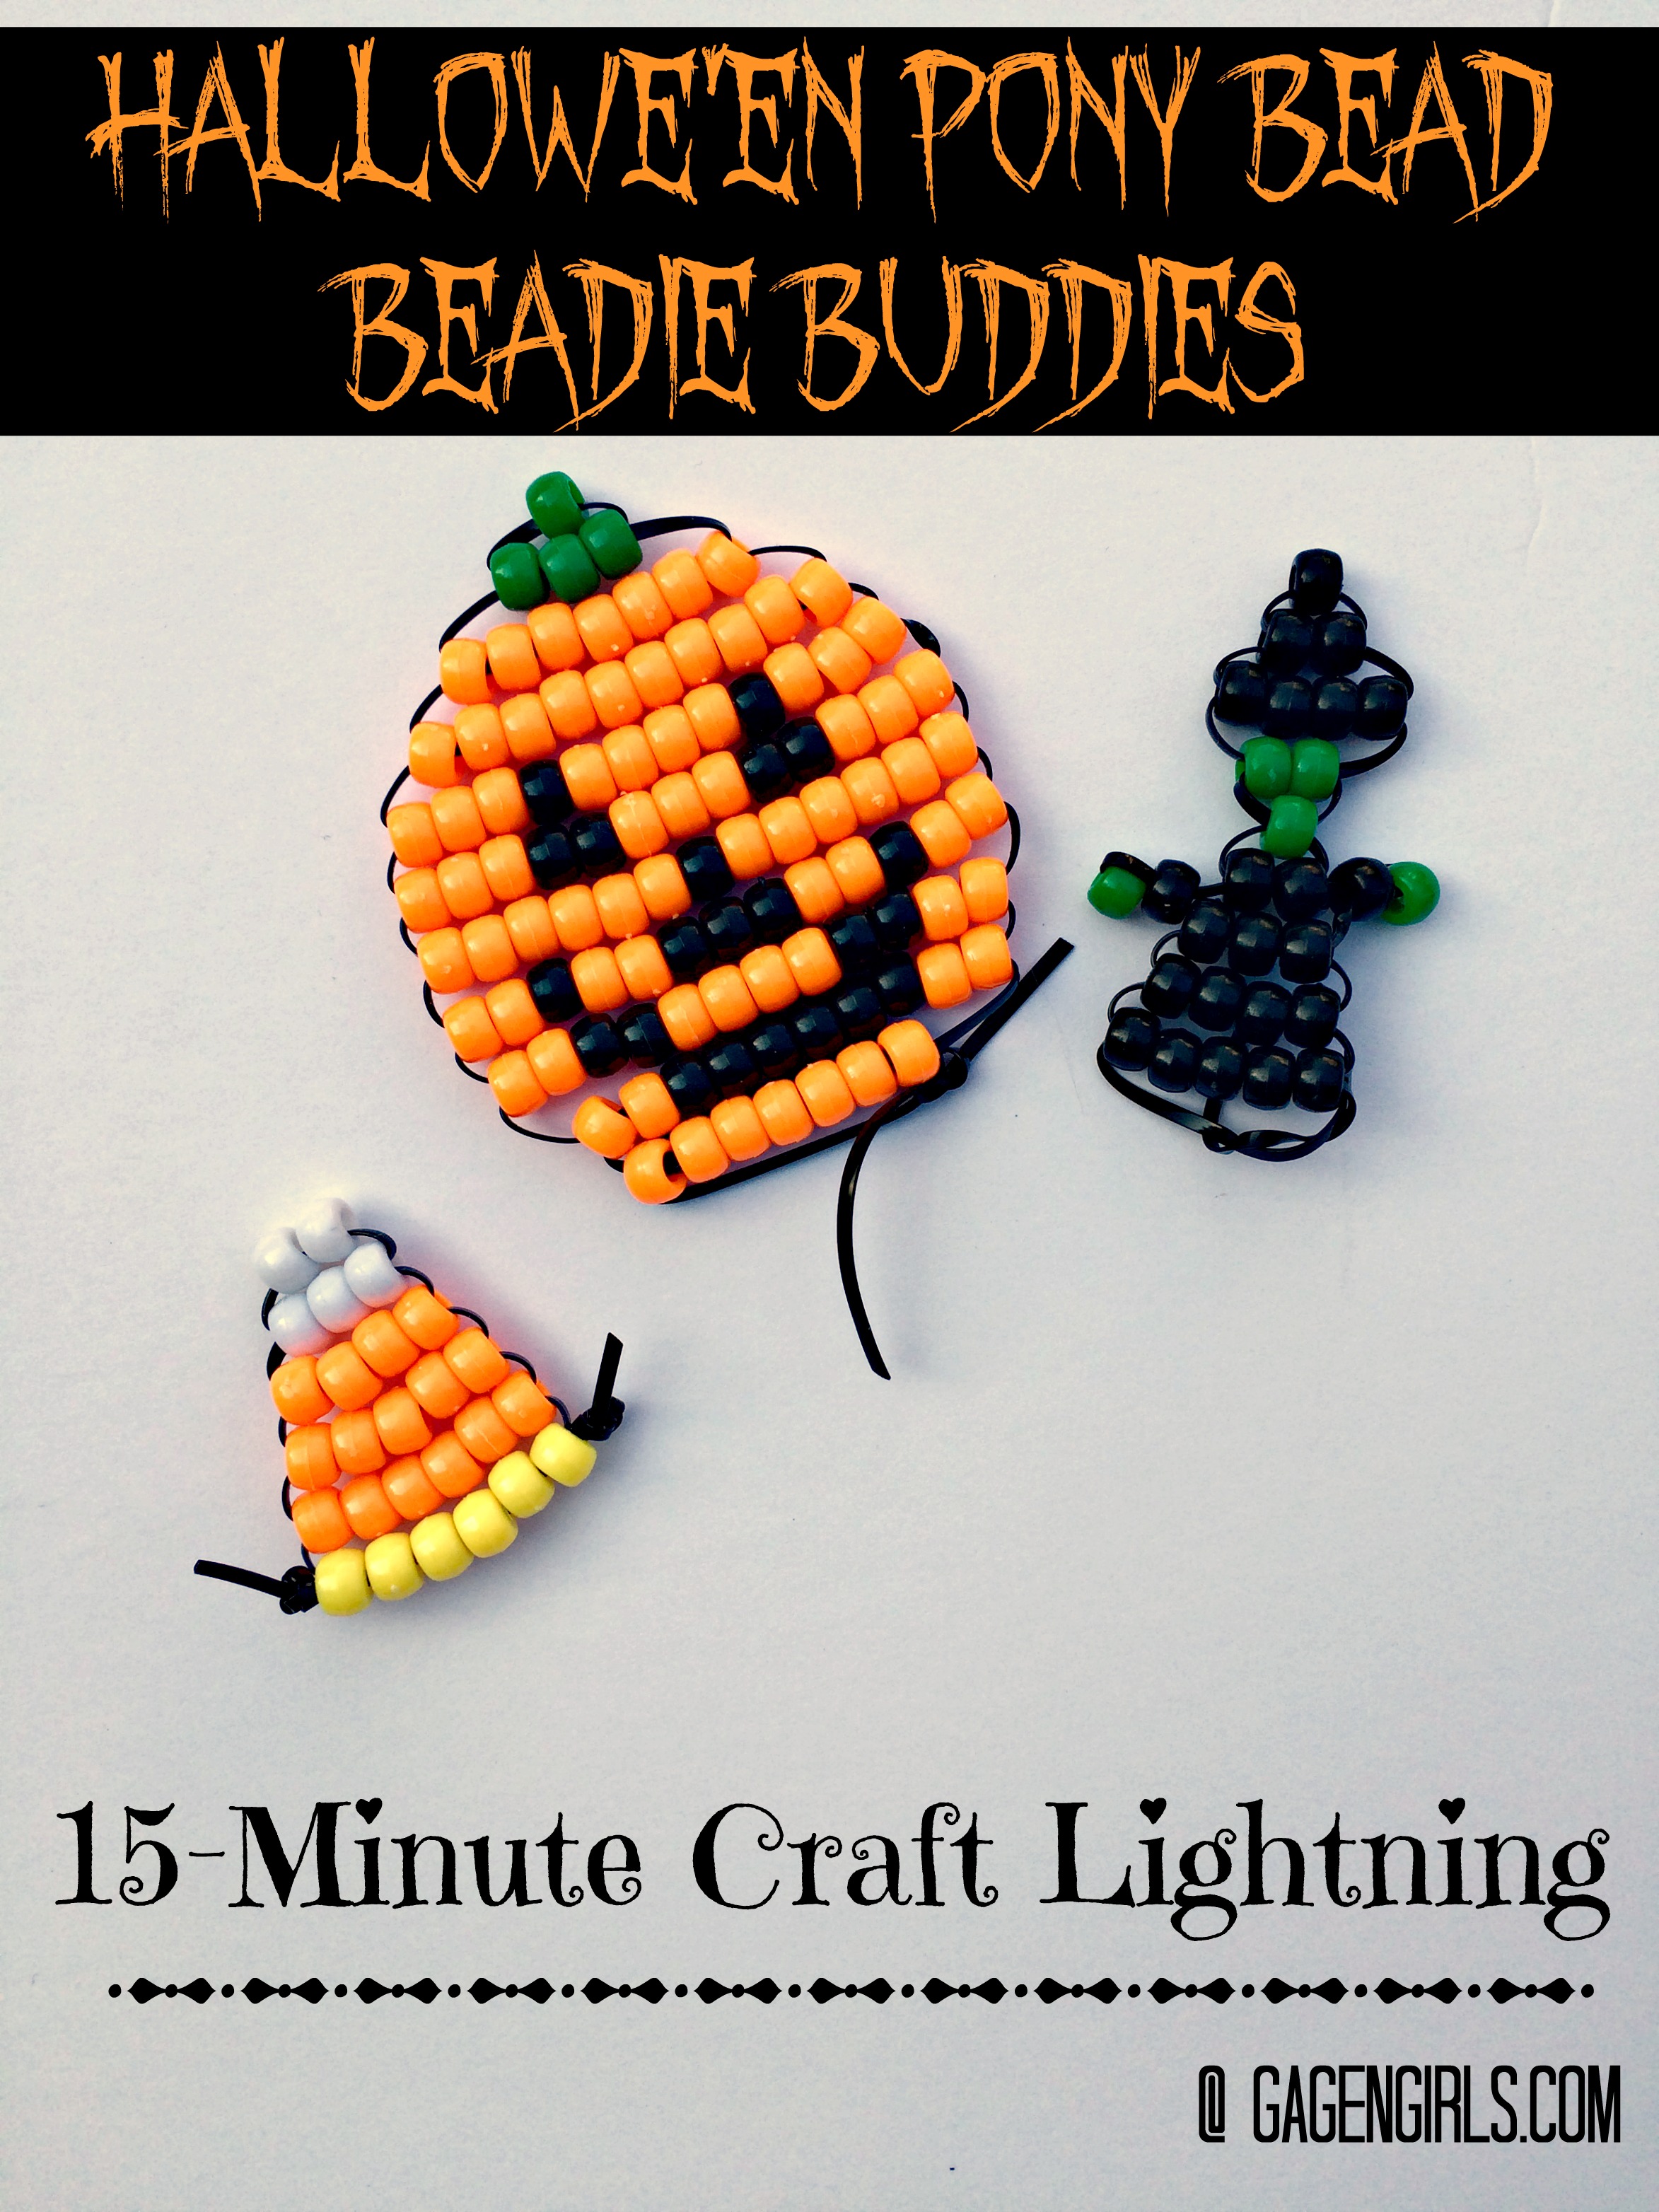
Hallowe’en is my absolute favourite holiday (well, tied with Christmas). It’s so visually appealing, with the jack-o’-lanterns, ghosts, bats, witches, and so much more. That means there are so many great options when it comes to Halloween crafts, like these adorable Halloween pony beads beadie buddies.
When I was younger, I used to love making pony bead beadie buddies so much that I had an old binder filled with about 50+ patterns. I intended to sell them – way cooler than a lemonade stand, right?
A few years ago, my little cousin also adored making beadie buddies, so of course I had to dig out some awesome Halloween pony beads beadie buddies patterns for us to bond over.
For those of you that have never encountered beadie buddies patterns before, let me walk you through the basics of how to create these adorable little crafts! They’re quick, they’re easy, and they’re definitely kid-friendly.
I’m absolutely in love with these BOO-tiful Halloween pony beads beadie buddies – let me show you how you can make your own in a snap!
Hallowe’en Pony Beads Beadie Buddies: Step-by-Step
We get commissions for purchases made through links in this post. Learn more about what this means.
Step 1: Find Patterns
The first thing any beginning bead-crafter should do is find themselves a pattern. I’m getting to the point where I can adapt or even create my own patterns from scratch, but when I was first starting out a pattern was a must-have.
Pony bead patterns are all over Pinterest and Google; just search ‘pony bead pattern’ and you should find some. One of the best websites around, which I used way back in the day as well, is beadiecritters.com. I could spend hours looking through their great selection of beadie buddies patterns!
I found these patterns on Pinterest (though I adapted my Jack O’Lantern beadie buddie from two different patterns). Unfortunately, most of these patterns were pinned from makingfriends.com and while that site still exists it has obviously reformatted or something and the pages don’t seem to exist anymore.
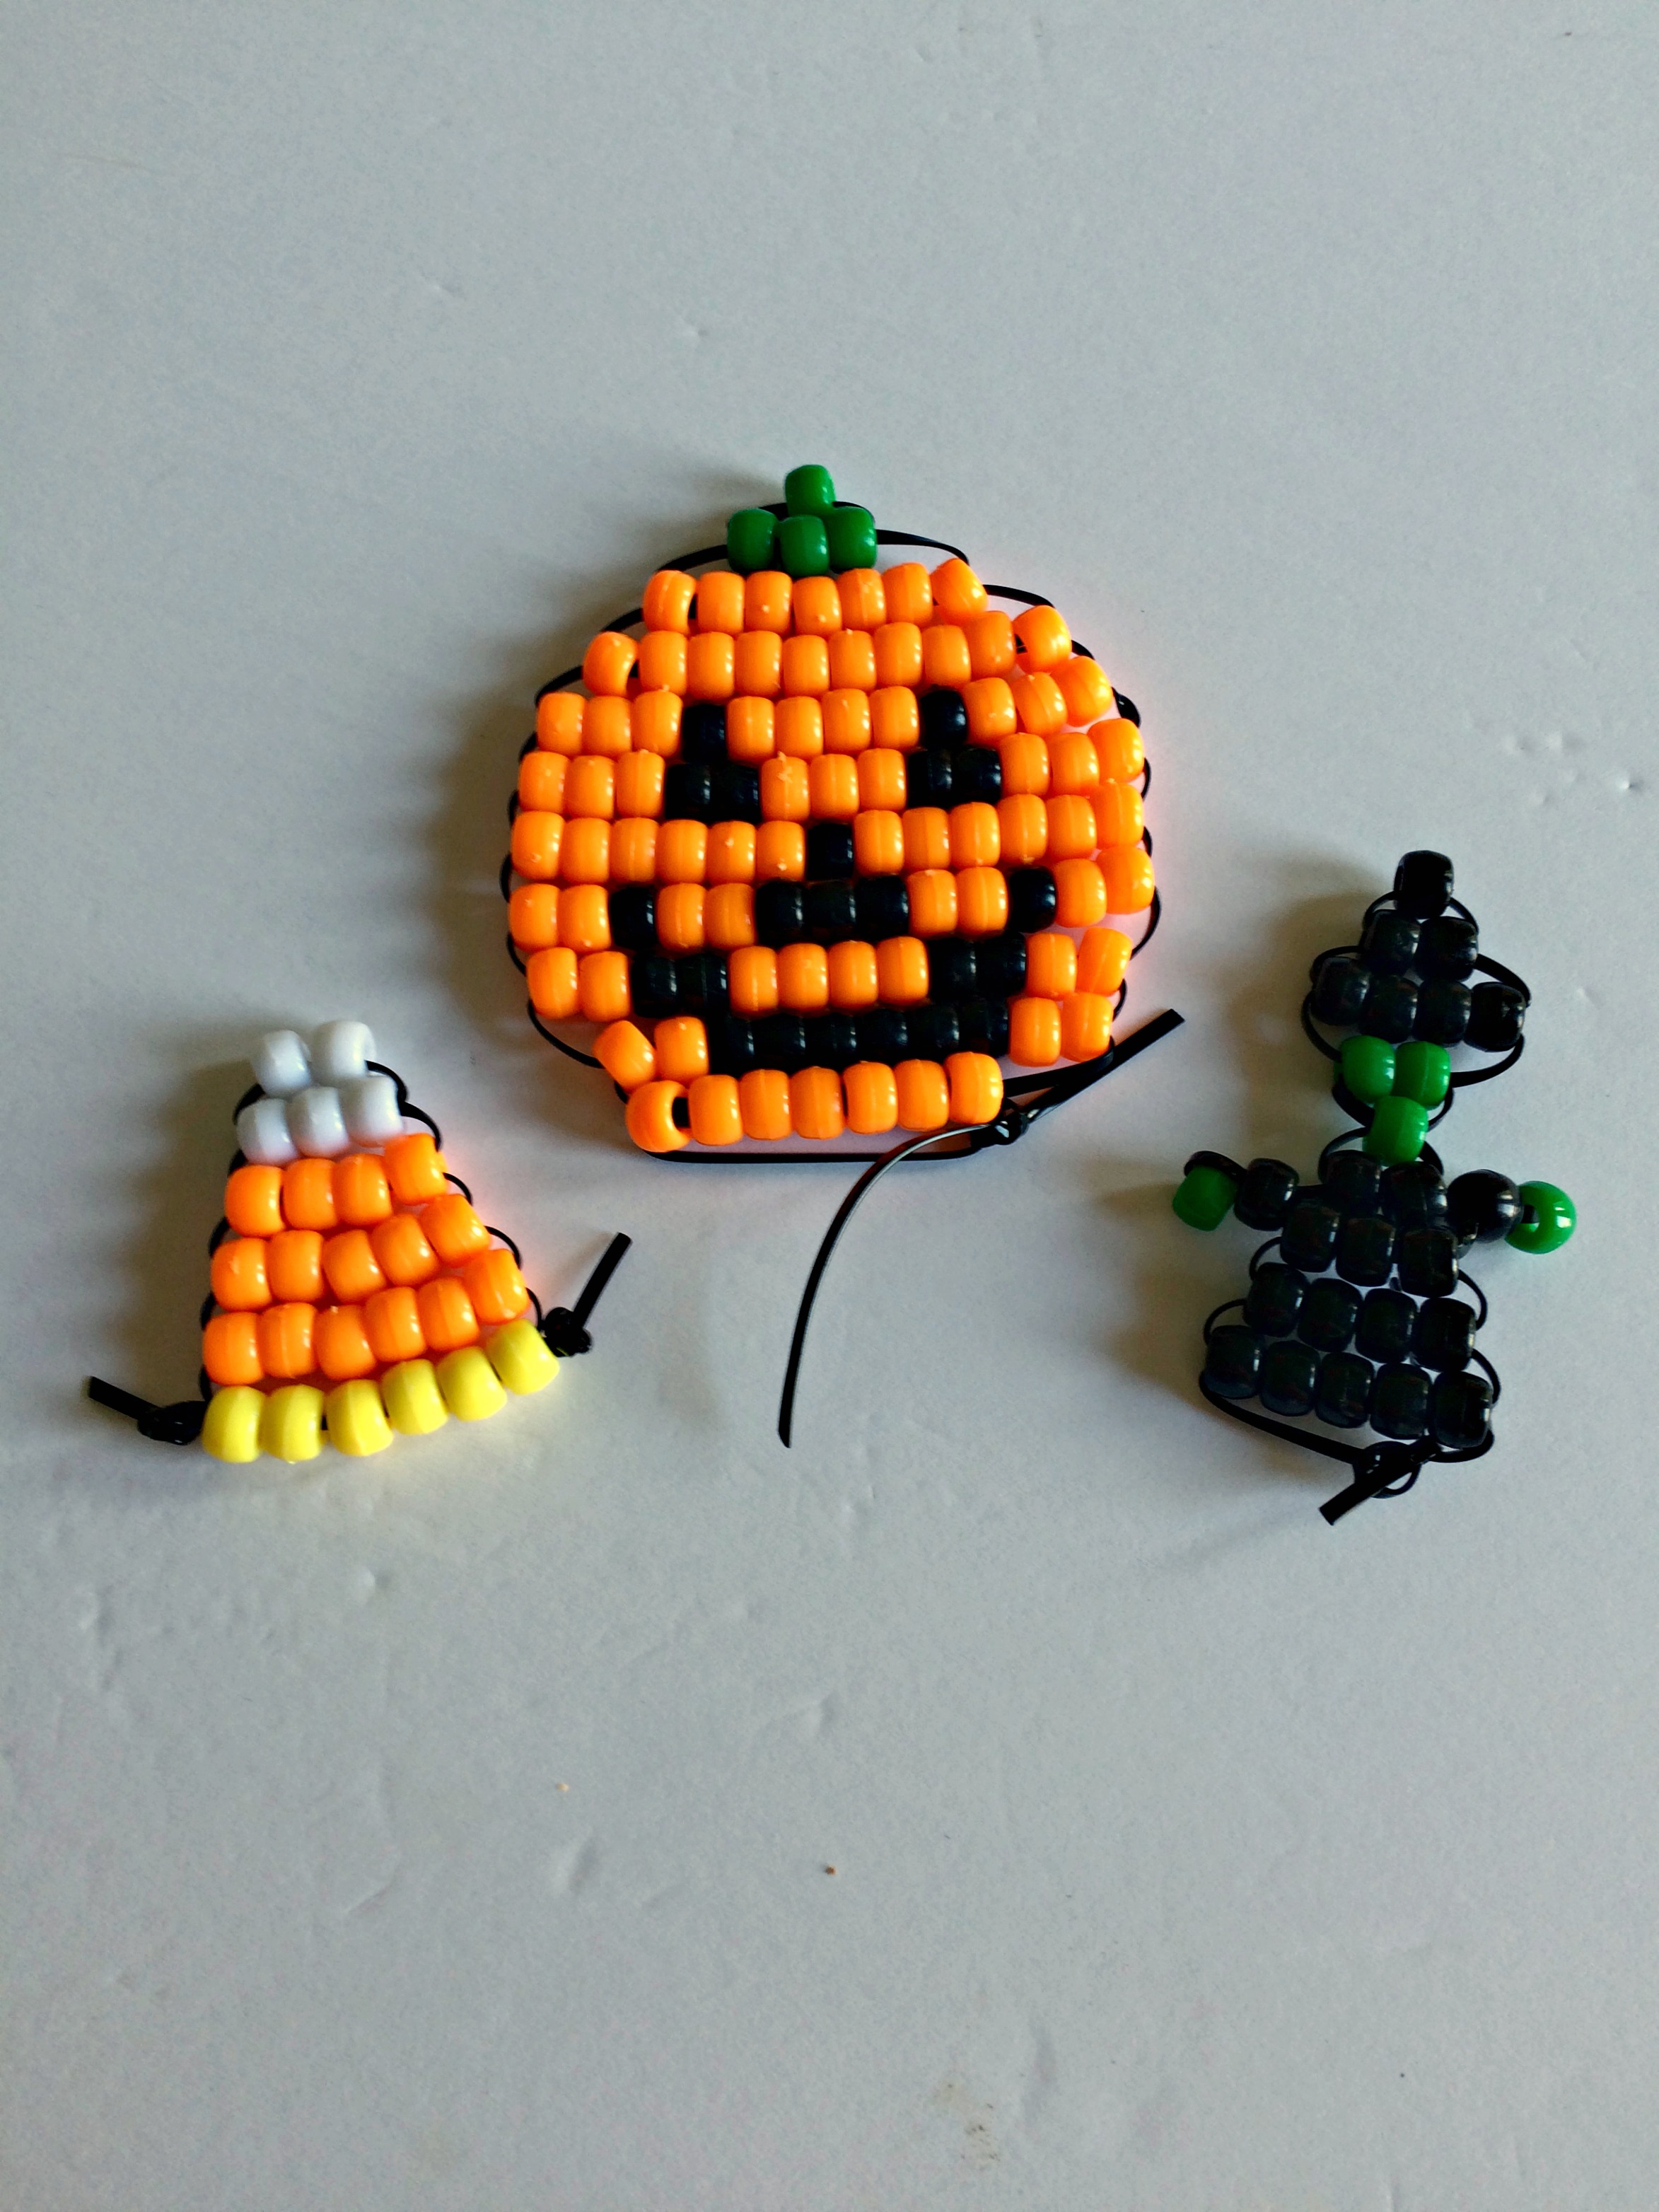
First up, this Hallowe’en classic treat: candy corn.
Then, one of the most iconic Hallowe’en costumes: a witch (with some friends that I didn’t make).
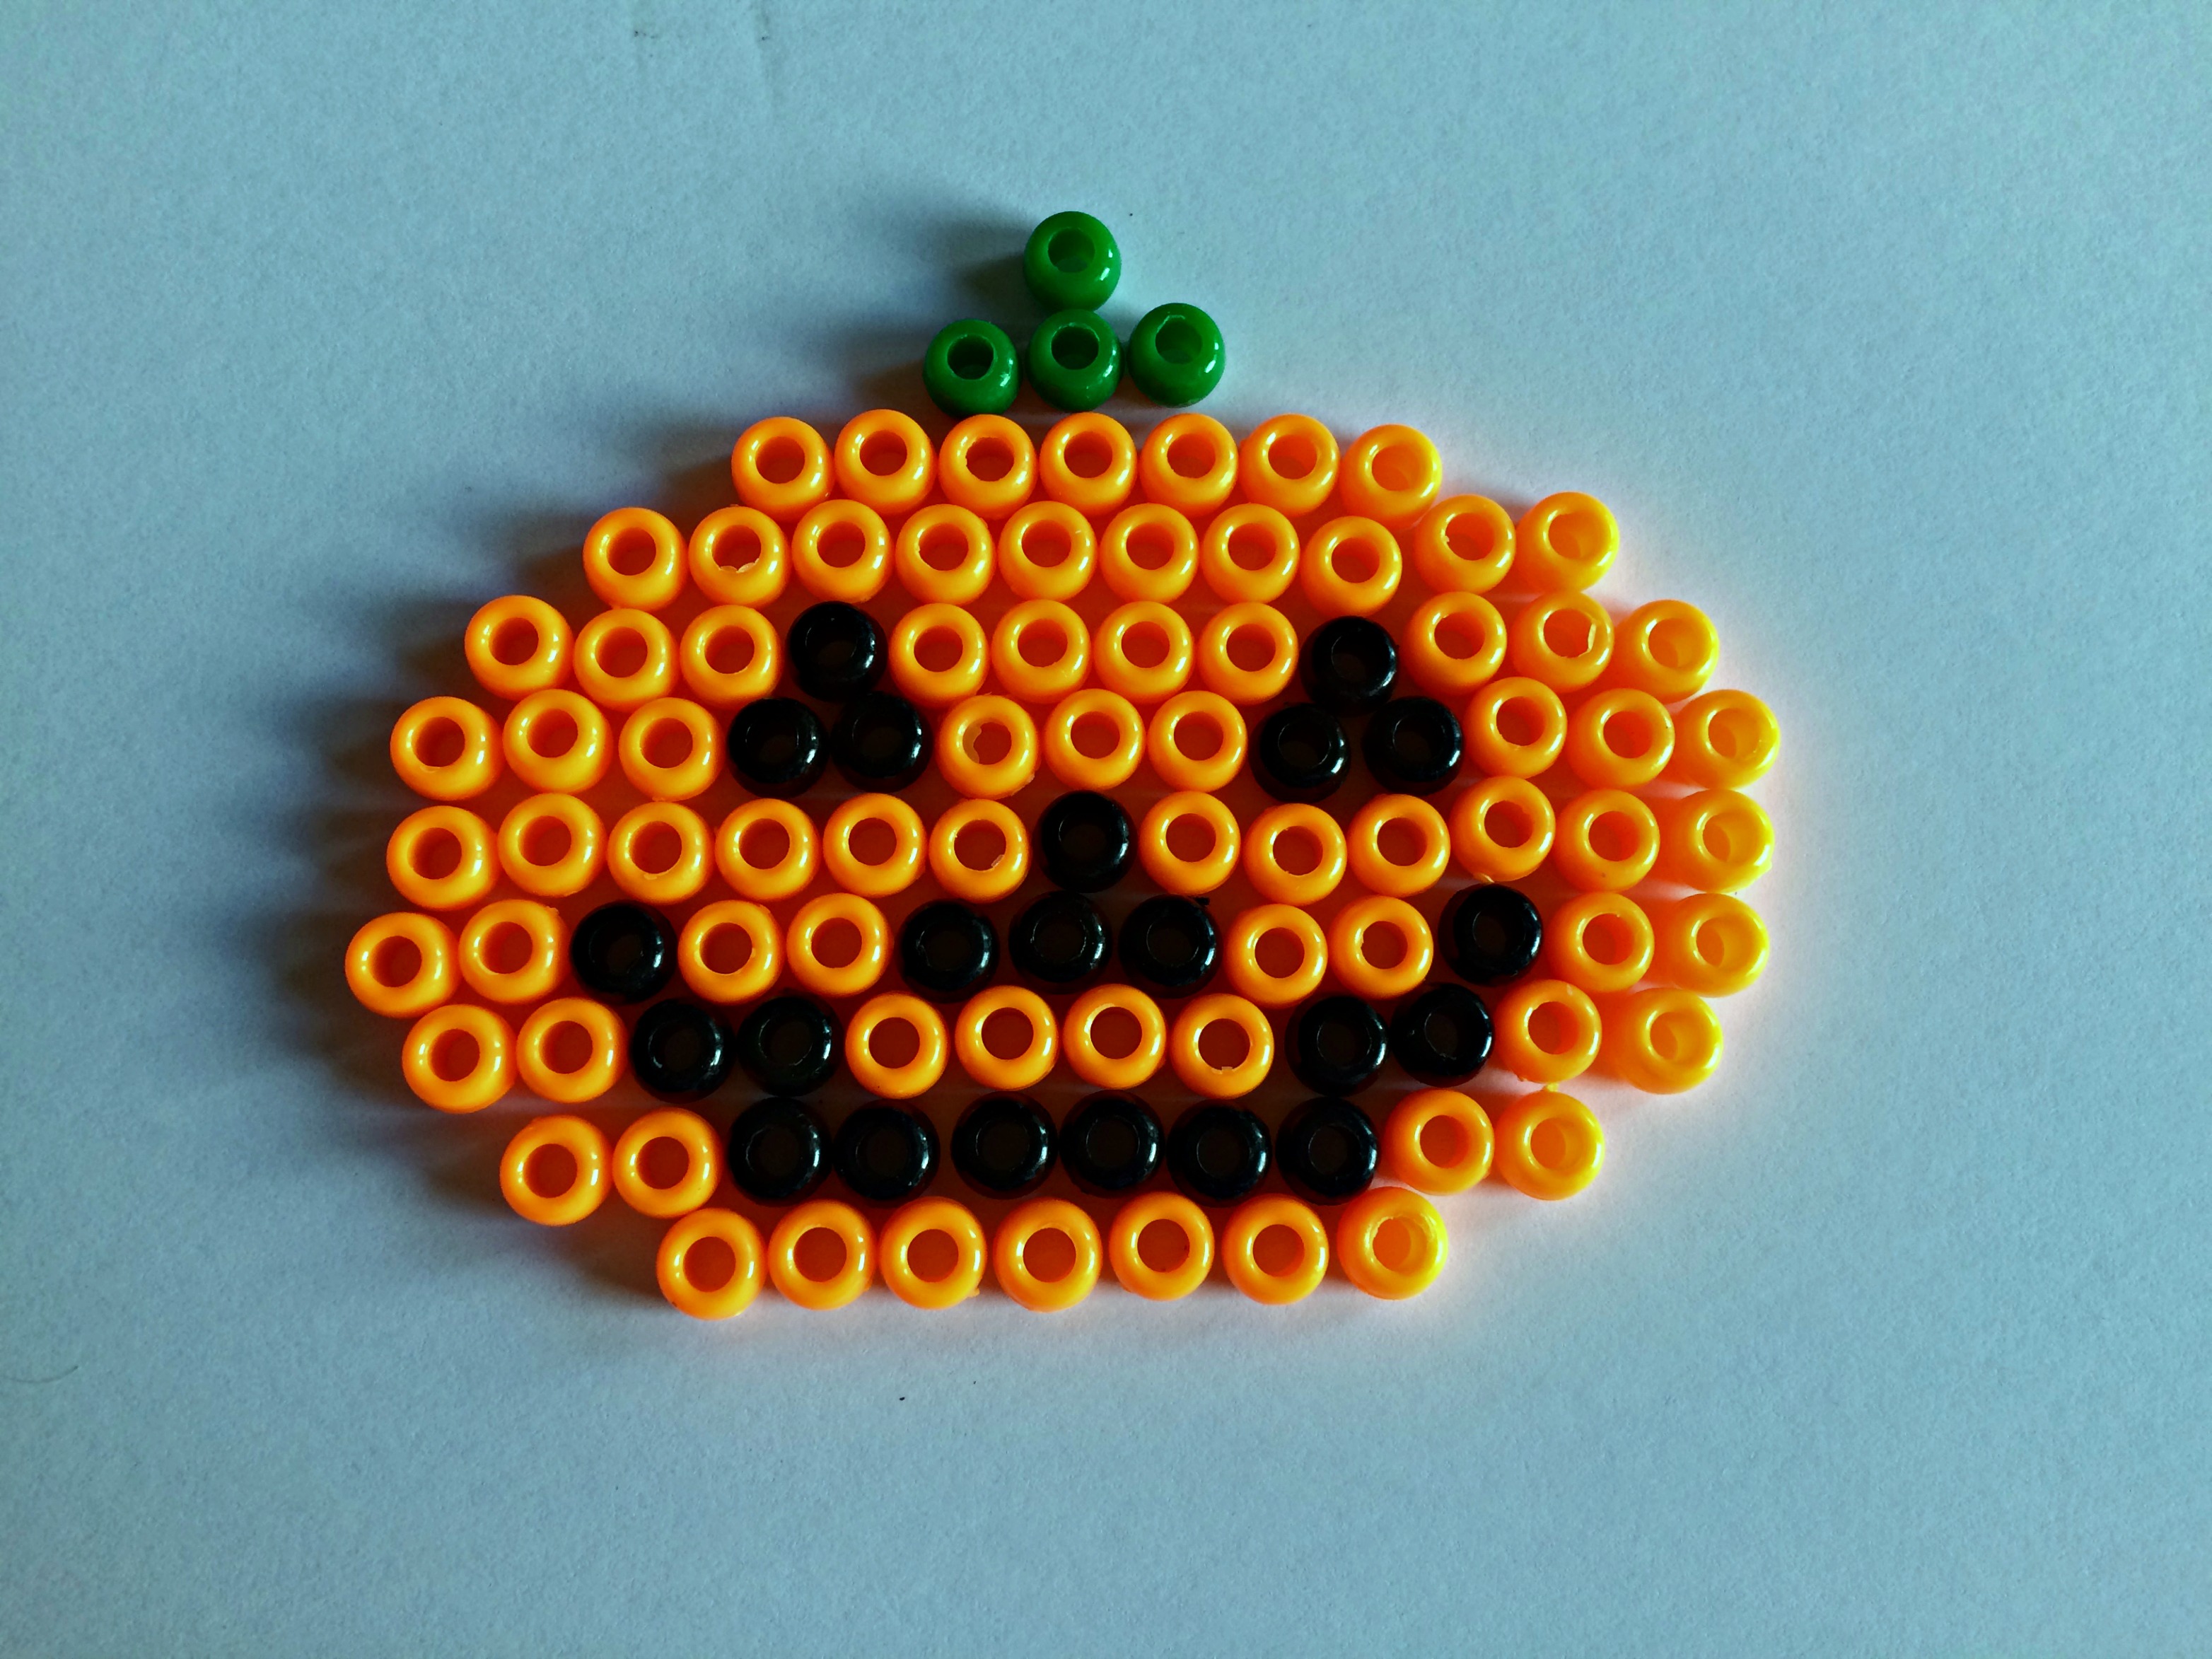
Lastly, for my cousin, her specifically-requested jack-o’-lantern, which I made by taking the green top of this pattern:

And combining it with this pattern:

(Because I liked this second pattern’s face better.)
Step 2: Get Supplies
Once you have your patterns picked out, you need the right colours of pony beads. I can usually get most of my supplies from the dollar store, but sometimes I have to also make a trip to Michaels. Trust me, get the cheaper ones if you can – I’ve never found a difference in quality.
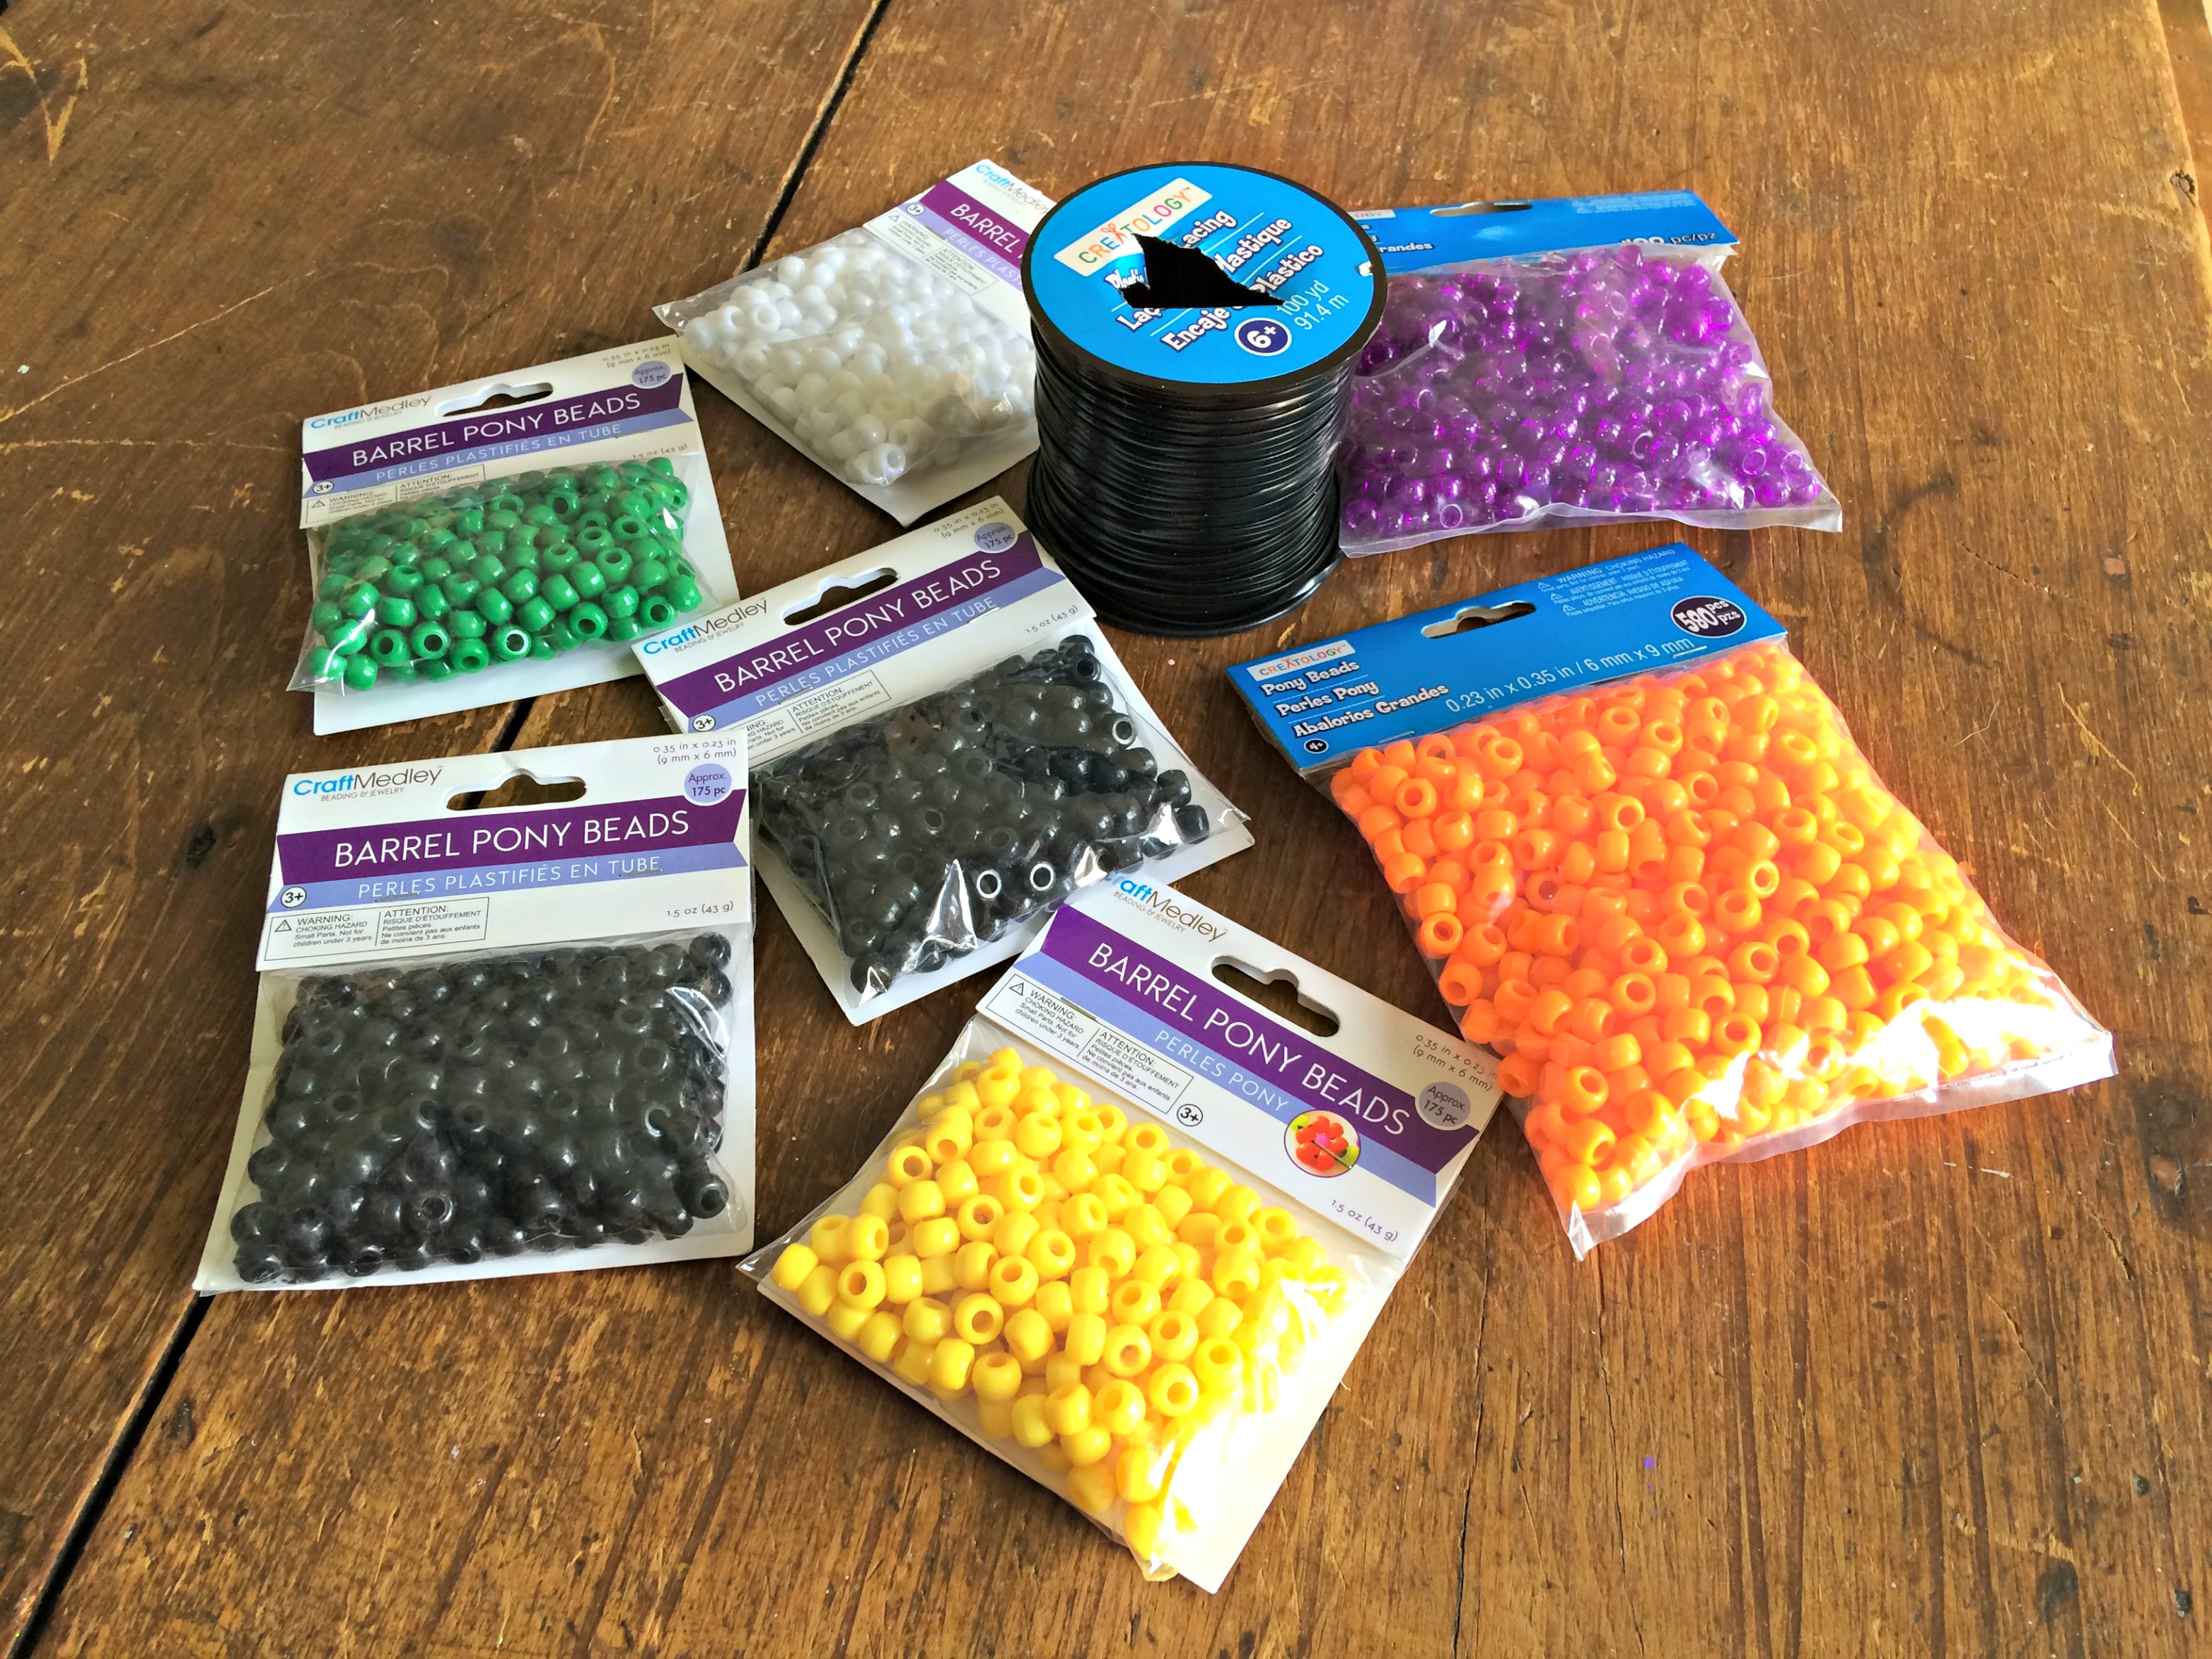
You’ll also see my spool of plastic lacing there, too, because you need something to string the beads on. I do not enjoy using this plastic for my beadie buddies – it doesn’t wrap as well, nor does it tie as well, leaving some of your creations a bit warped (for example, look at the bottom of my Jack O’Lantern – he’s going to be re-done once I find some cord I like).
Usually, I much prefer using silk/satin cord, but I couldn’t find any in time to do this craft. I have since found this variety pack of cord in lots of great colours, but haven’t tried it yet.
The last thing you may want to pick up is key rings, which is the “traditional” way of starting off your beadie buddies. I may or may not have forgotten to pick some up and therefore decided to make mine without it, but it’s easier for newbies to start the projects by knotting a key ring halfway through their cord.
Step 3: Review Pattern
Once you have your equipment gathered, you might want to lay out your beads into the pattern. This is a more time-consuming way of starting off, but gives you a good idea how it will look. I tend to only do this when I’m creating or adapting a pattern. I started off with my jack-o’-lantern pattern to get a good idea of how combining the two patterns would work out.
Keep in mind that this is not exactly how the final product will look since all of the beads will be on their sides and the cord will be visible on the ends of each row.
Like I said, that’s a more time-consuming way of starting off. I prefer just having the beads accessible and only grabbing the colours row-by-row. It’s much faster. (Plus you won’t be able to bump the table and send your pattern flying – not that I’ve done that, ahem.)
Bare minimum, you need to count your beads and make sure you have enough and review the pattern to ensure you understand what it’s asking you to do.
Step 4: Get Your Starting Rows
For most patterns, you’ll need 2-3 yards of cord. I tend to not even look at the instructions anymore and just measure out about 3 yards and if I have extra, c’est la vie. You can just chop off the extra at the end.
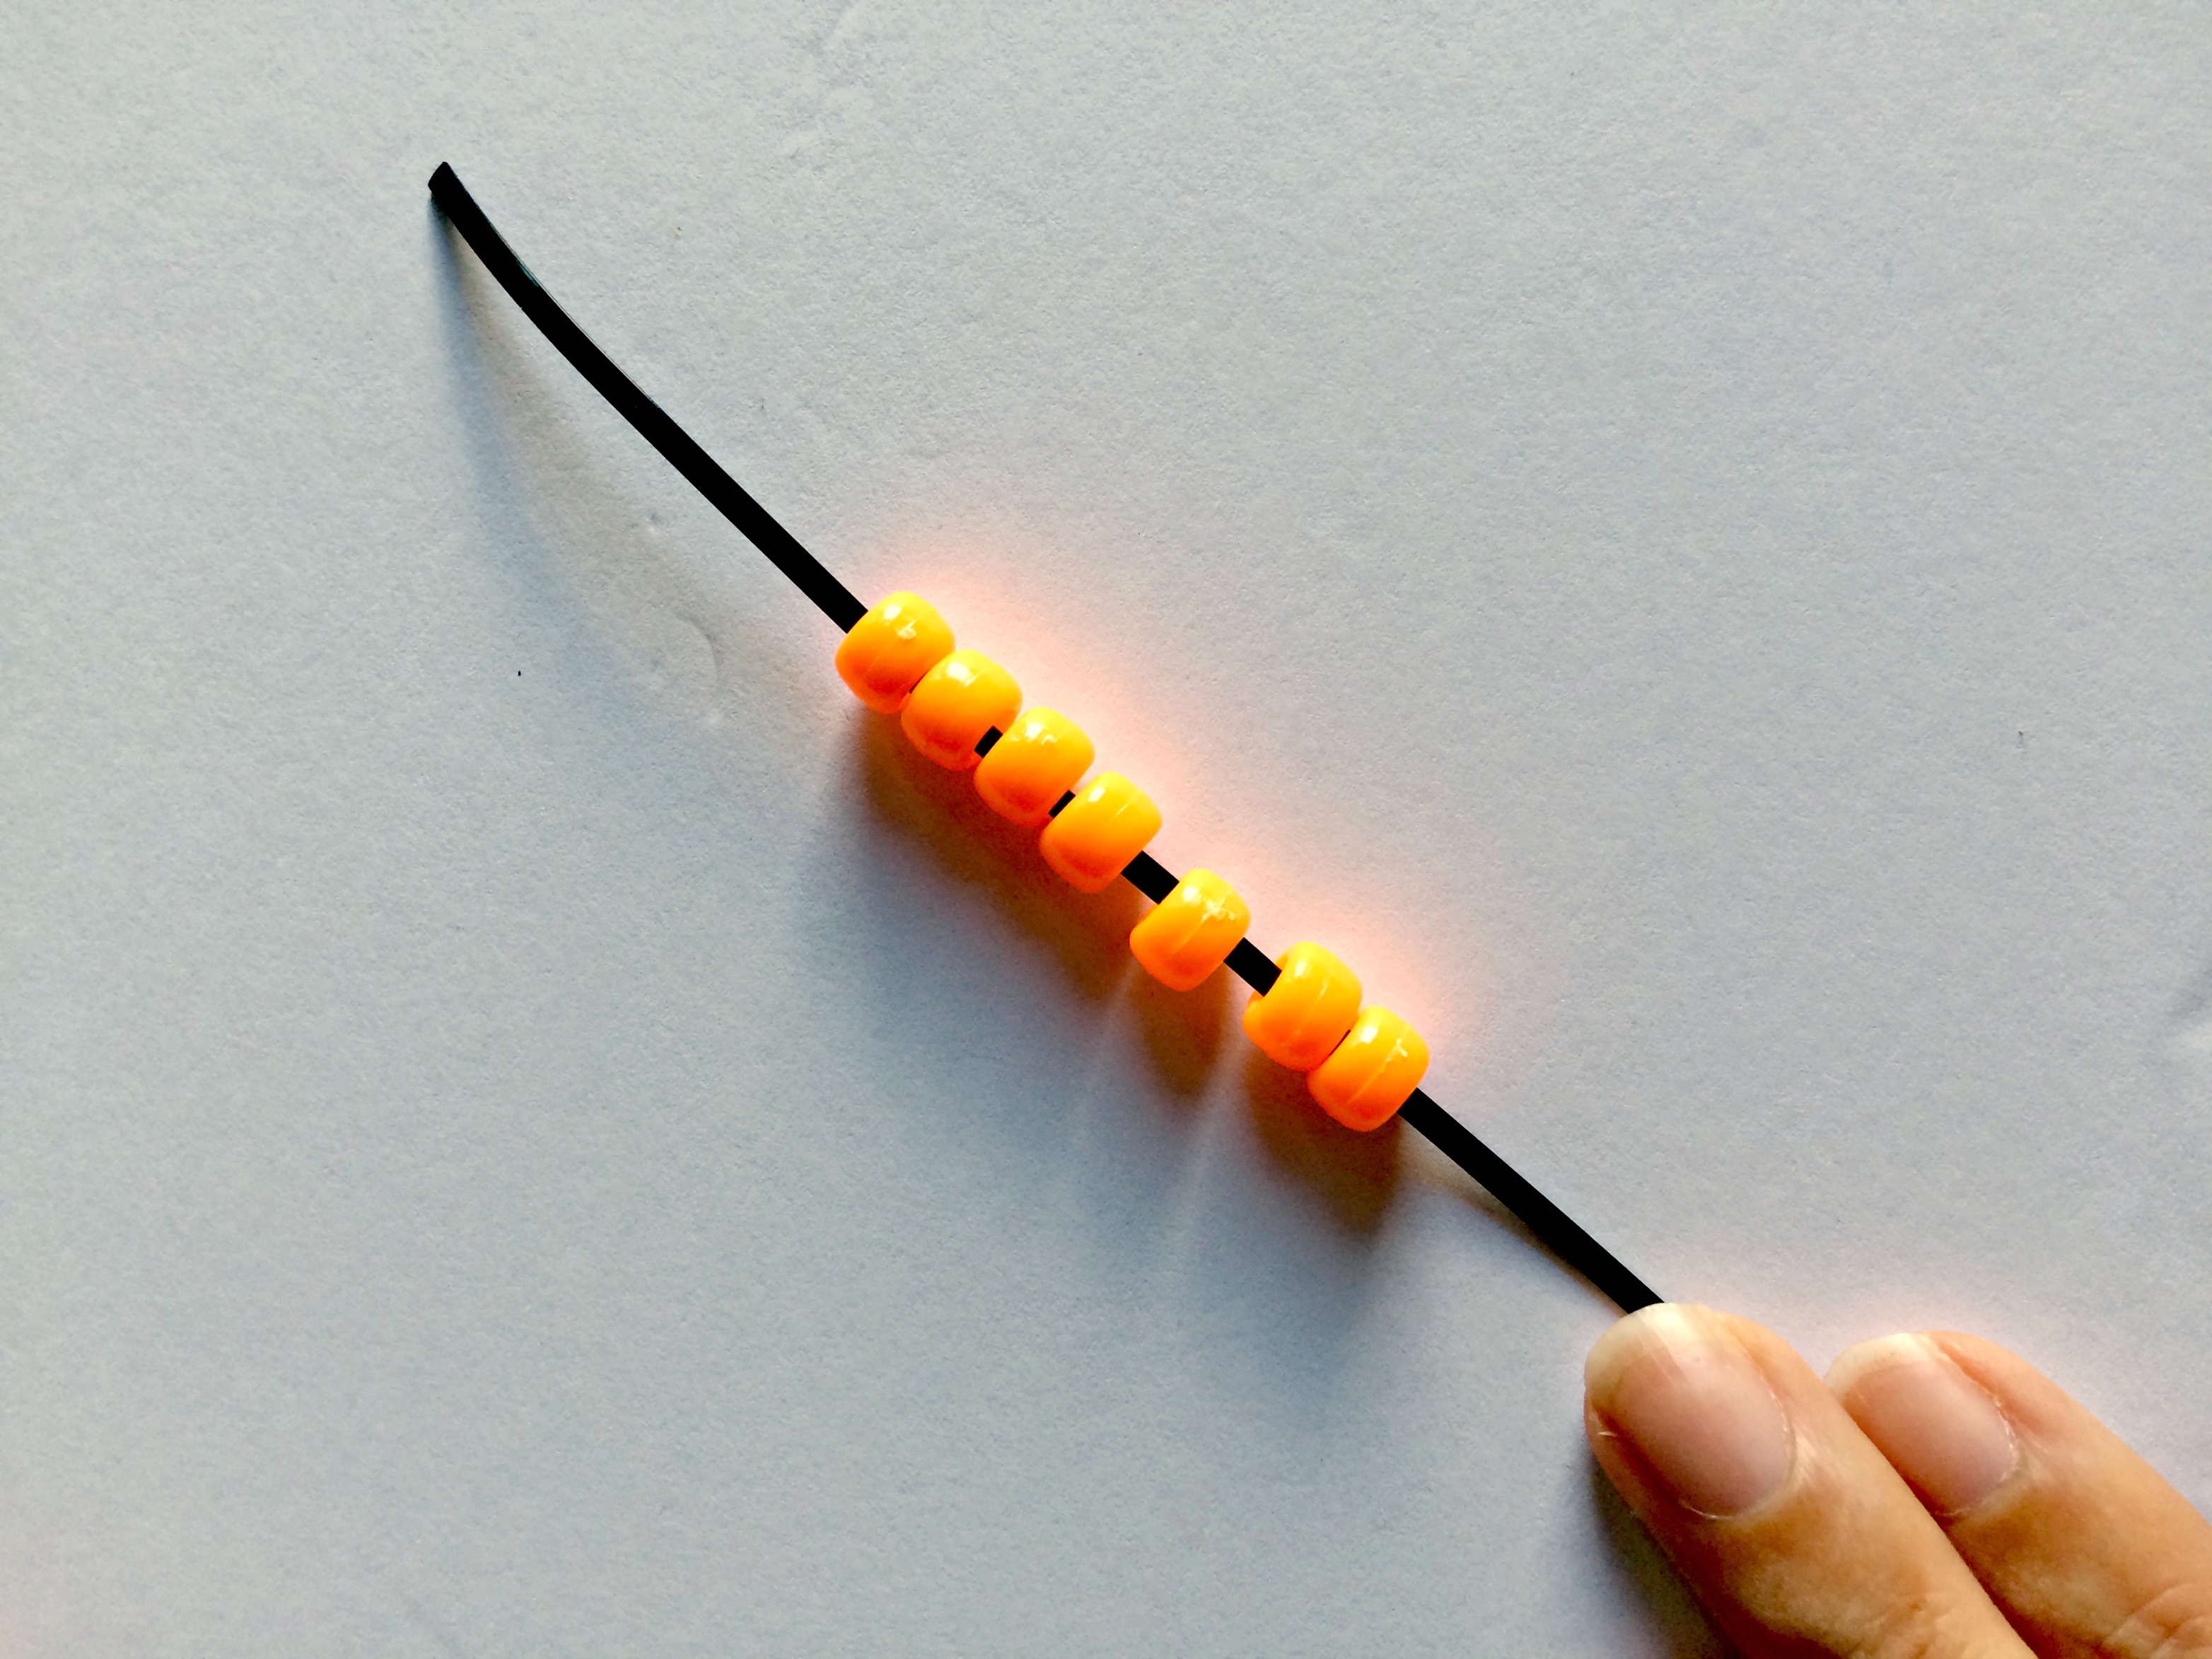
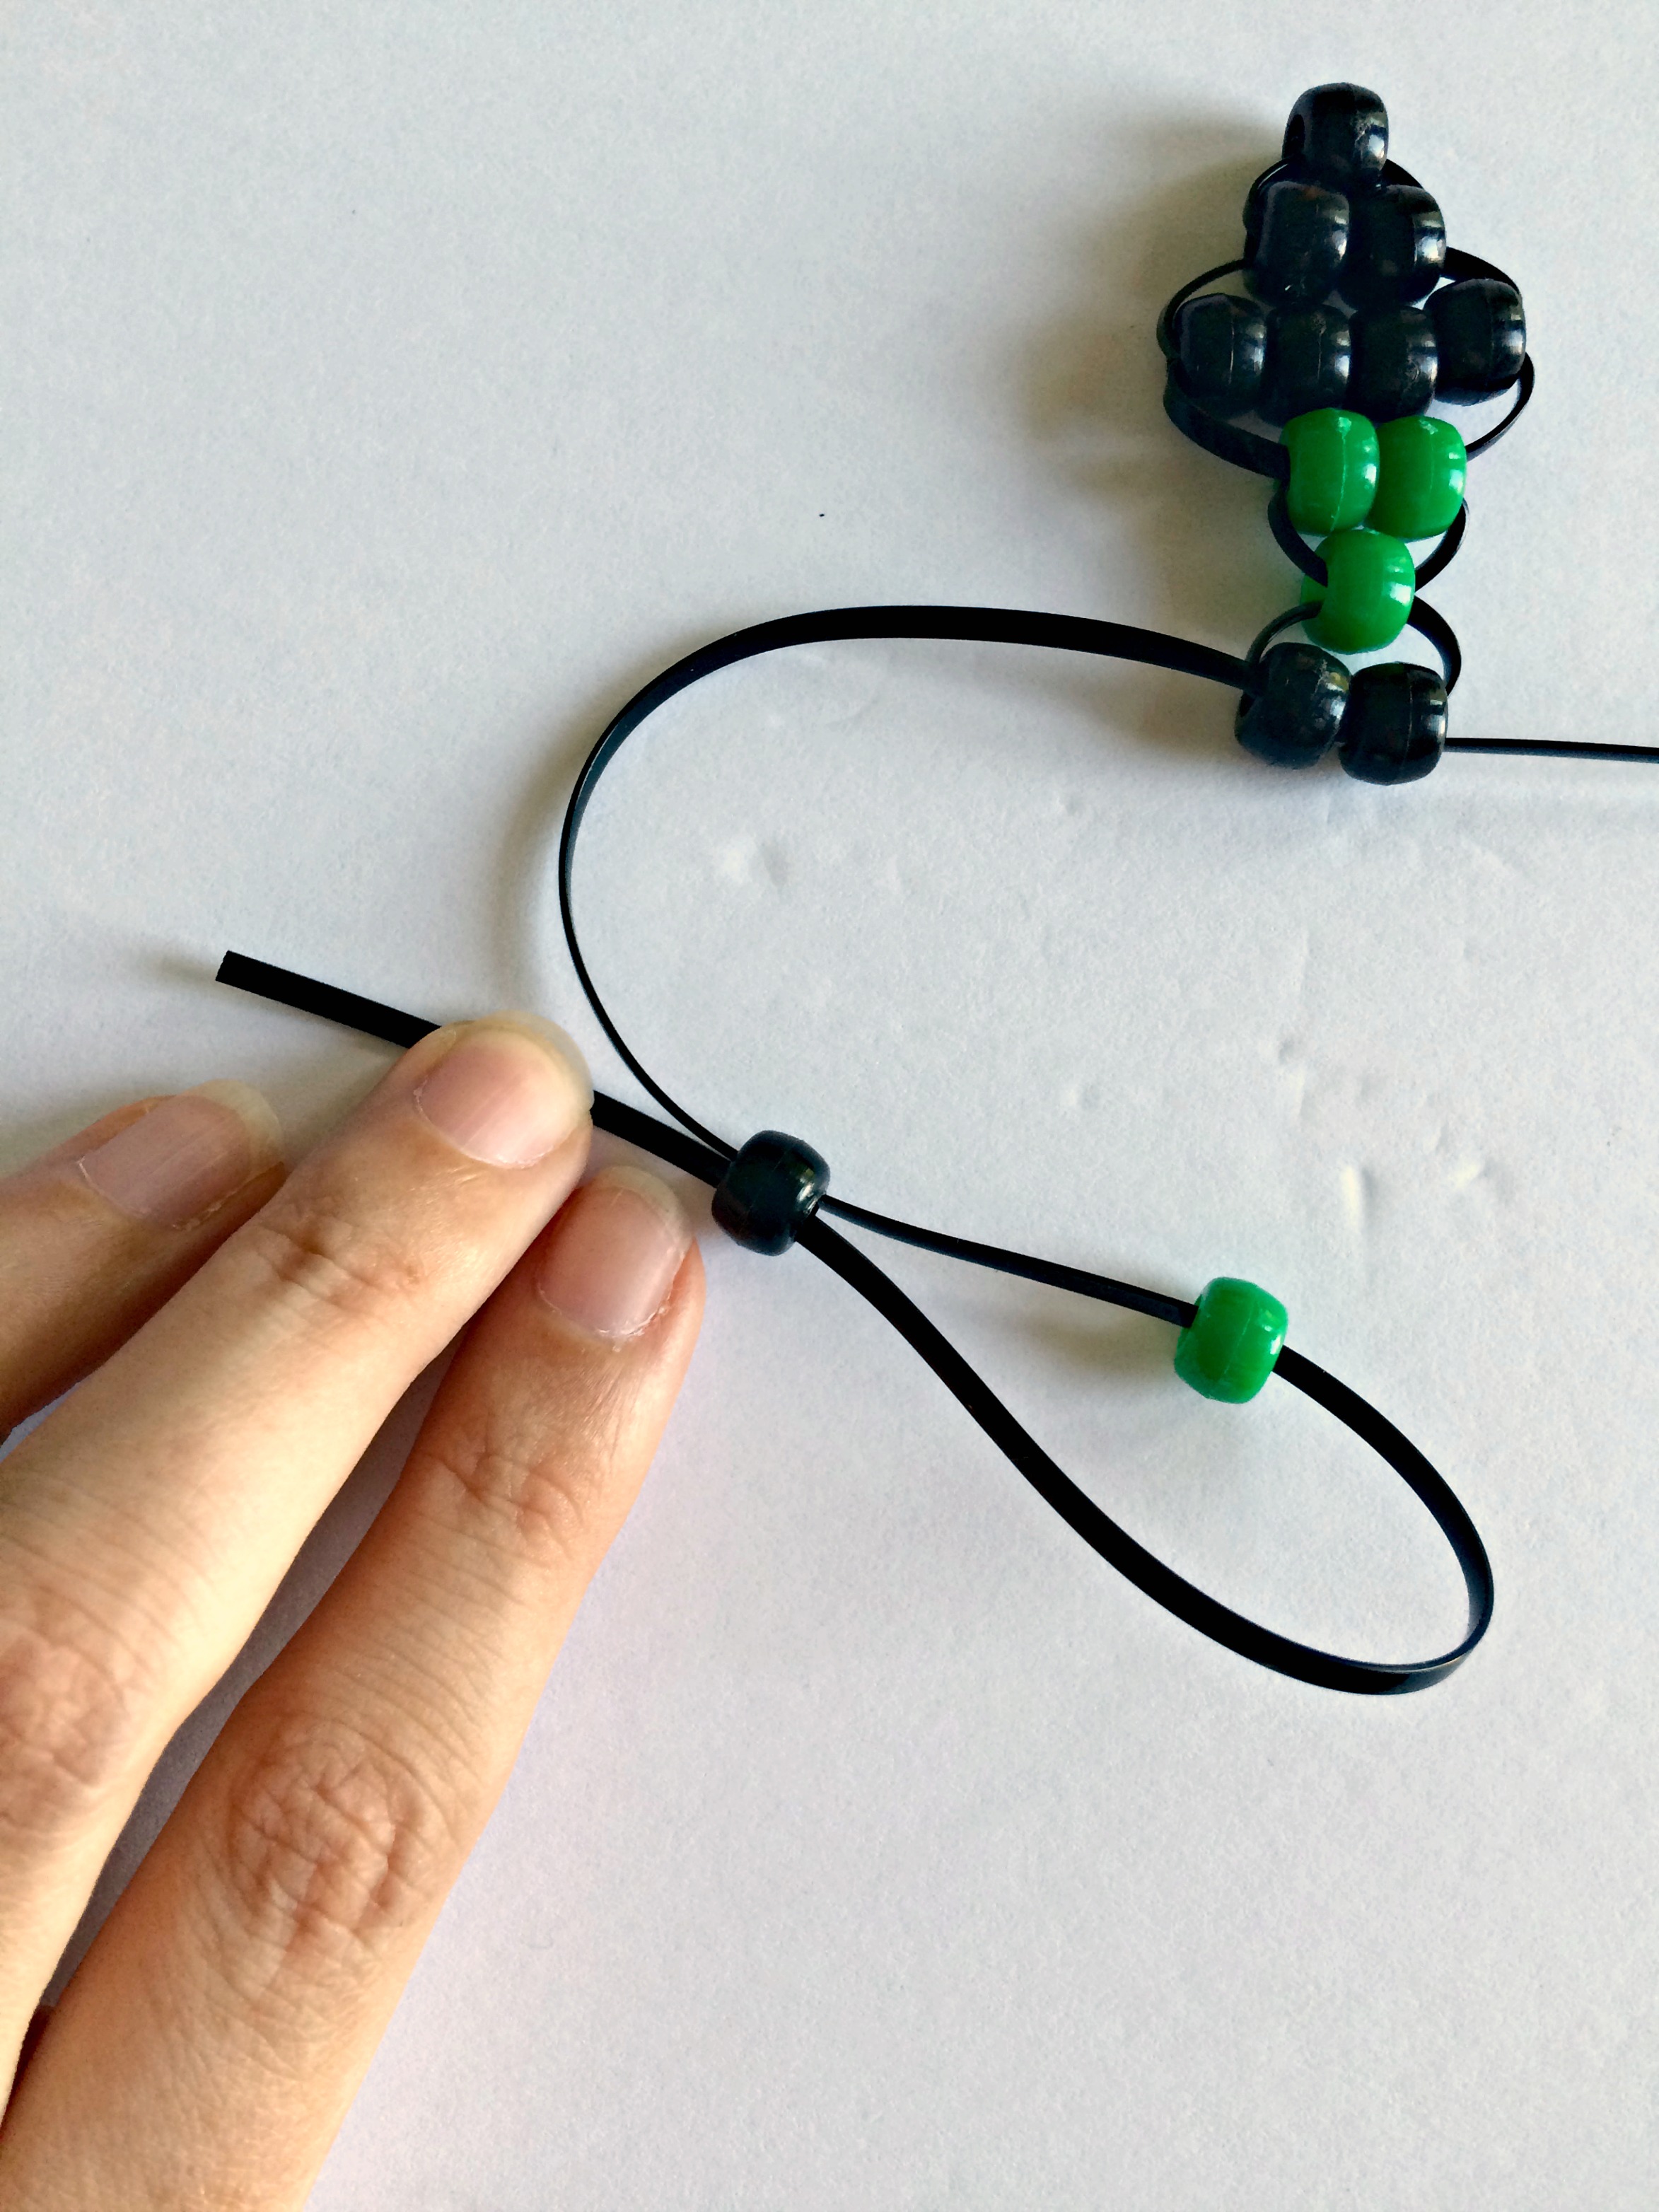
Since I was doing these beadie buddies sans key ring, I found my starting point by folding the lacing in half. This is where you want to position the first beads. You always do these bead patterns from top to bottom, so find whatever beads you need for the top row and position these at that halfway point.
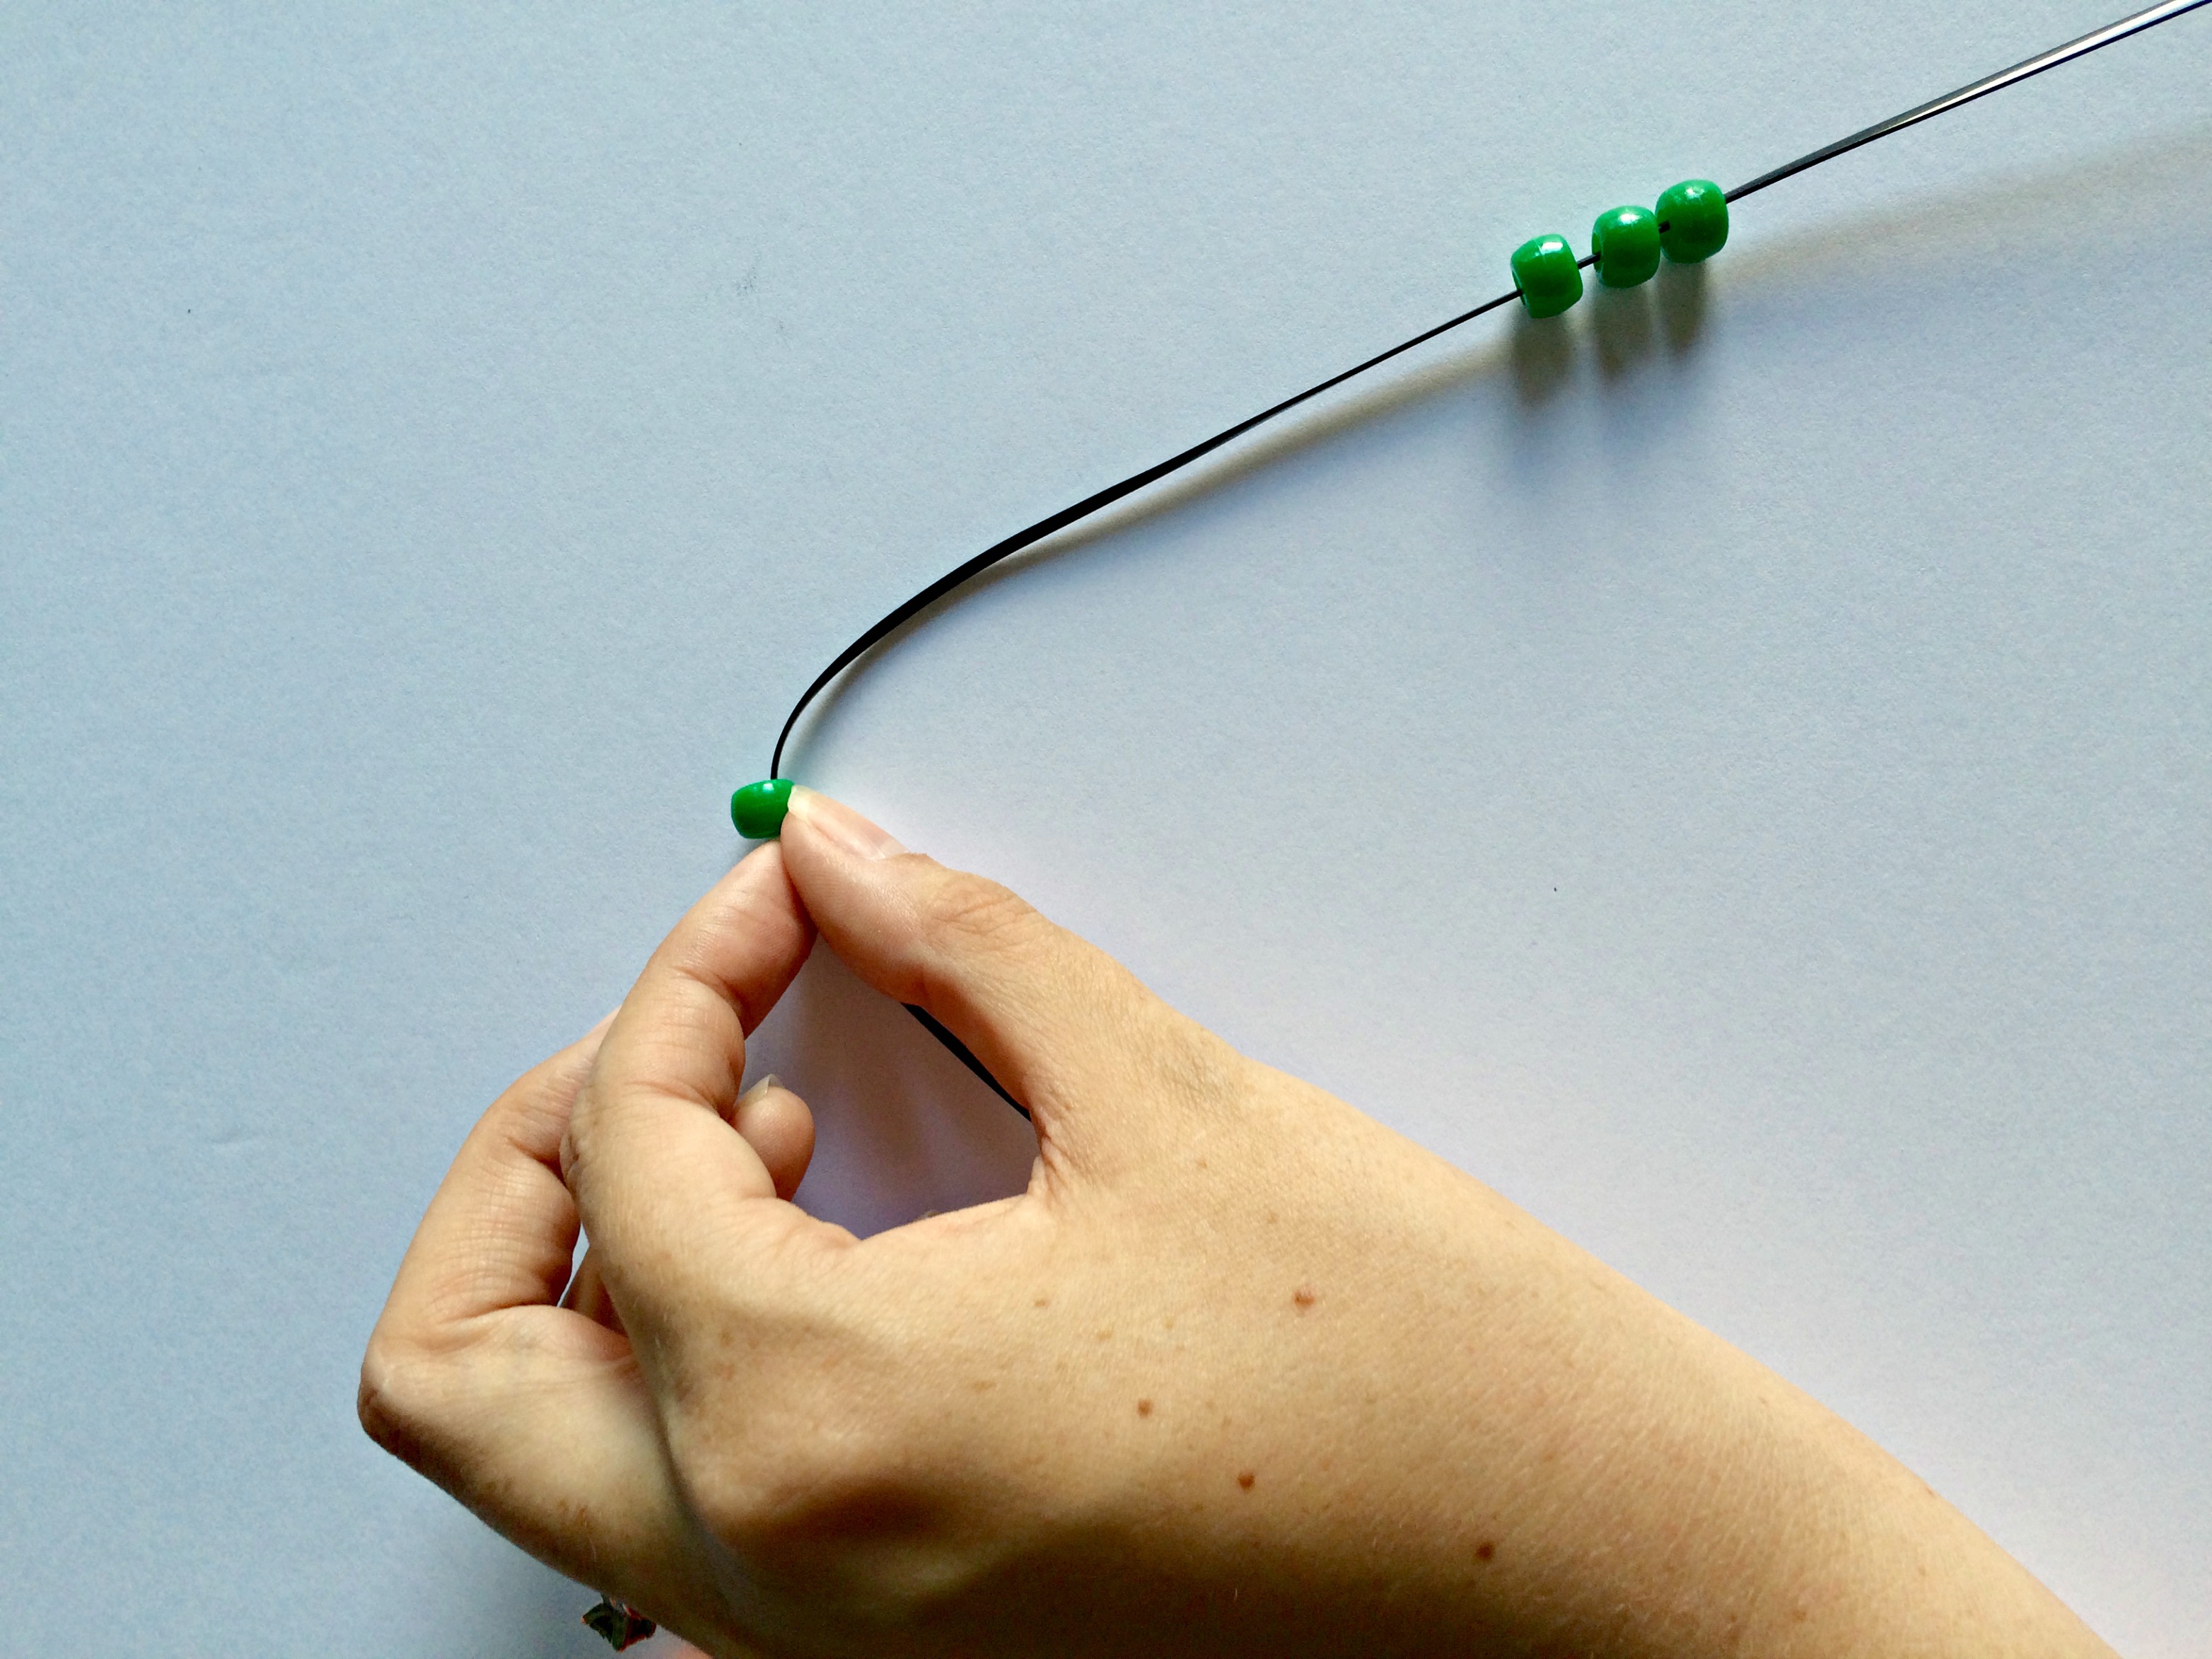
Then, as you can see I’ve done in the picture above, get the second row strung up ready to go as well.
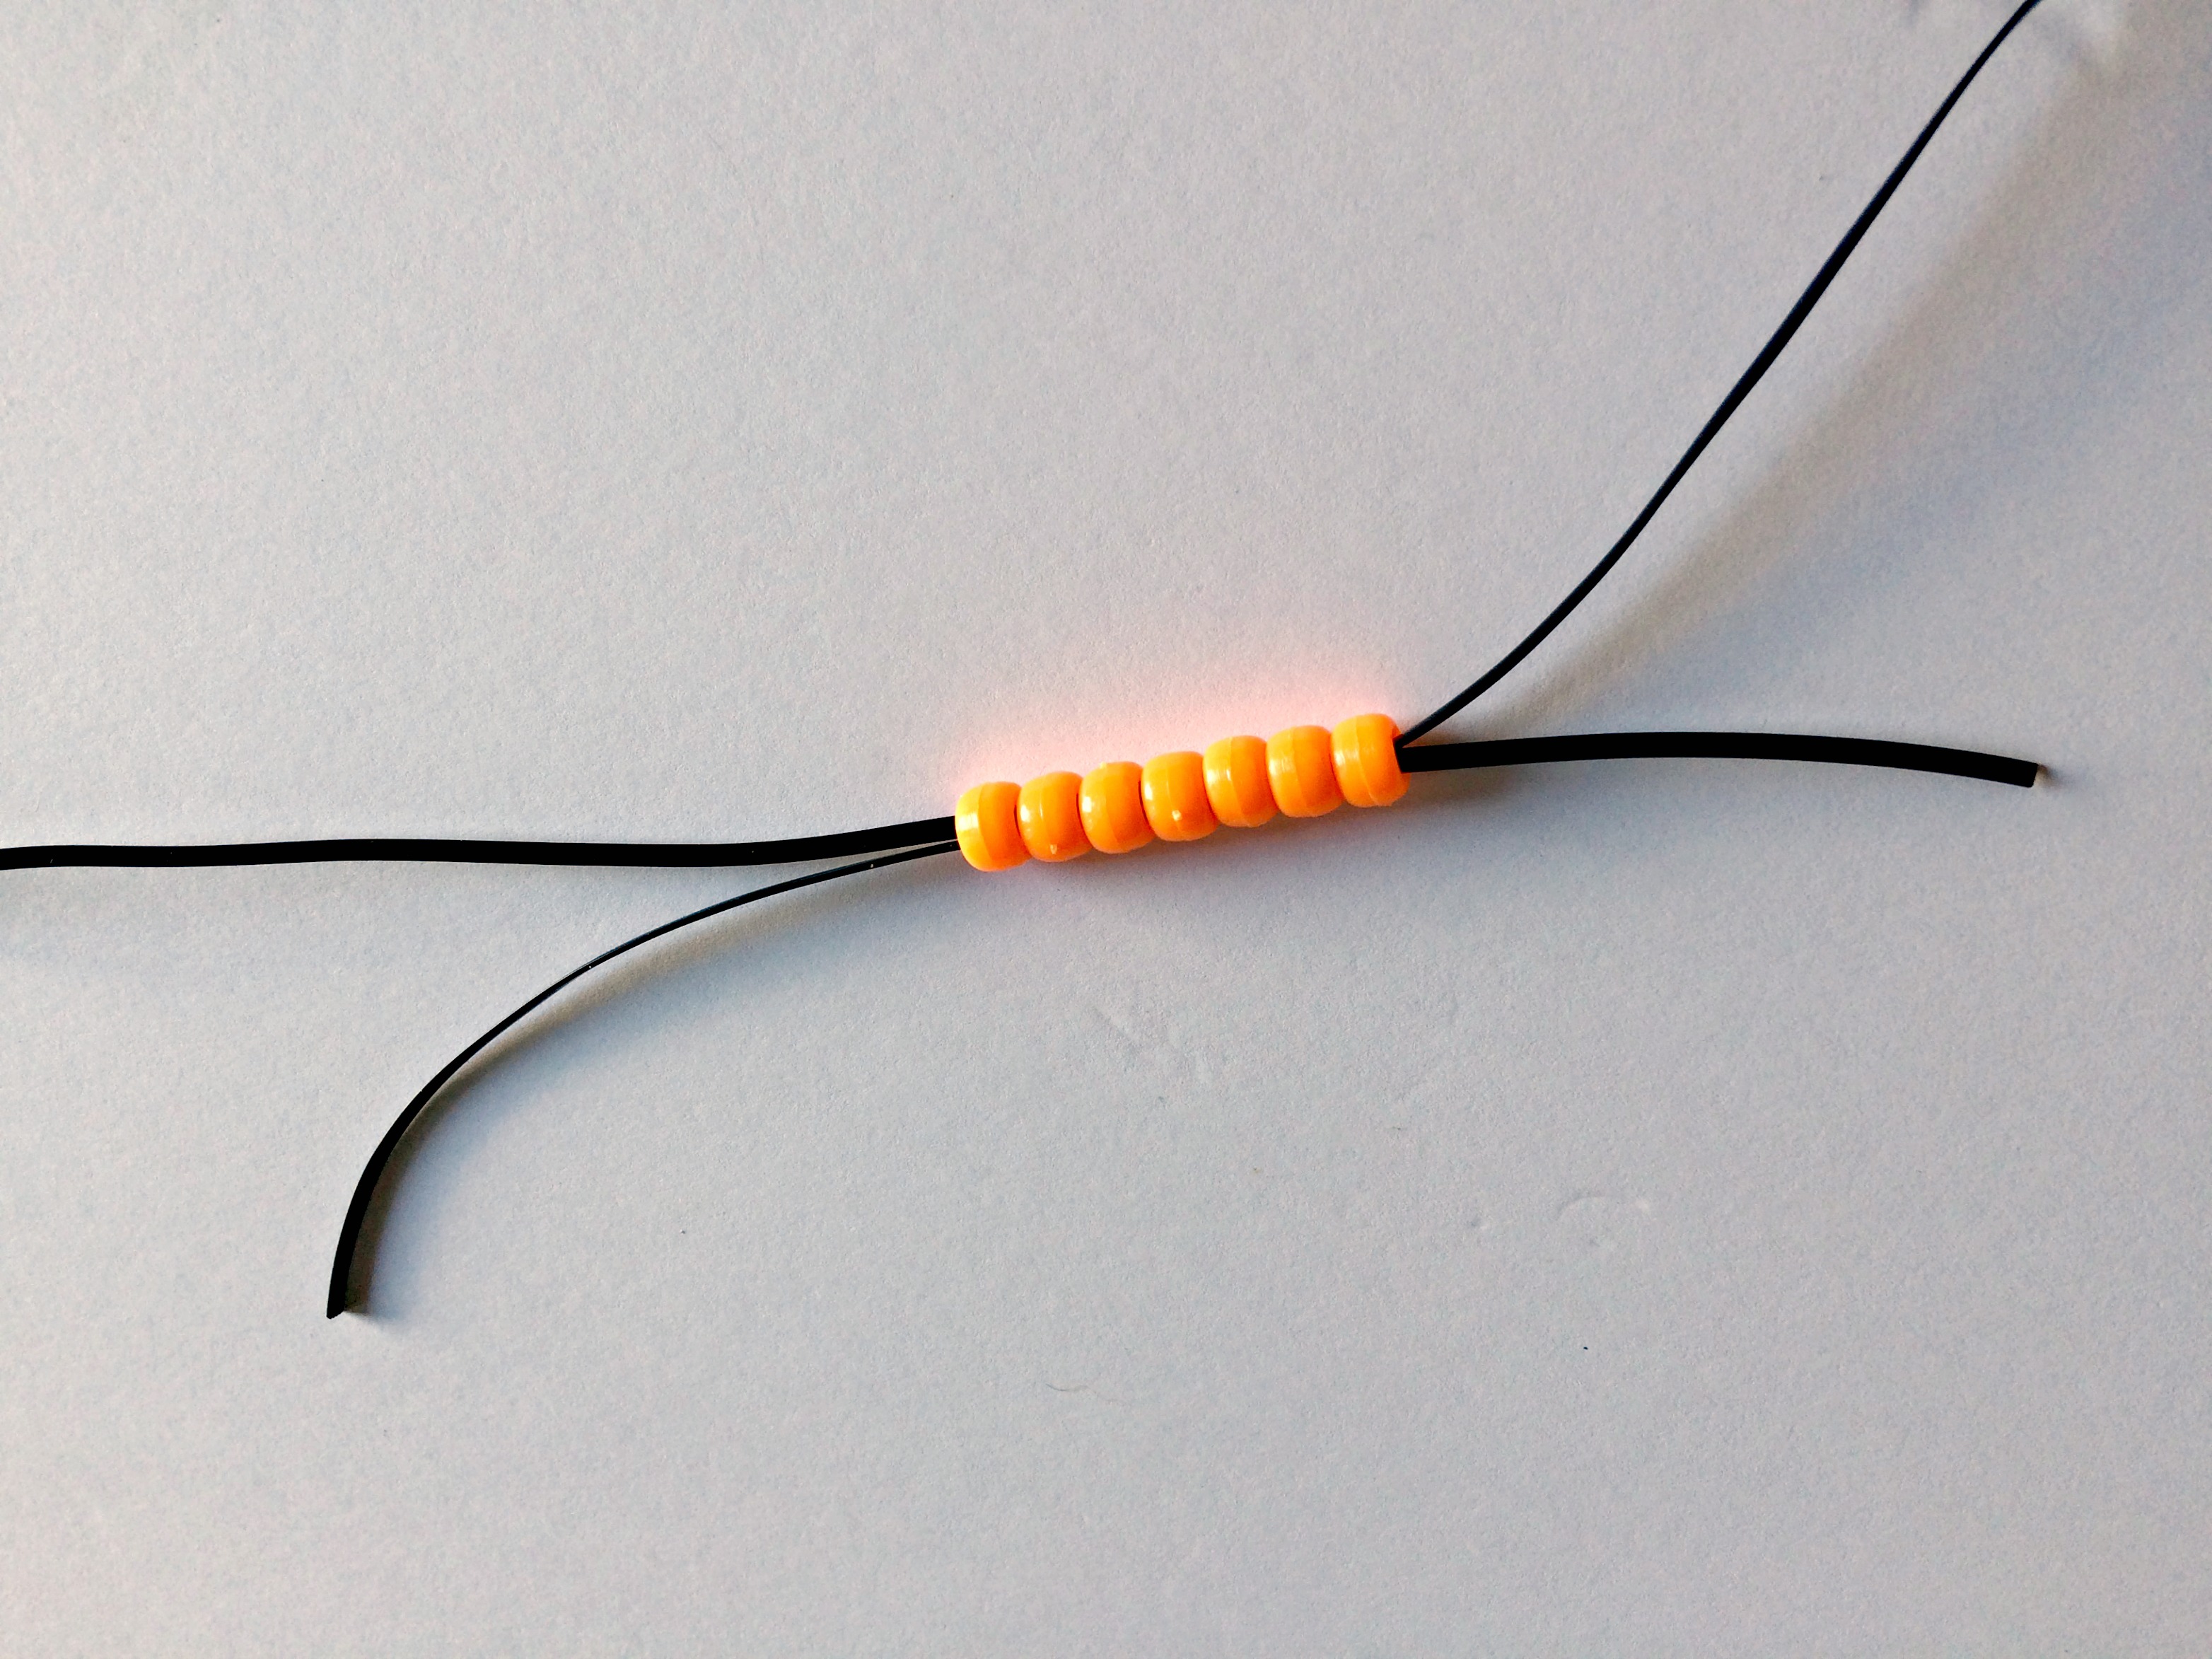
You want to get that second row of beads horizontally underneath that first row. To do this, take the other half of the cord and string it the opposite way through the beads.
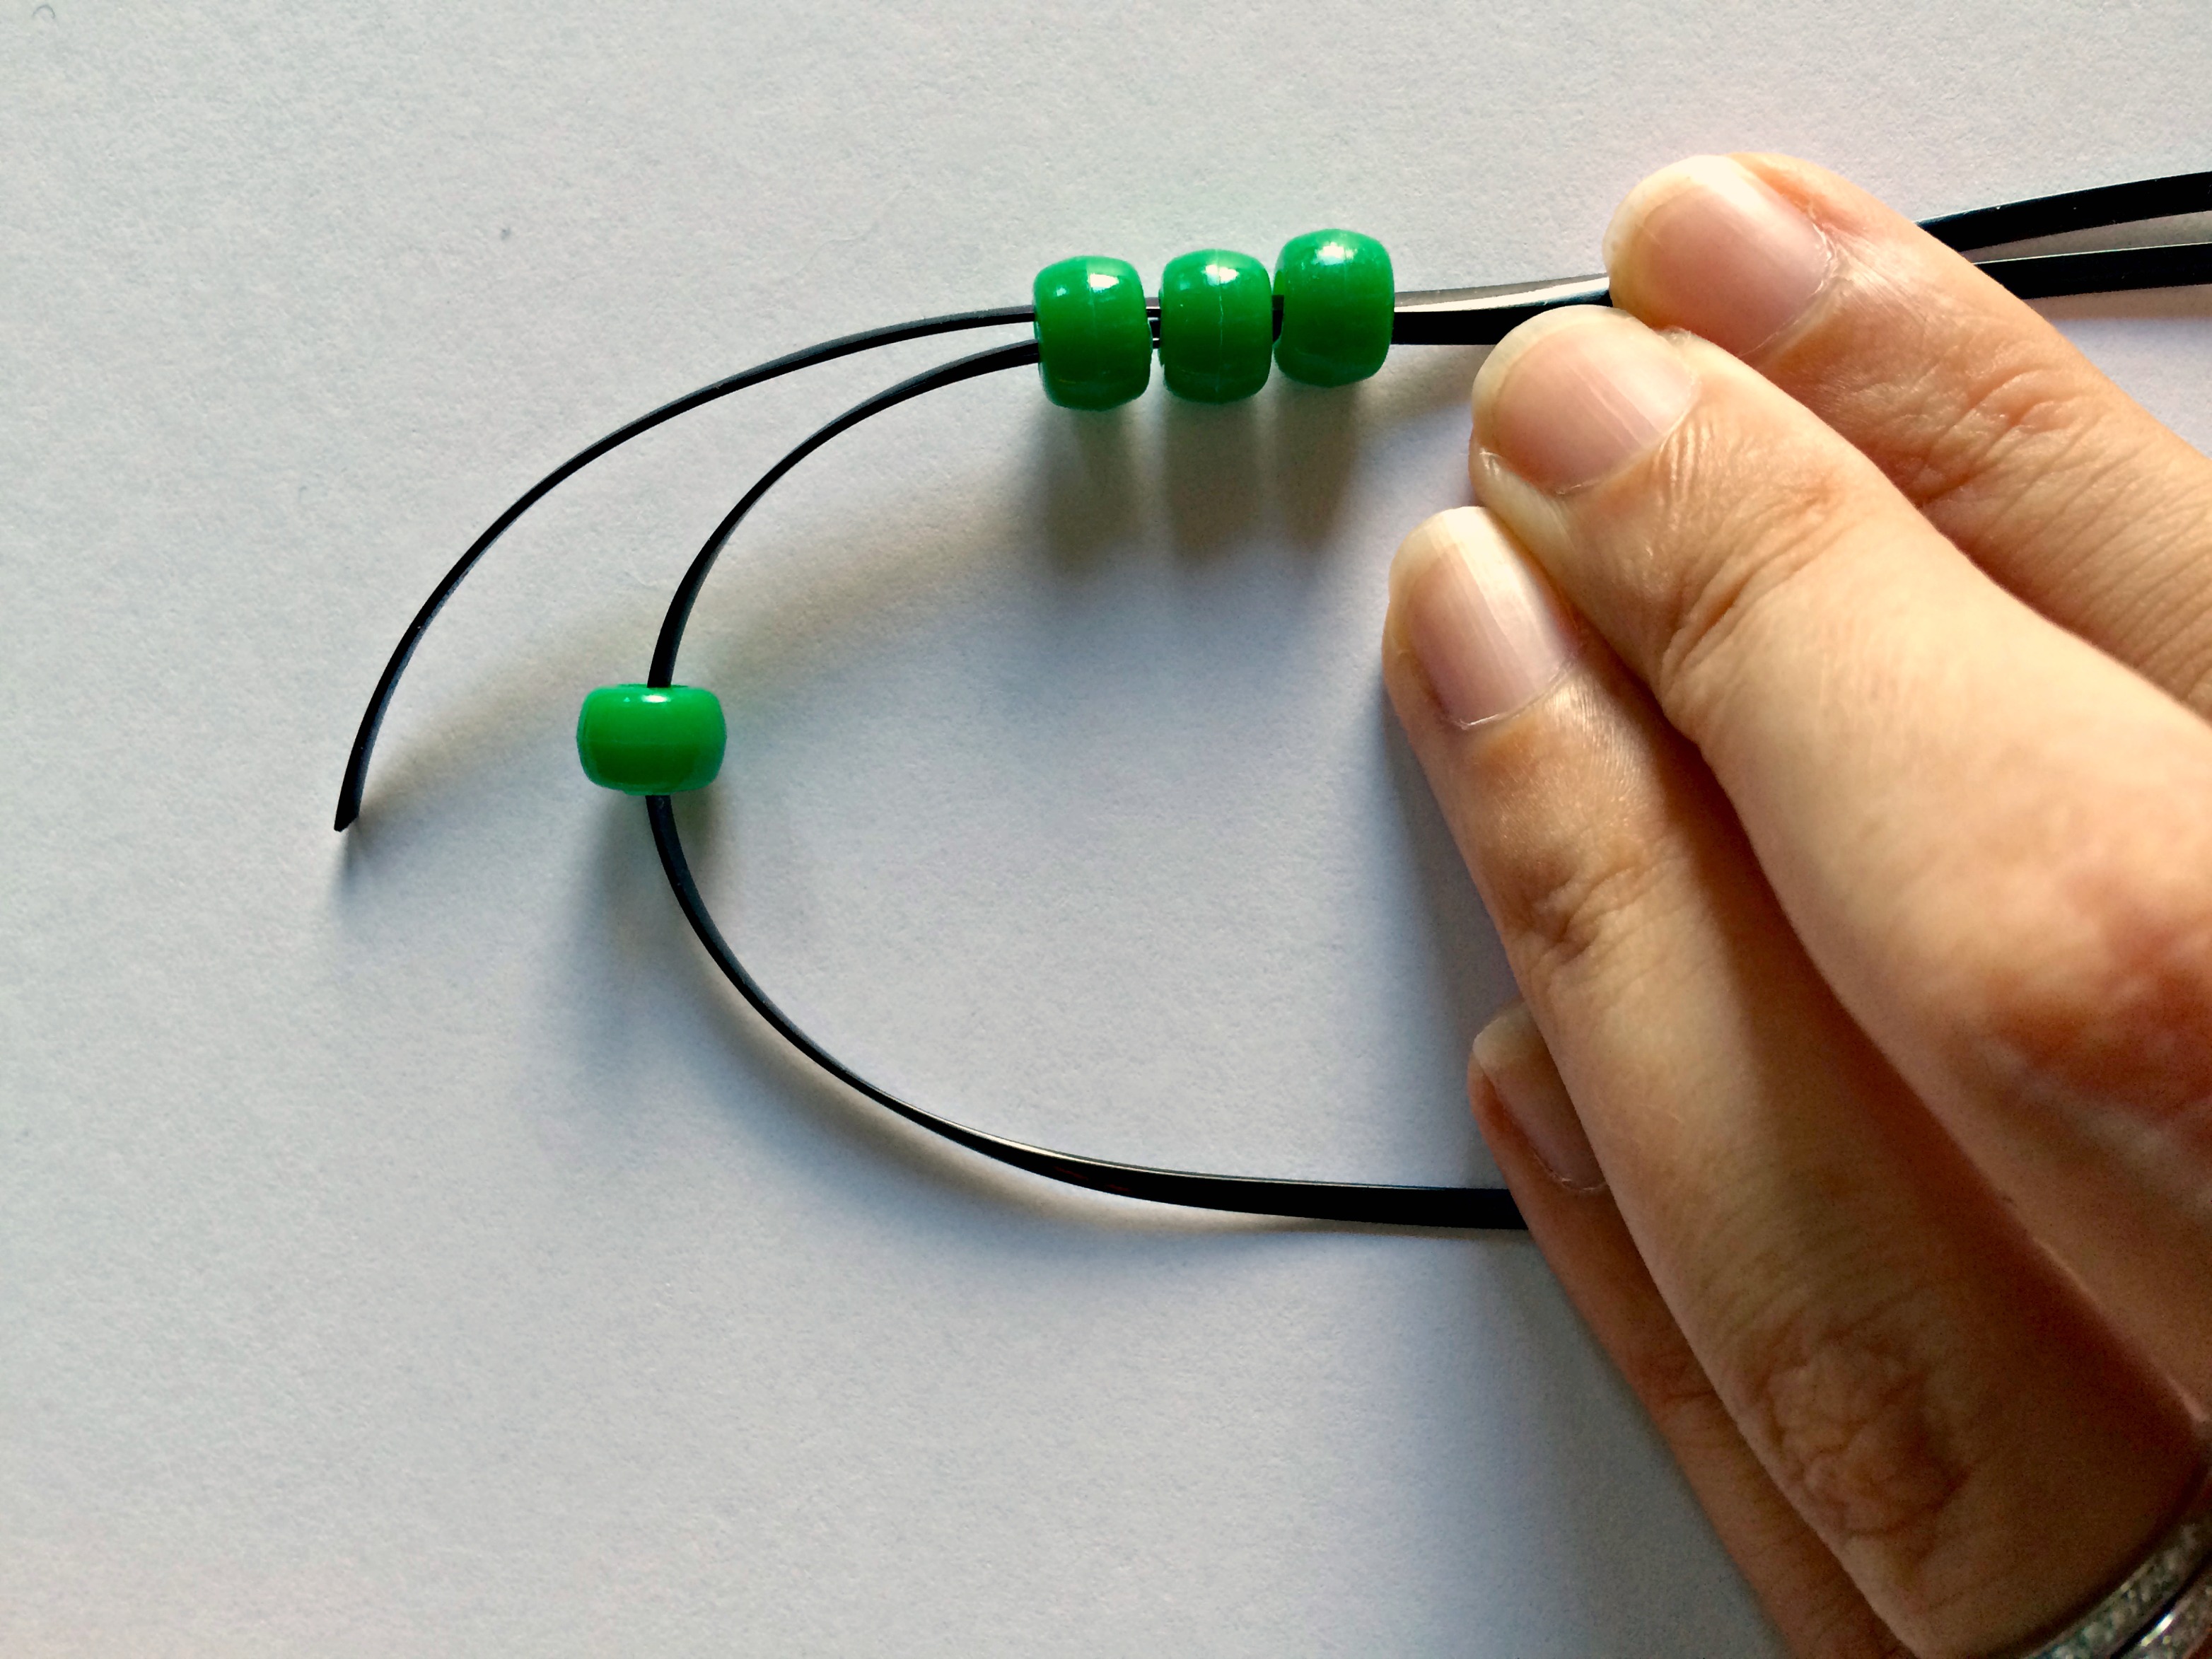
If you’ve done it right, your row of beads should be in a loop of cord with ends of each half of cord sticking out either side.
Now, pull gently but firmly on each end of the cord to tighten the loop and pull that second row up underneath the first row. Sometimes you’ll have to (gently) manhandle some of the beads and the two halves of cord to get the row centered, but that’s usually only a problem for the first few rows and the last row.

Great start! If it looks like this, you’ve successfully started your beadie buddie creation. Even if it looks a little loose, like mine does, it’ll get sorted out as you get more rows on there.
Step 5: Continue to Follow Pattern
Okay, now look back at your pattern and get the third row. It becomes very repetitive at this point. String up the beads on one half of the cord:
Loop the other half of cord through the beads going the opposite direction:
Pull the ends of the cord to slide this row up to join the rest. It doesn’t matter if you have the row nowhere near the others before you loop and pull, like in the picture above. You can also put it quite close to the previous rows beforehand, like in the picture below. Find what works for you – the end result is the same!

Keep going, row by row, following the pattern.
What’s nice is the patterns have the lines drawn to represent the strings/lacing going through, so you can follow it along and see exactly where the string should be going.
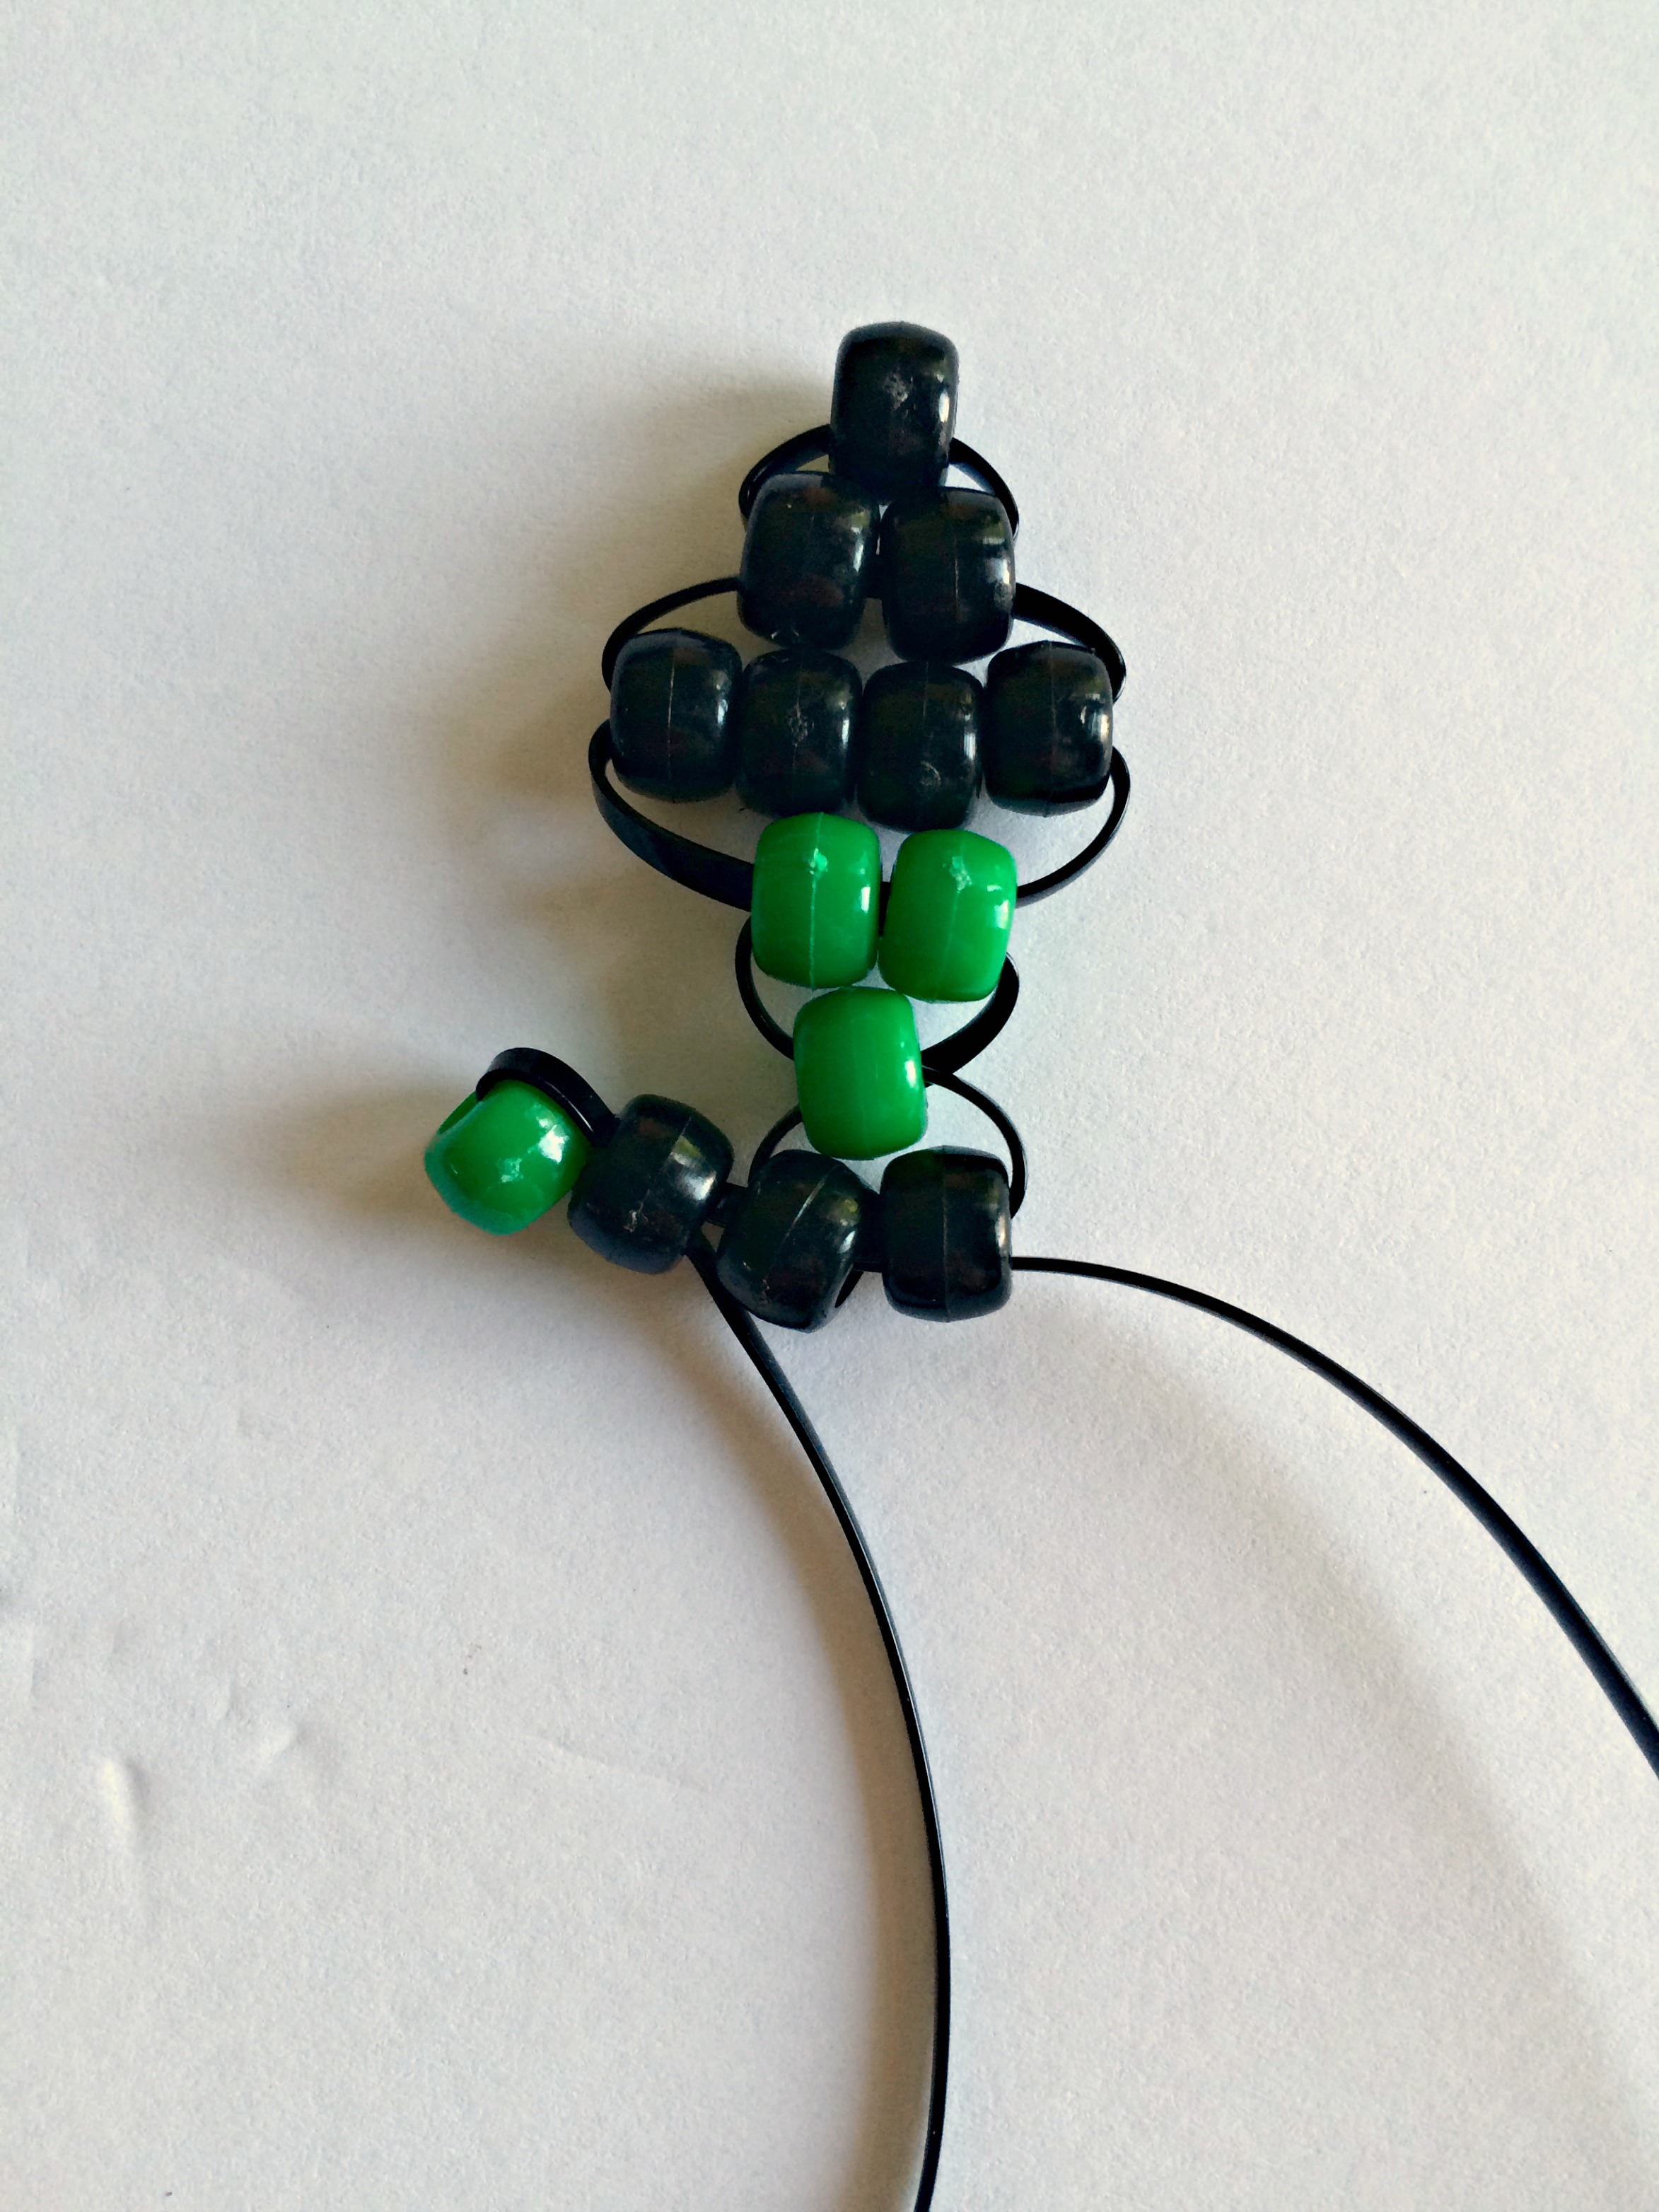
Now, what happens when you hit a row that isn’t all one solid colour? String the beads in the order exactly as shown in the pattern, like below:
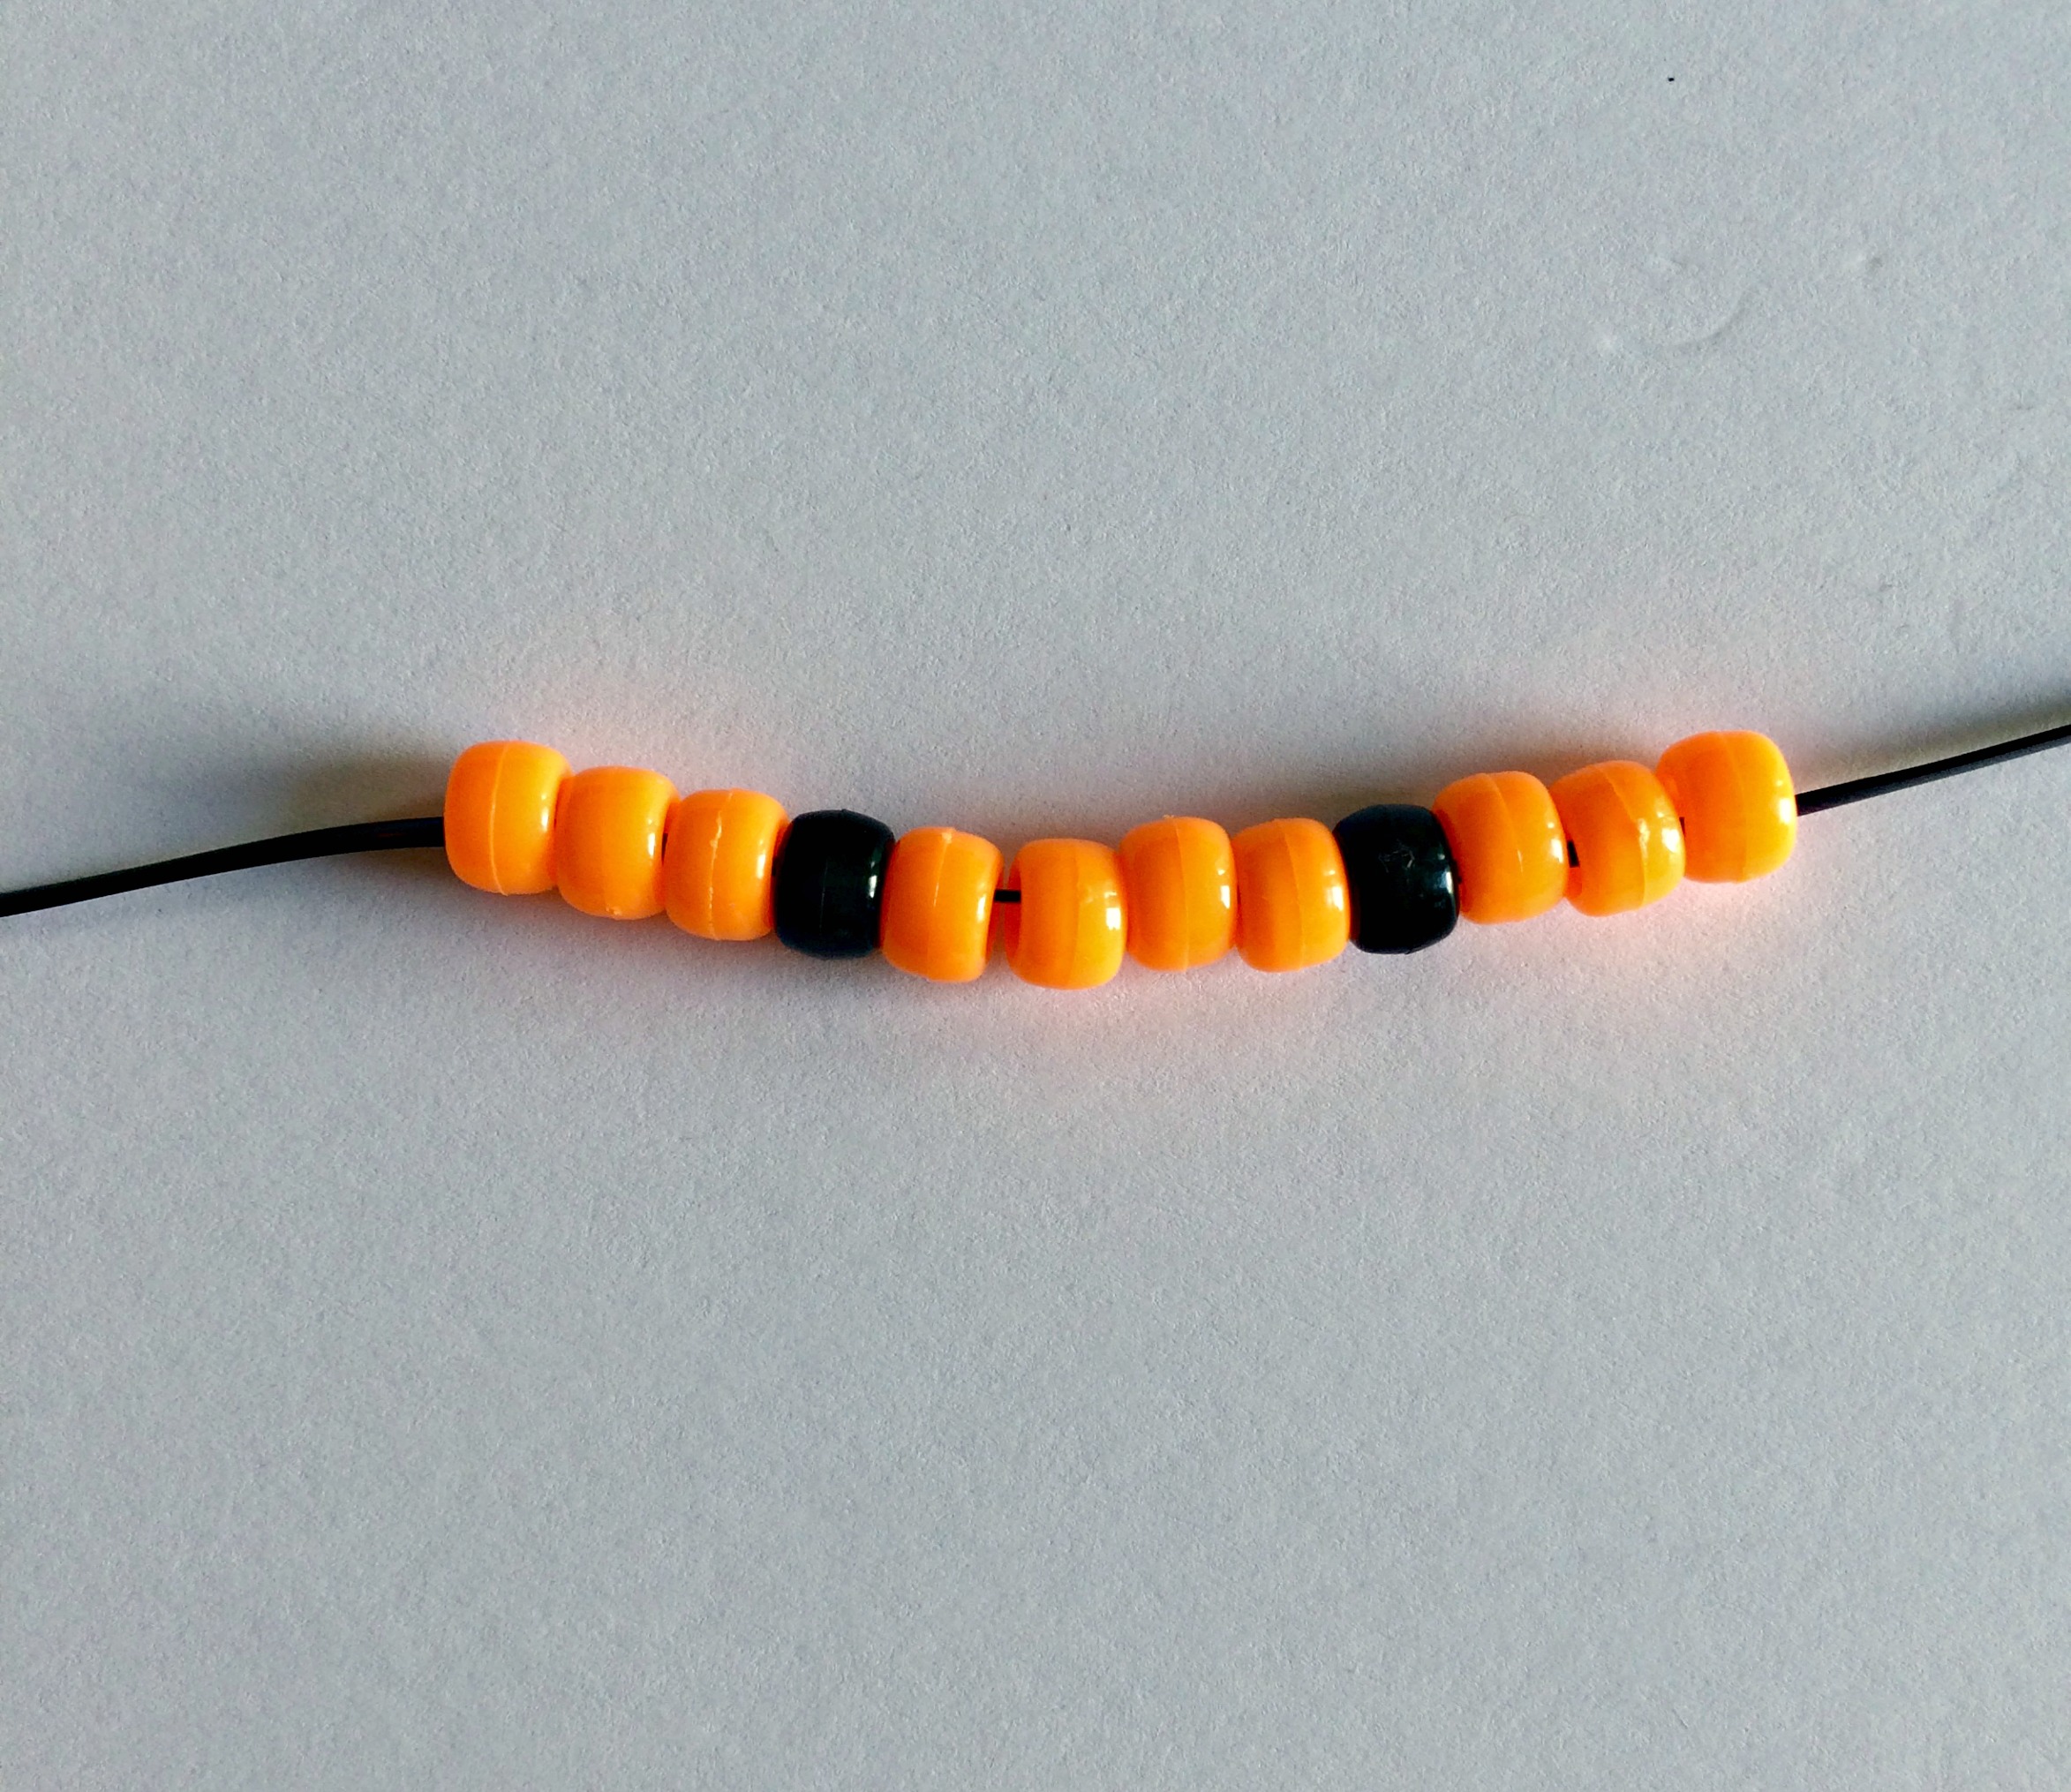
It helps that this row was a mirror image. If it wasn’t, you just have to make sure you’re paying attention to what side of the cord you’re adding it to. Fold the cord under the previous rows in the direction it’ll end up being pulled to make sure it’s correct. (Or only do patterns with mirror images.)
Step 6: Tie-Off & Complete
Keep stringing and looping and pulling while keeping track of your pattern. Finally you’ll have a completed beadie buddie!

There are few different ways to end it off. For this one, the plastic lacing was kind of warping the last row of beads, so I tried to add some stability by looping one end of the lacing back through the row another time. Then, I gathered both ends to one side and tied them off.
Traditionally, you’d bring both ends of the cord/lacing together underneath the last row and tie off (like I did with the witch below).
The one nice thing about using this plastic lacing is that it’s so thick when you tie it in a knot, so for the candy corn I just tied off each end on its own.
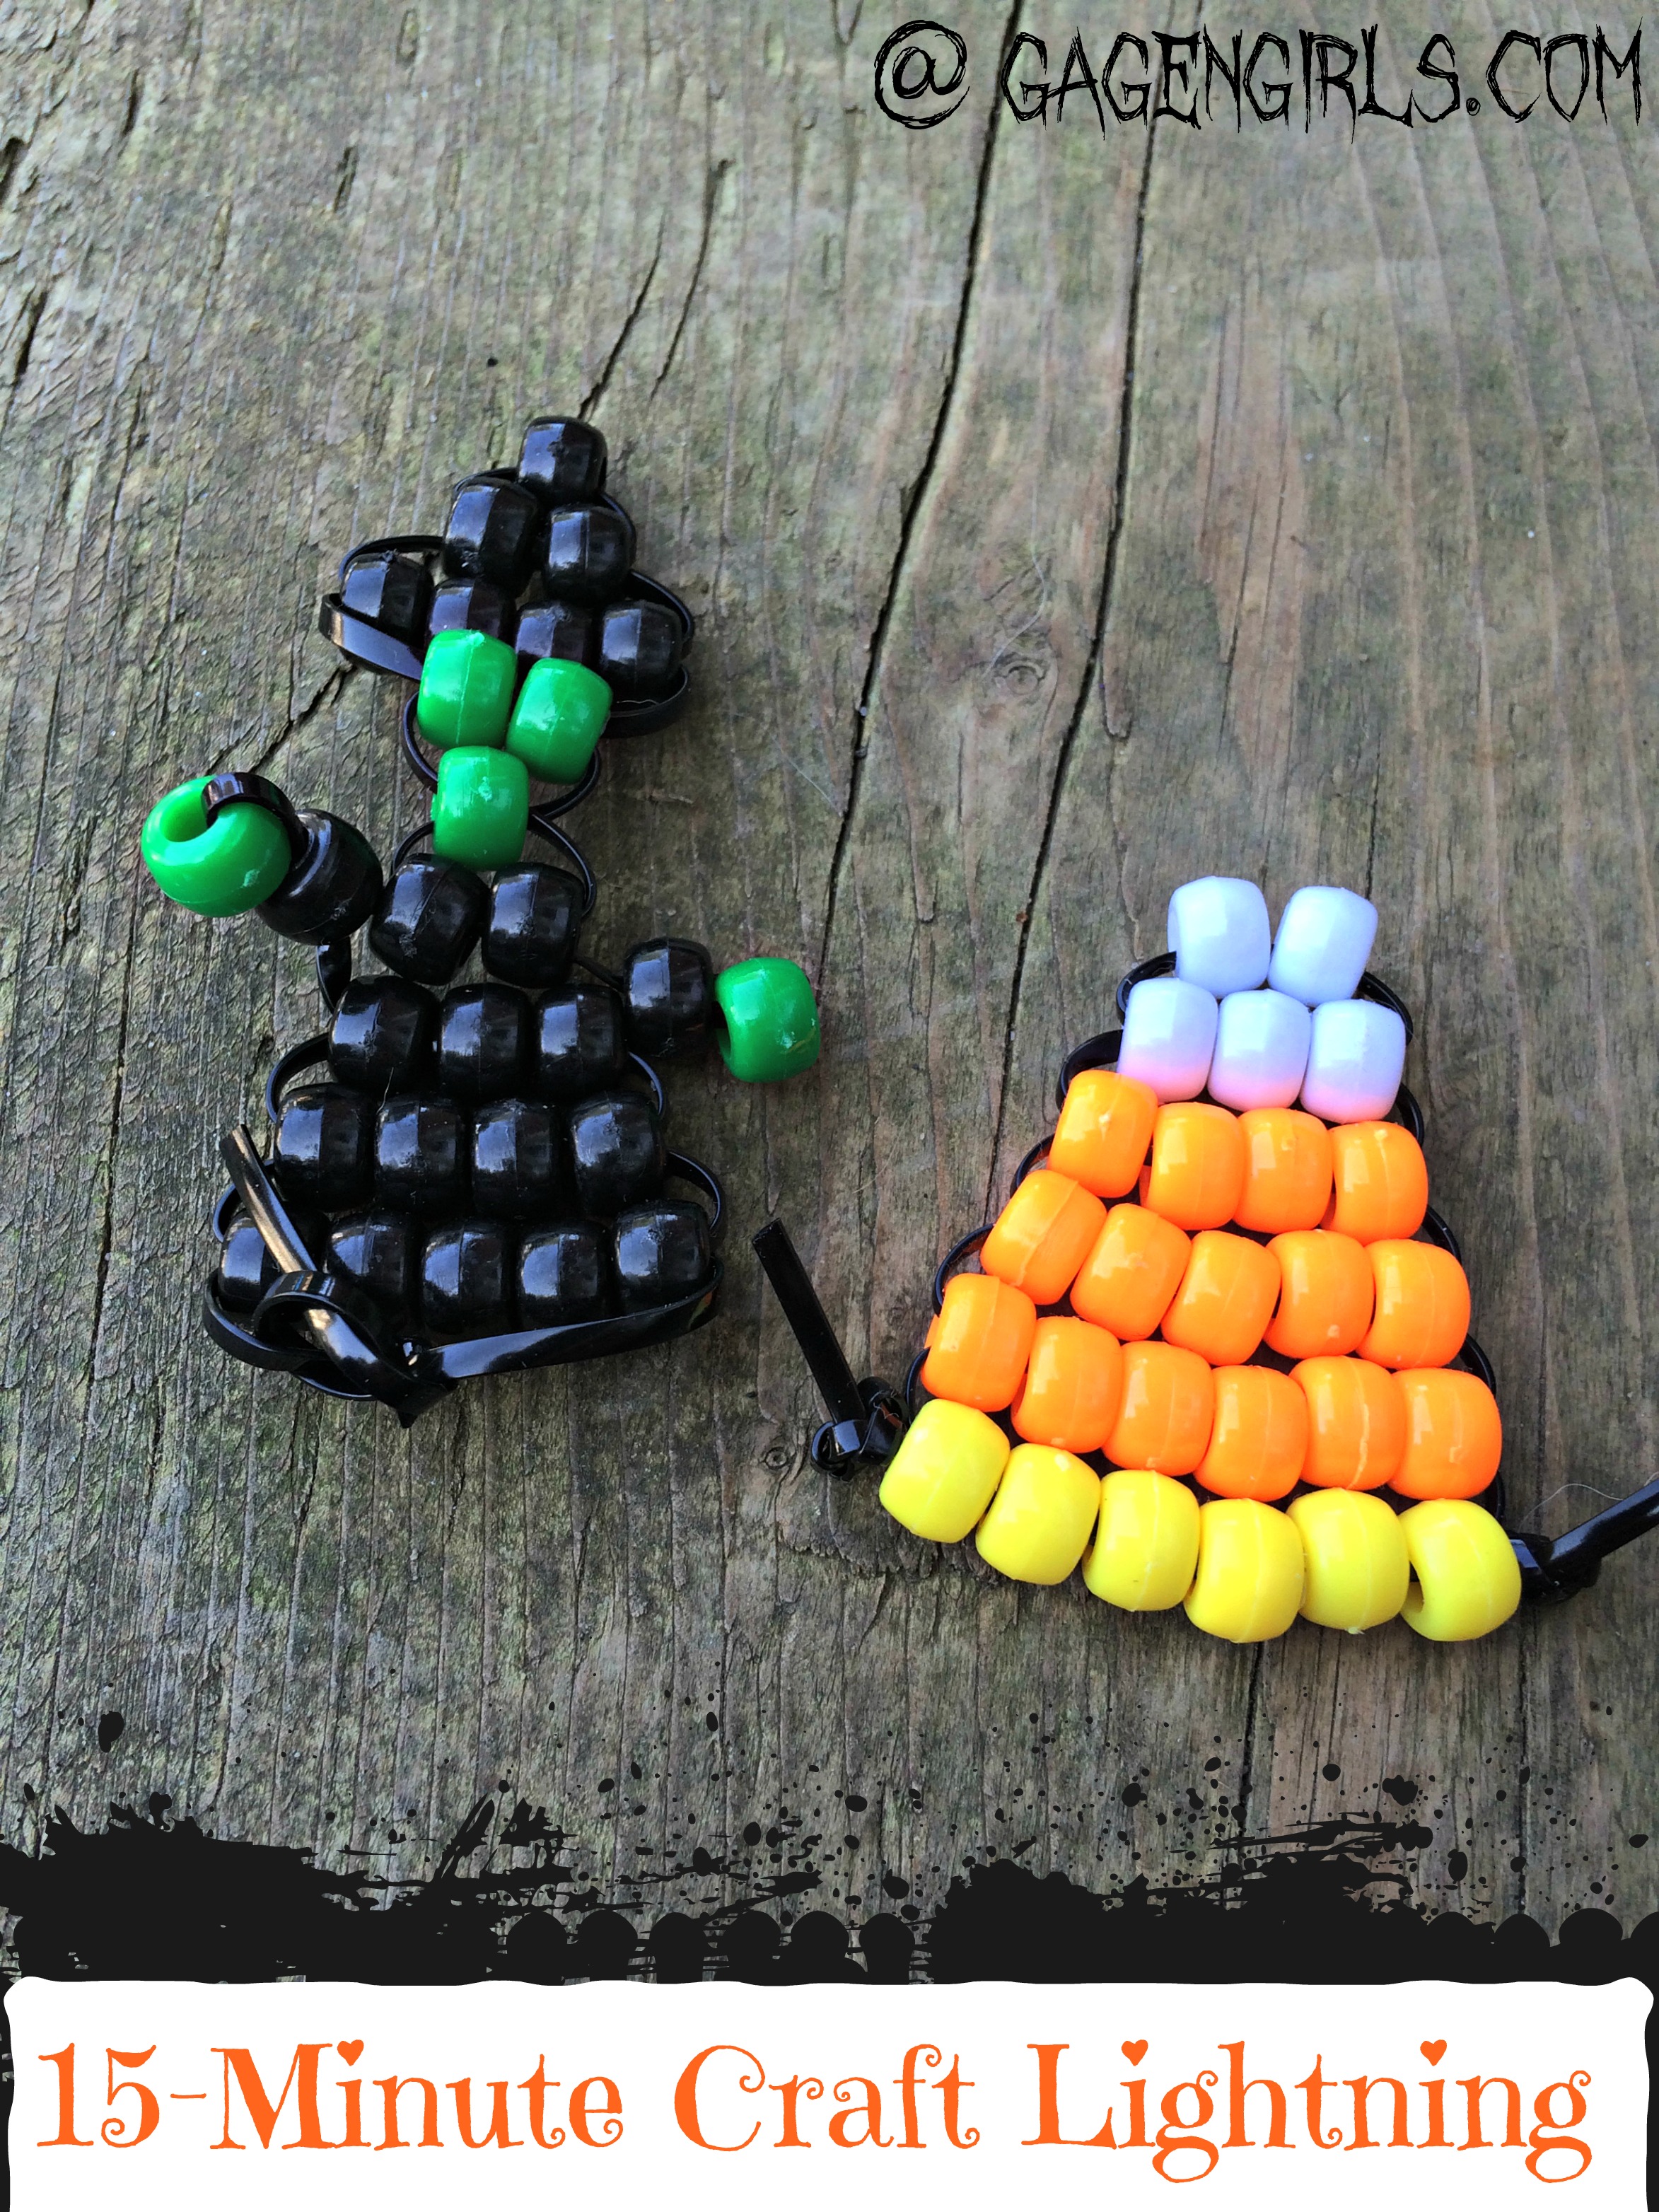
The jack-o’-lantern by itself took about 15 minutes because it’s a bit larger. These next two, however, were BOTH completed in 15 minutes combined! Super quick!
How to Do the “Tricky” Parts
Now, you may have noticed that my little witch has arms, as witches tend to do. If you string them up the way you do every other row, they won’t stick out. This is the only part that ever trips up newbie beadie buddy makers.
Arms and legs only get strung through ONE half of the cord, which you then loop back on itself.
Again, you’ll notice on patterns they try to make it really clear where the cord is going. Follow the line along and you’ll notice that it’s only one half of the cord; the other half has its own arm to do. Check out the pattern again to see if you understand what I mean:
In the case of this little witch, you string up the hat and head as normal, plus the two black beads just under her chin, then do each side separately for the two arms.
The two halves of cord come back together after the arms are complete and everything goes back to normal.
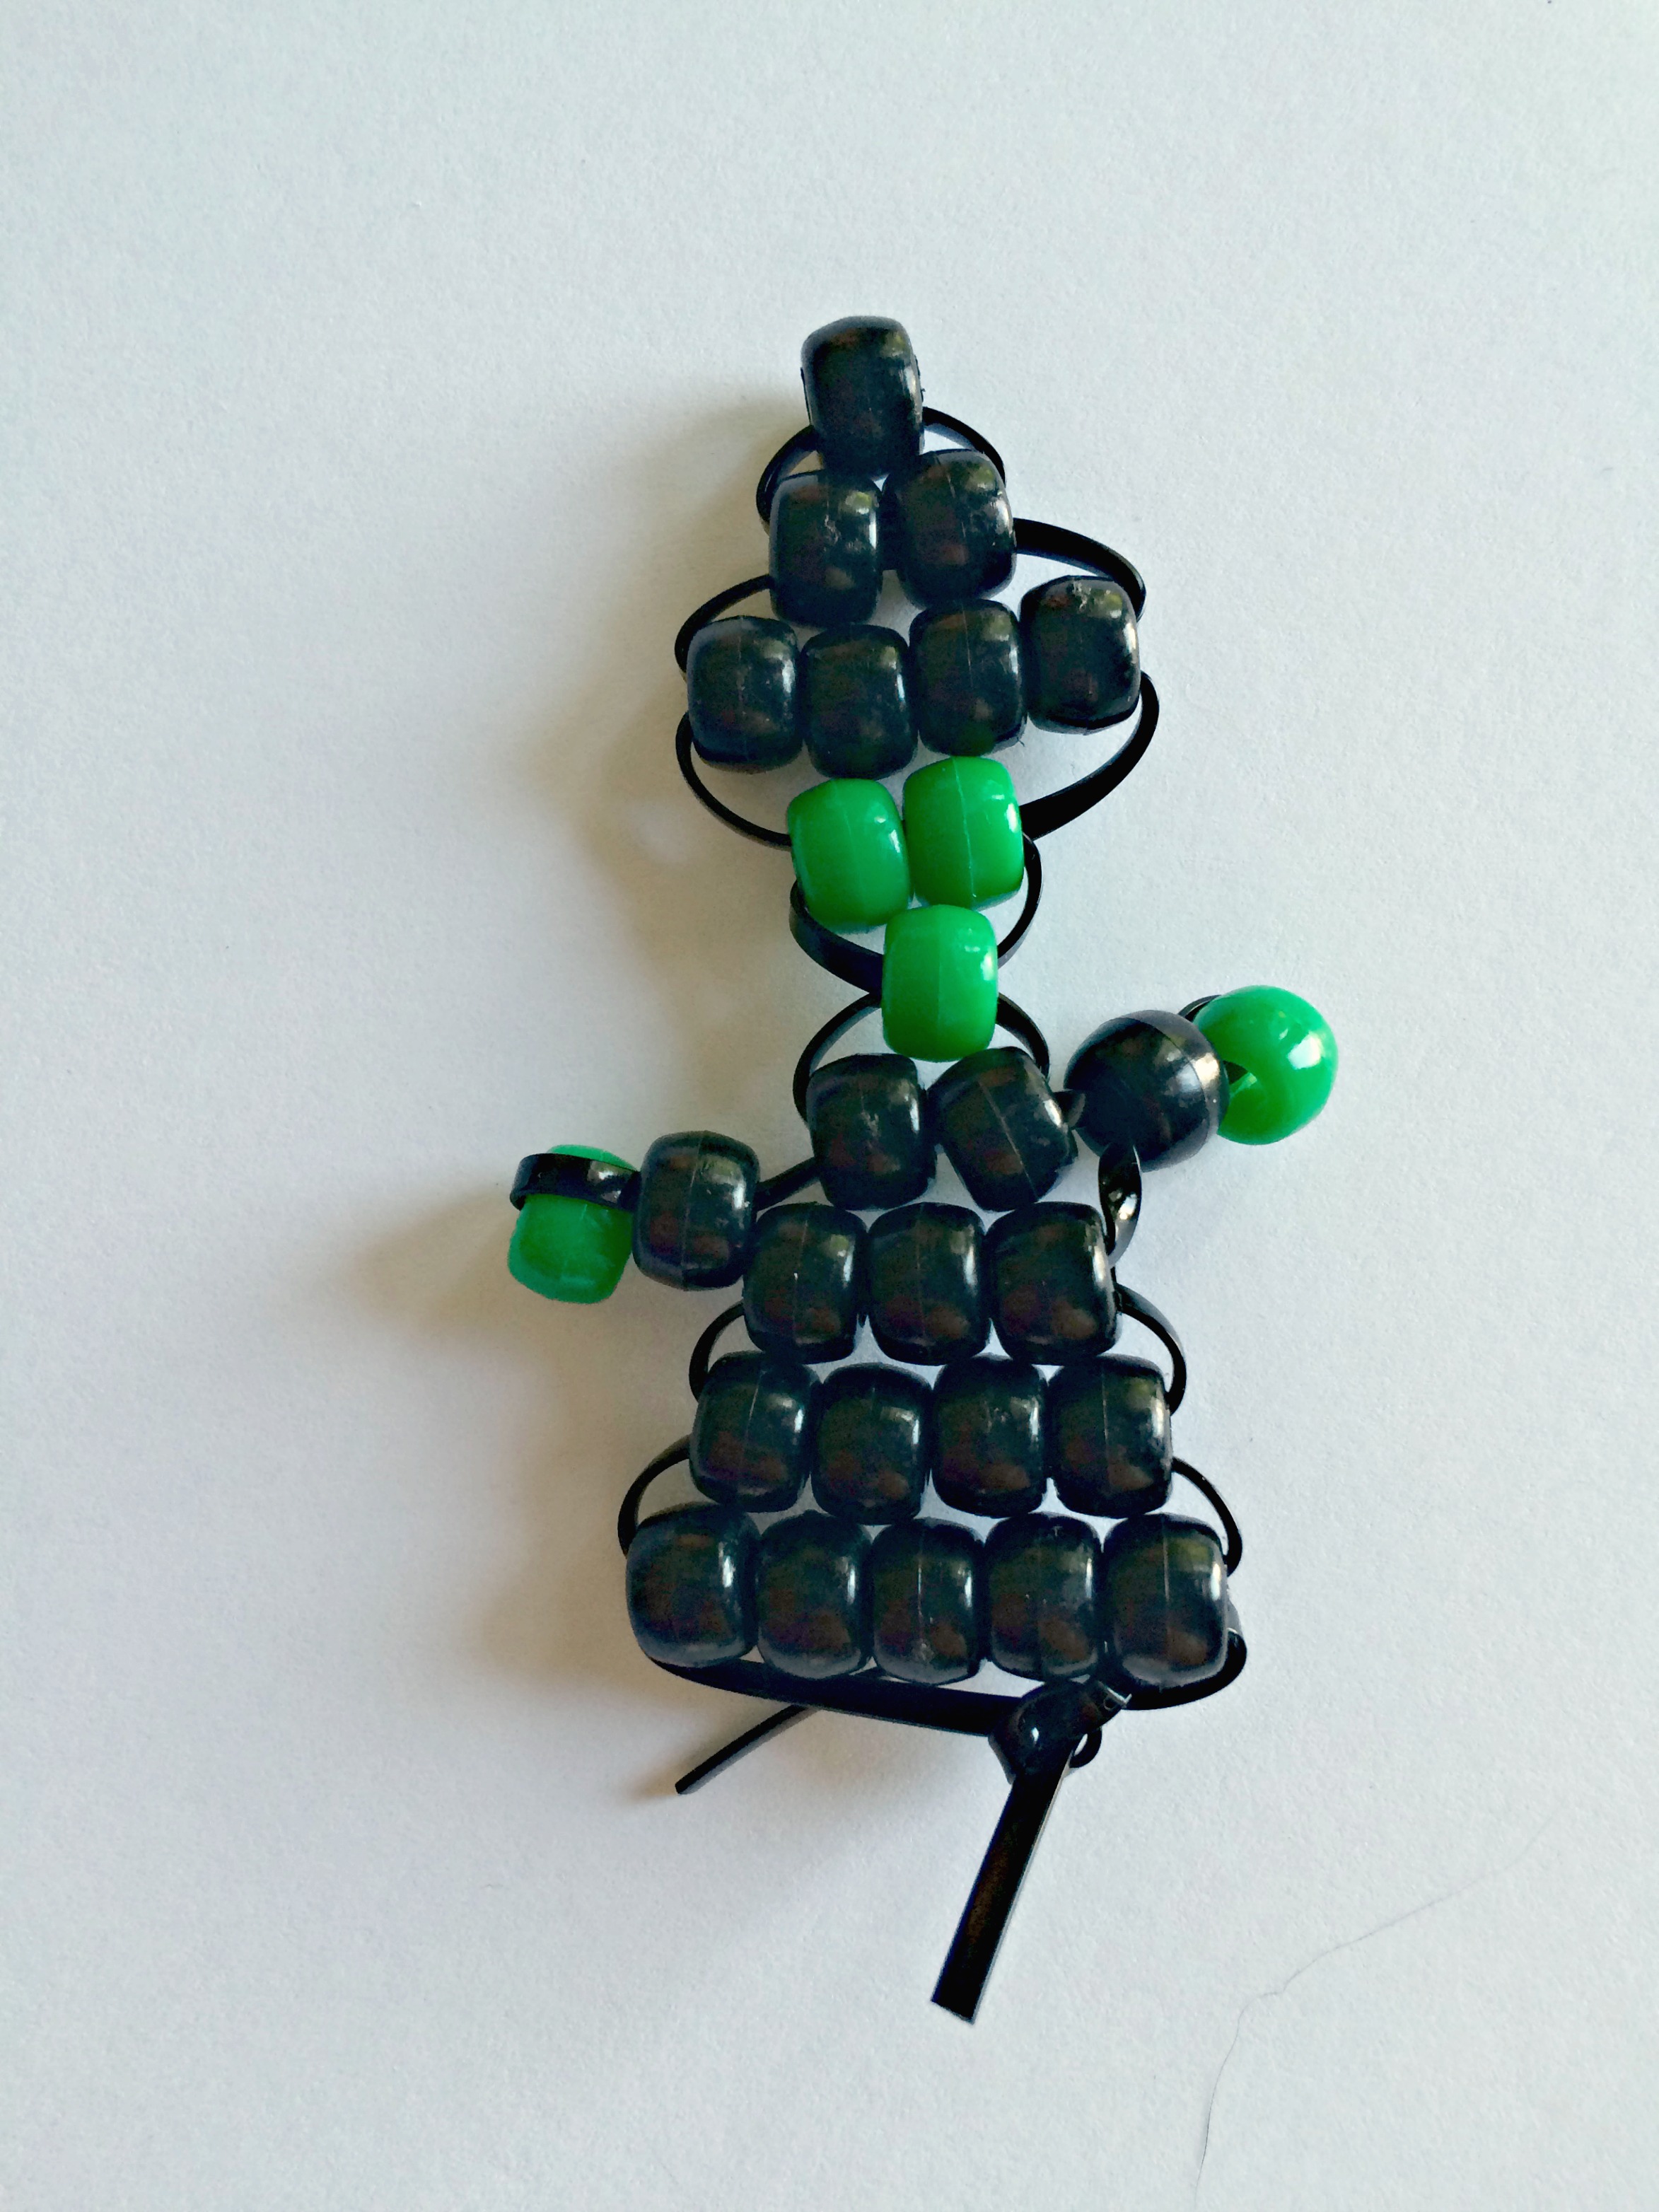
And voila!
The candy corn one in particular was so simple, I did it in a flash! So here they are, my Halloween pony beads beadie buddies!
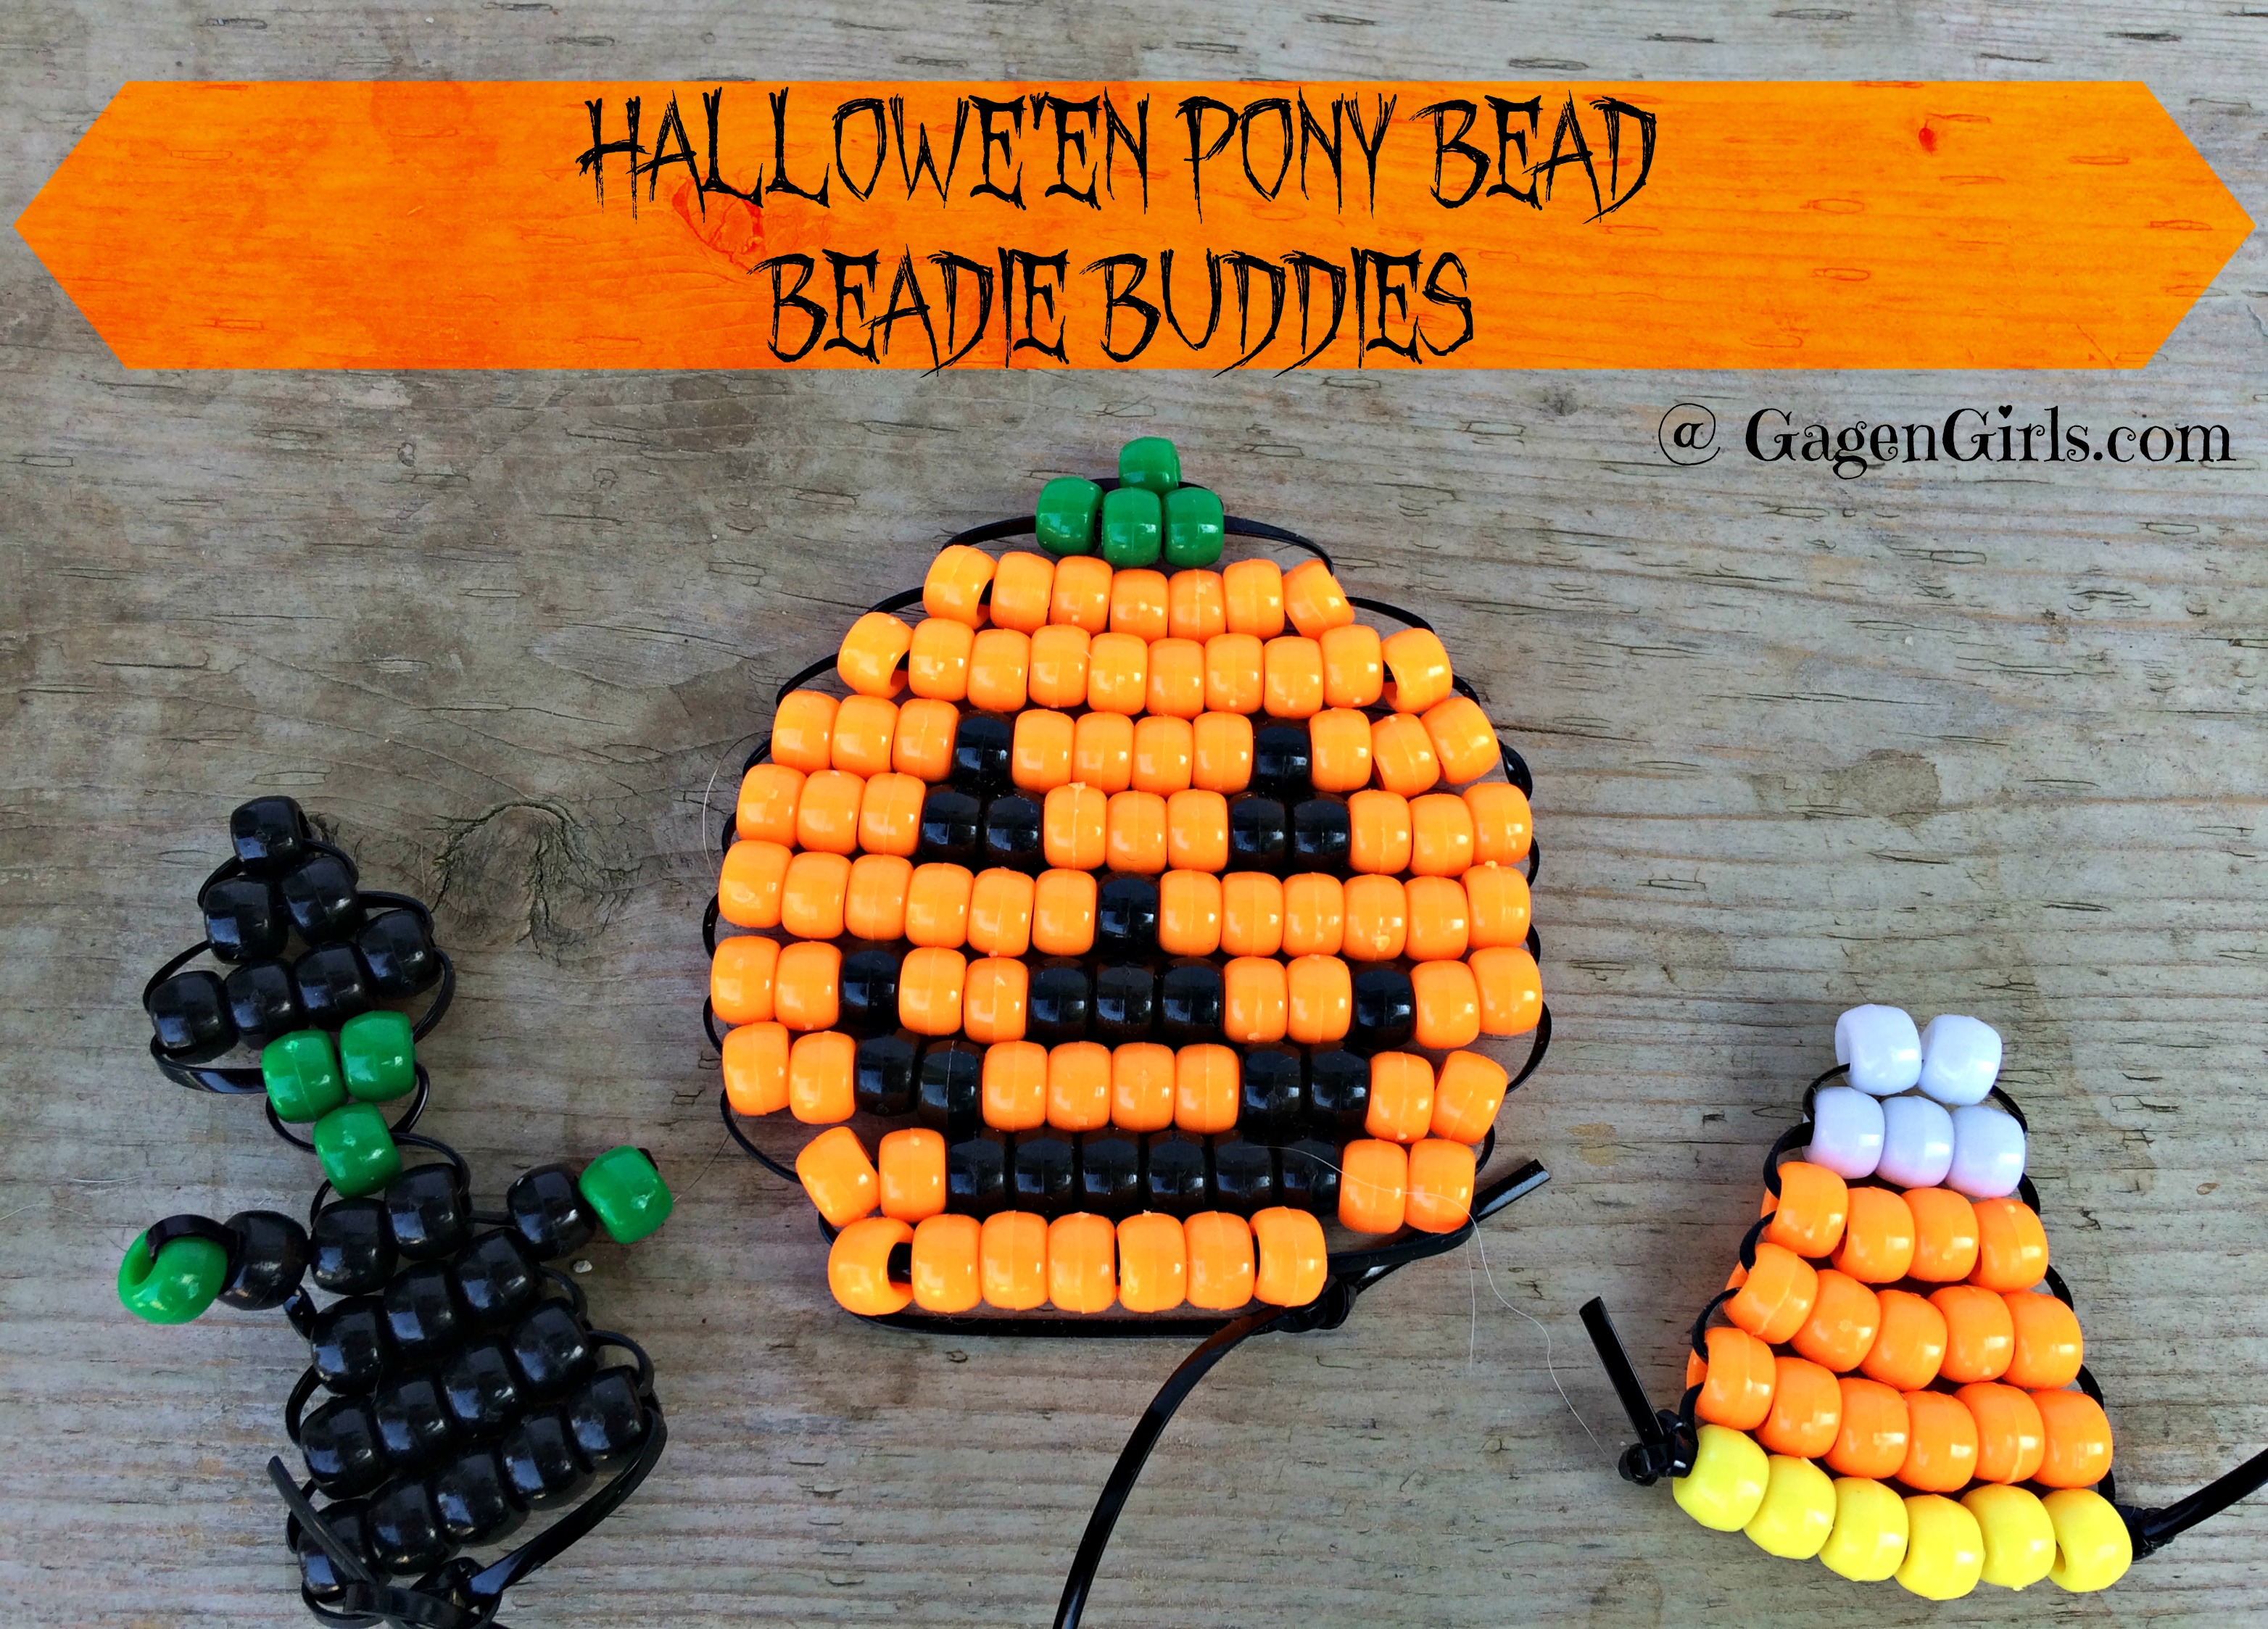
Aren’t these Halloween pony beads beadie buddies just adorable? I need to make some more, like a bat or a skeleton! Are there any other designs you’d like me to show you?
I hope you found this tutorial helpful. If you have any questions or concerns (or just want to say hi!), drop me a line in the comments below.
Happy Halloween!


These are super cute, Cyn! I love the different designs!!
These are super cute crafts!! I never realized how easy these are to make like this, they turned out great!
How many inches is the finished product?
The jack-o-lantern is about 4″ tall, the witch is just under 3.5″ tall, and the candy corn is about 2″ tall.
Do you have a creative strategy for preventing gapping between rows when you hang the animal from a keychain or ornament hook? They look great when laid flat, but even with the string as taught as it can be without warping, the rows sag as soon as I pick it up from the top. It’s most apparent with longer rows, like the ones used in wider patterns.
I’ve experimented with different kinds of string.. It’s somewhat less of an issue with flat plastic lacing vs braided or satin cord, but that material also gives them a more childish look (and sags a bit anyway).
Thank you in advance!!
I’m so sorry but we don’t. This is just something that commonly happens. I’m going to look into it and experiment and see if I can find any solutions.
Yes sometimes the rows can twist up out of order or sag and cause gaps. Not sure how to prevent that’s